
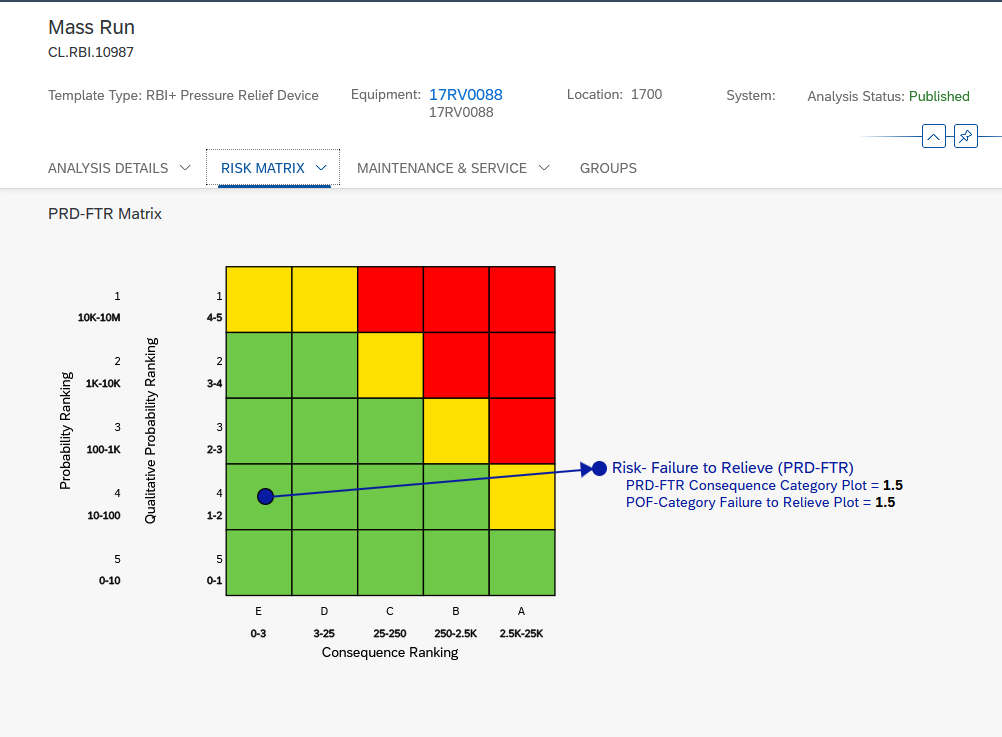
Edit The Risk Matrix Tab in Asset Strategy Detail will draw a line between the Point on the matrix and the legend to the right when we hover over either of them.
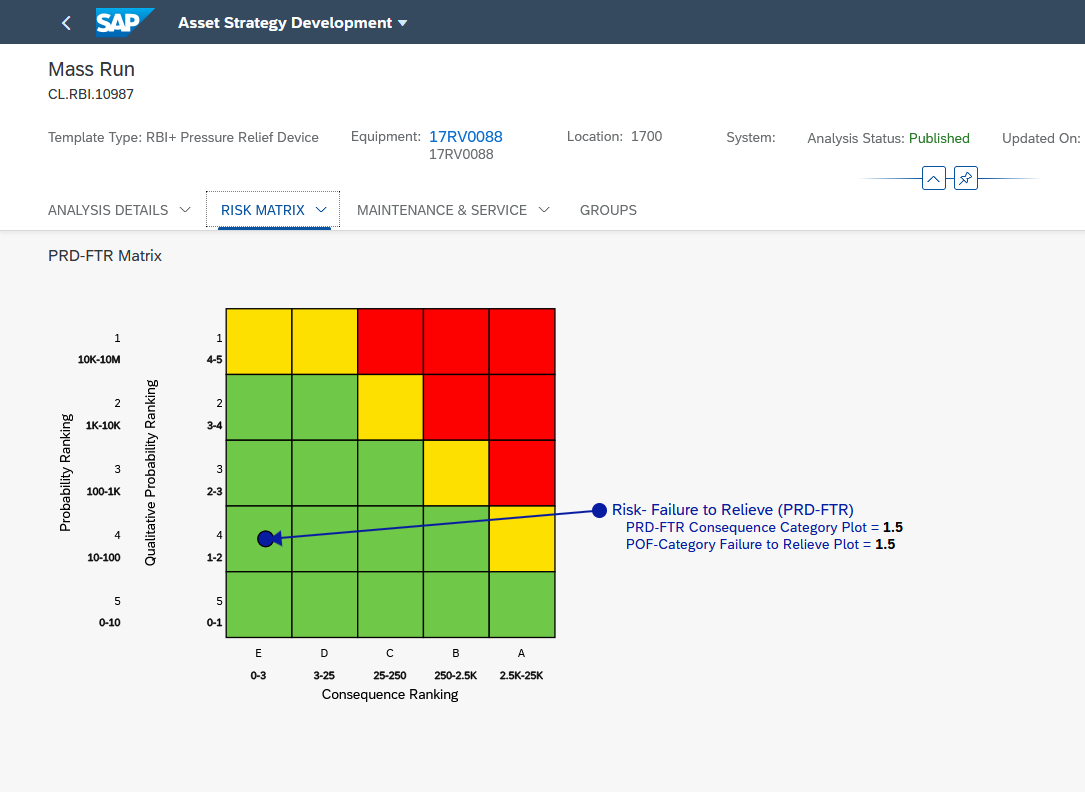
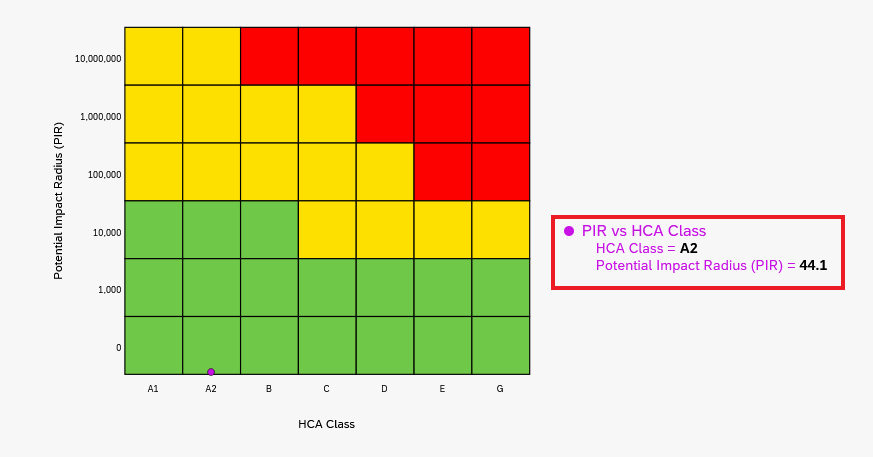
Support to Display one Qualitative and one Quantitative value to plot the point
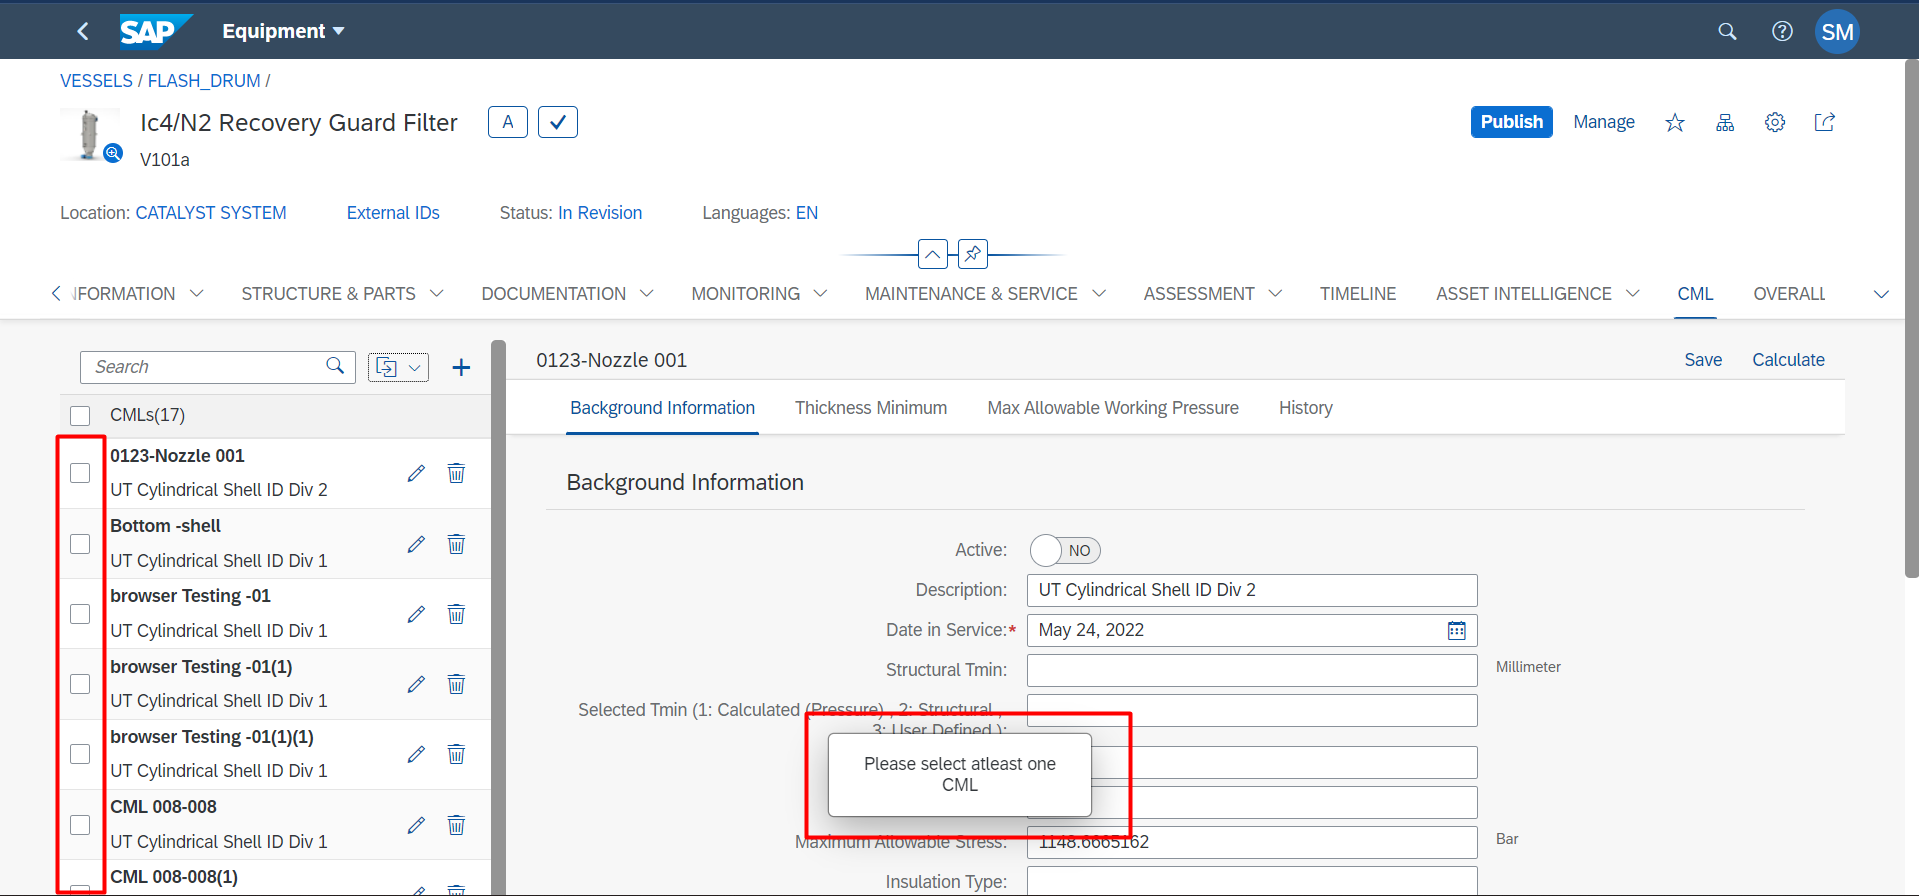
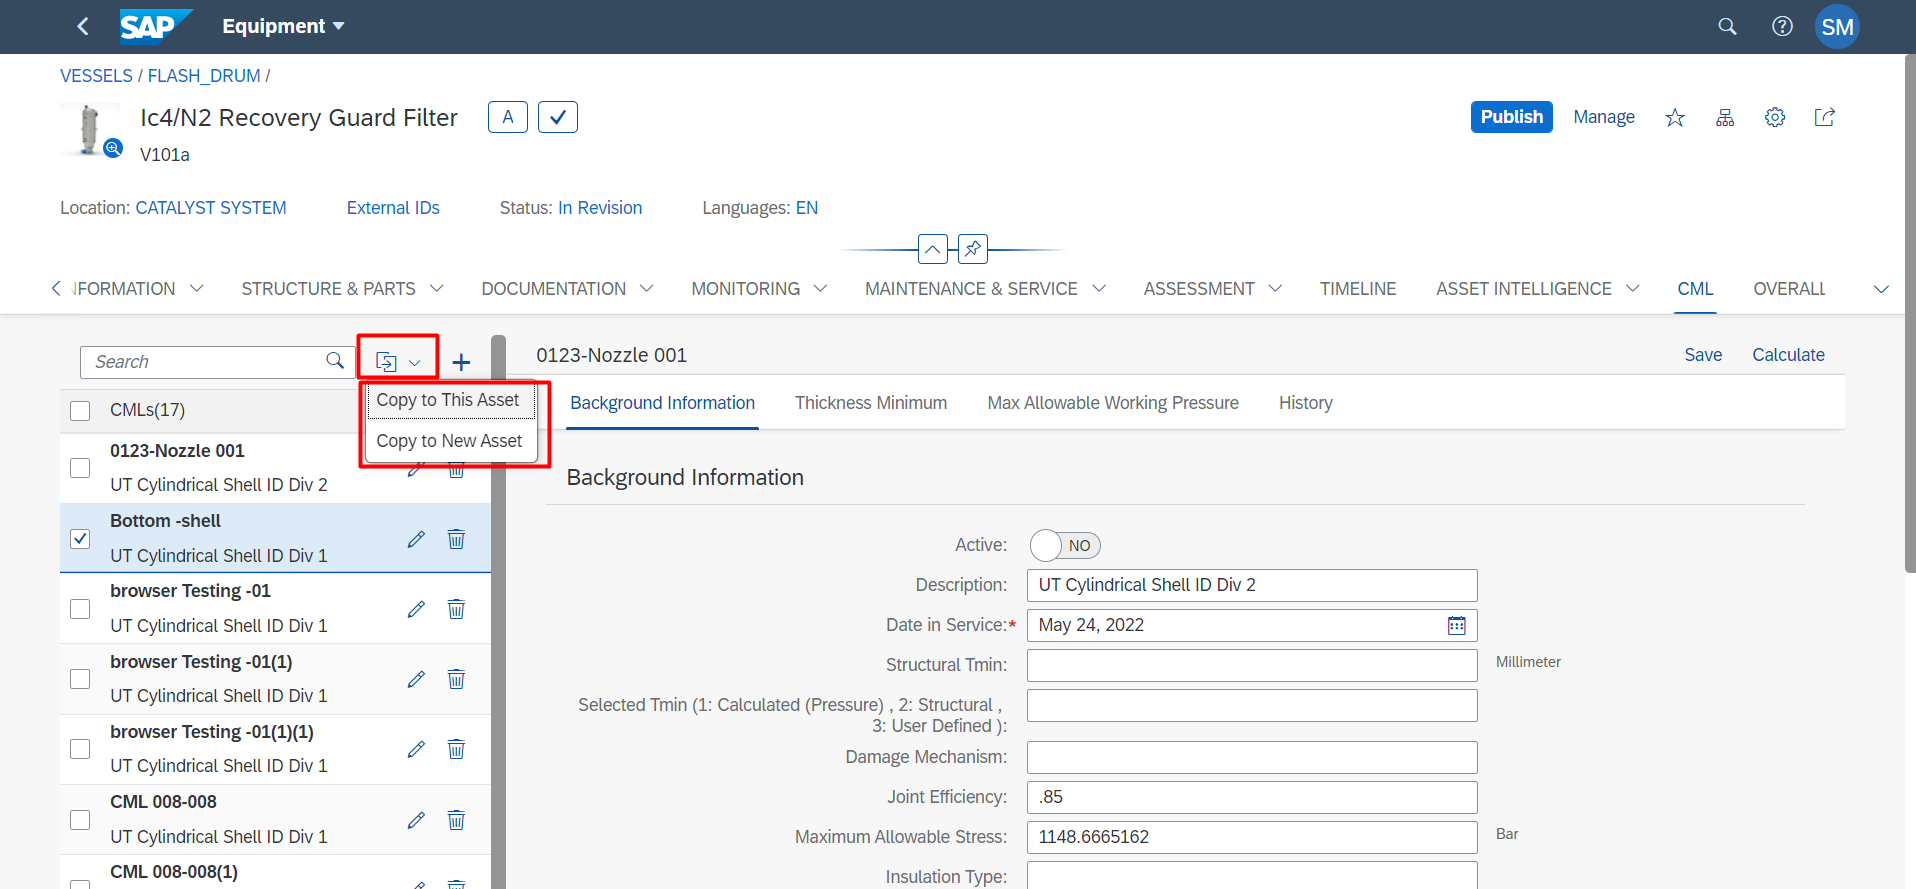
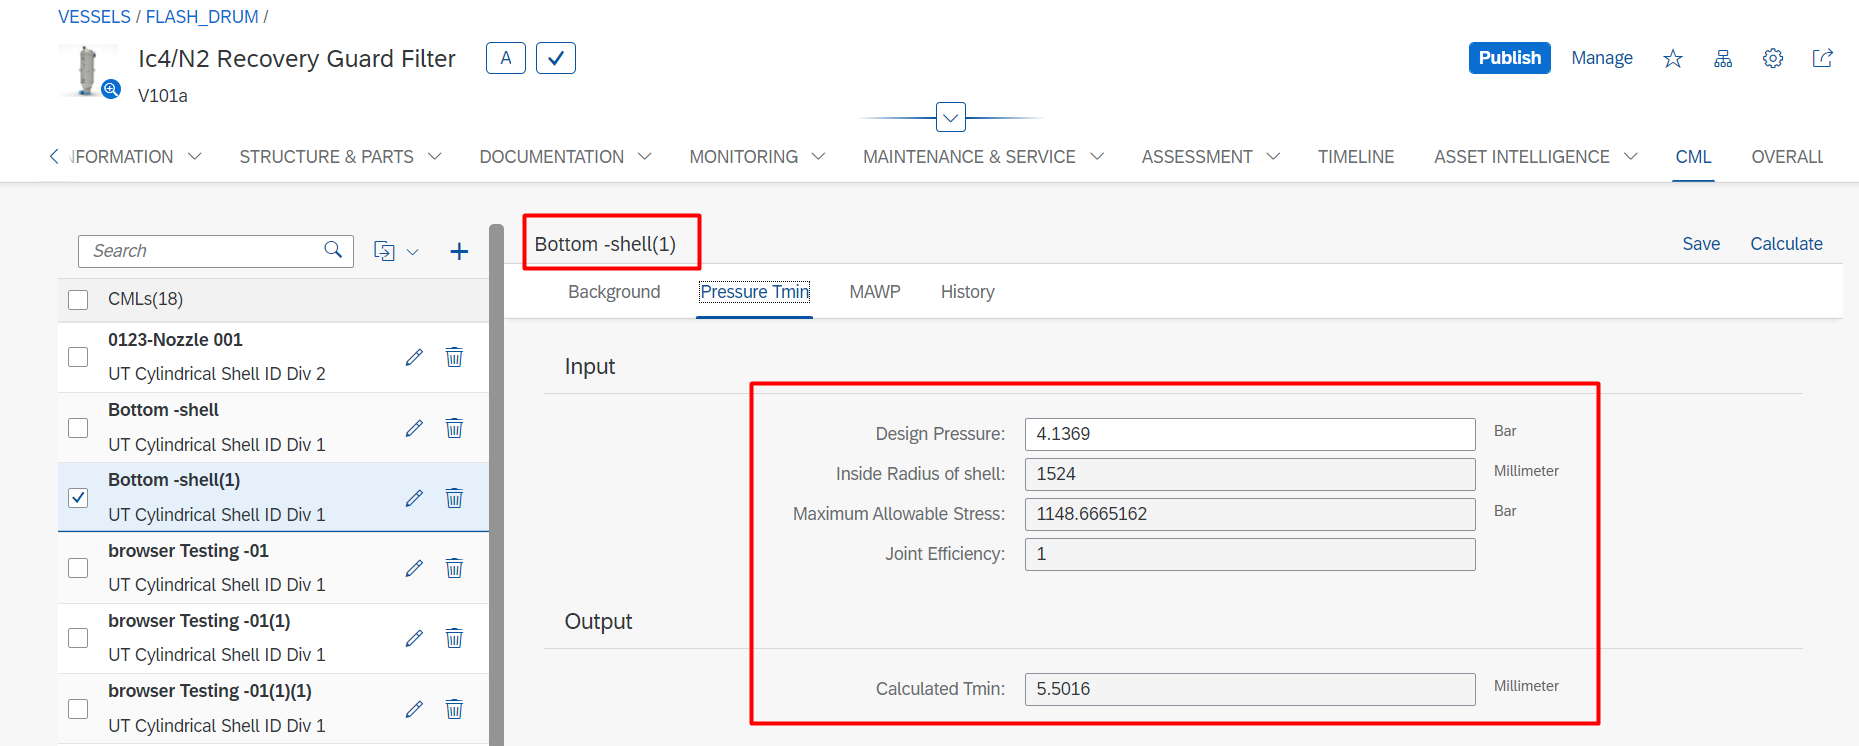
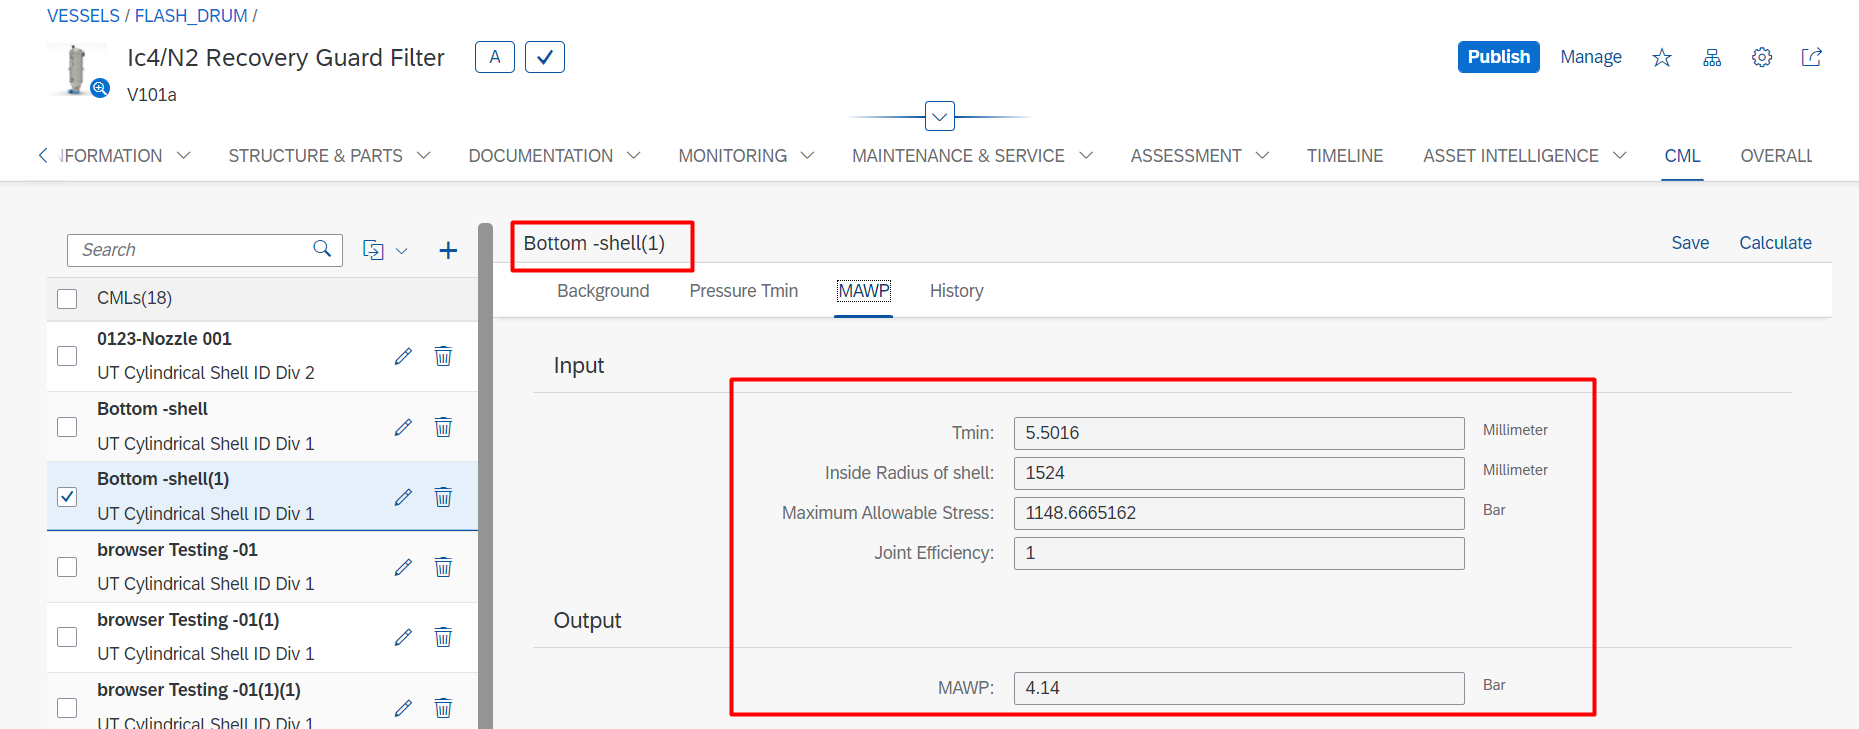
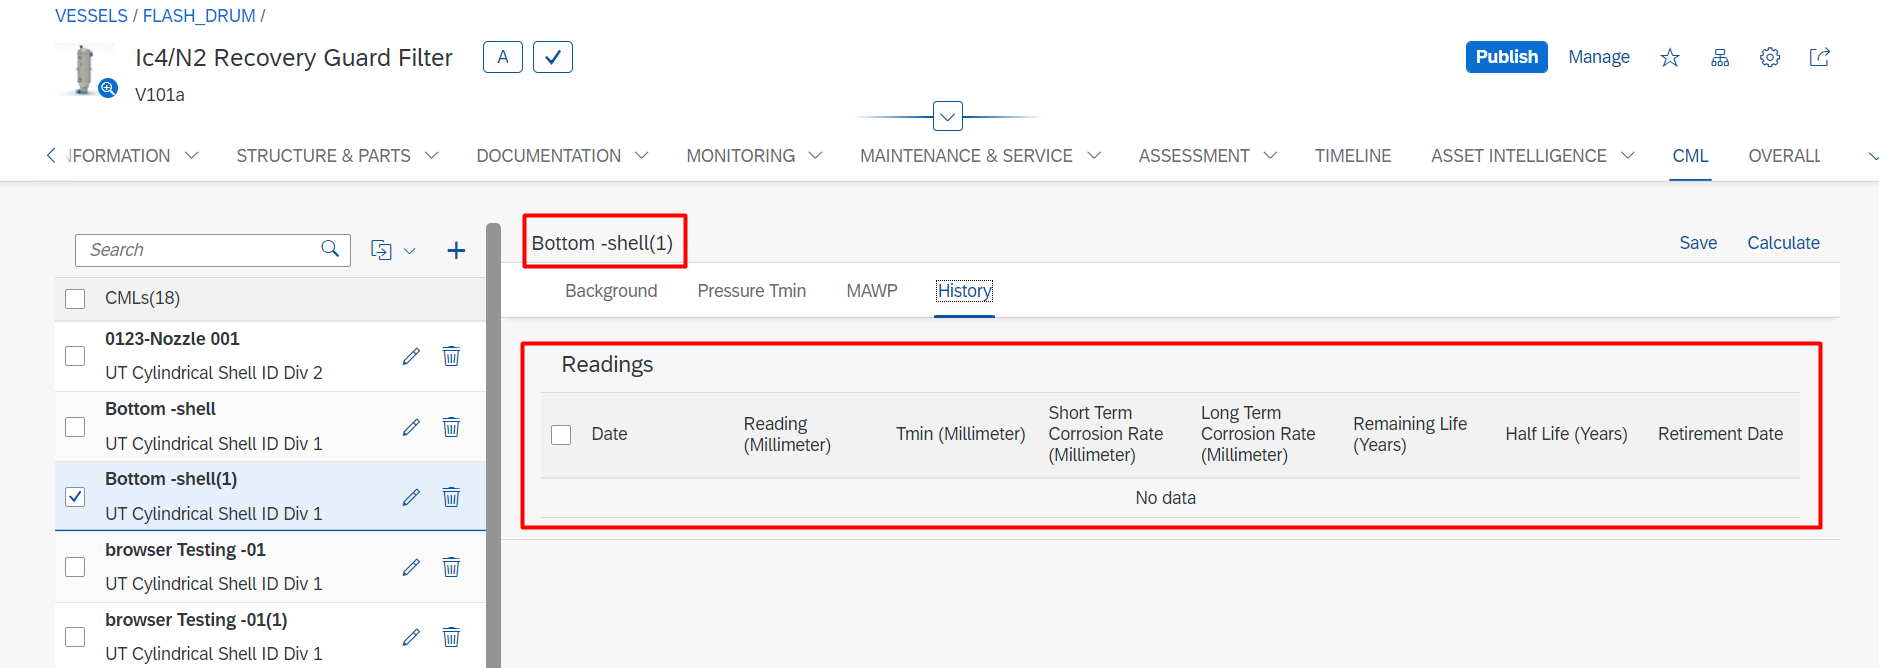
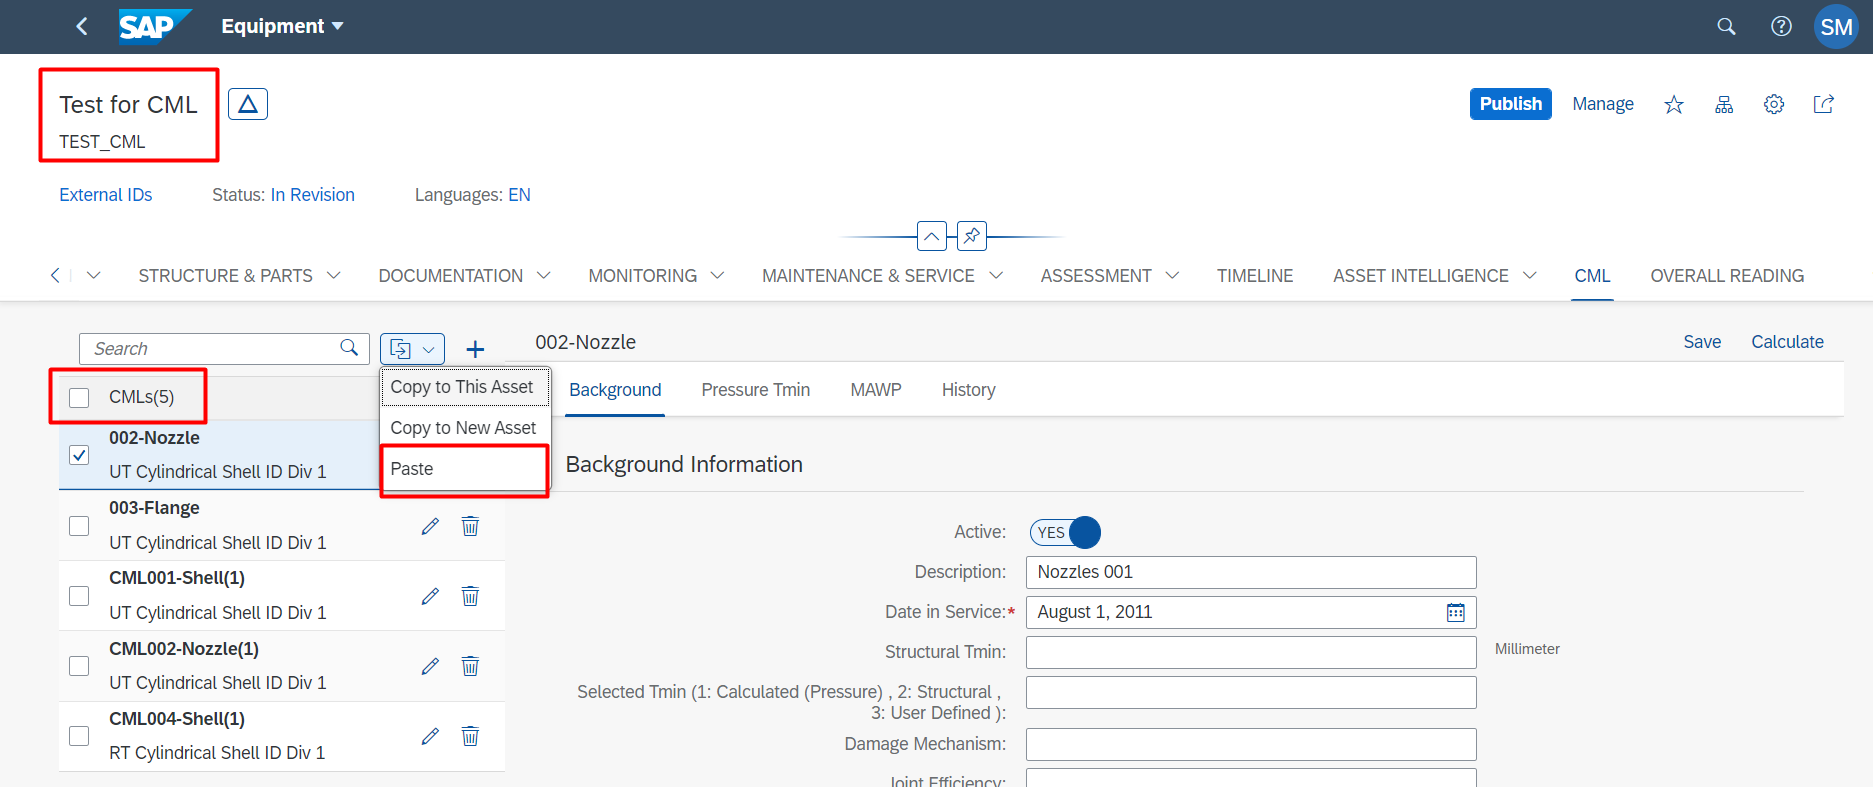
The CMLTab in Equipment/Location will show the list of CML(s). By using this clone feature the user can clone the CML(s) within the same Equipment/Location or to a new Equipment/Location. To clone, at least one CML should be selected. If not selected, then the below error message will be shown
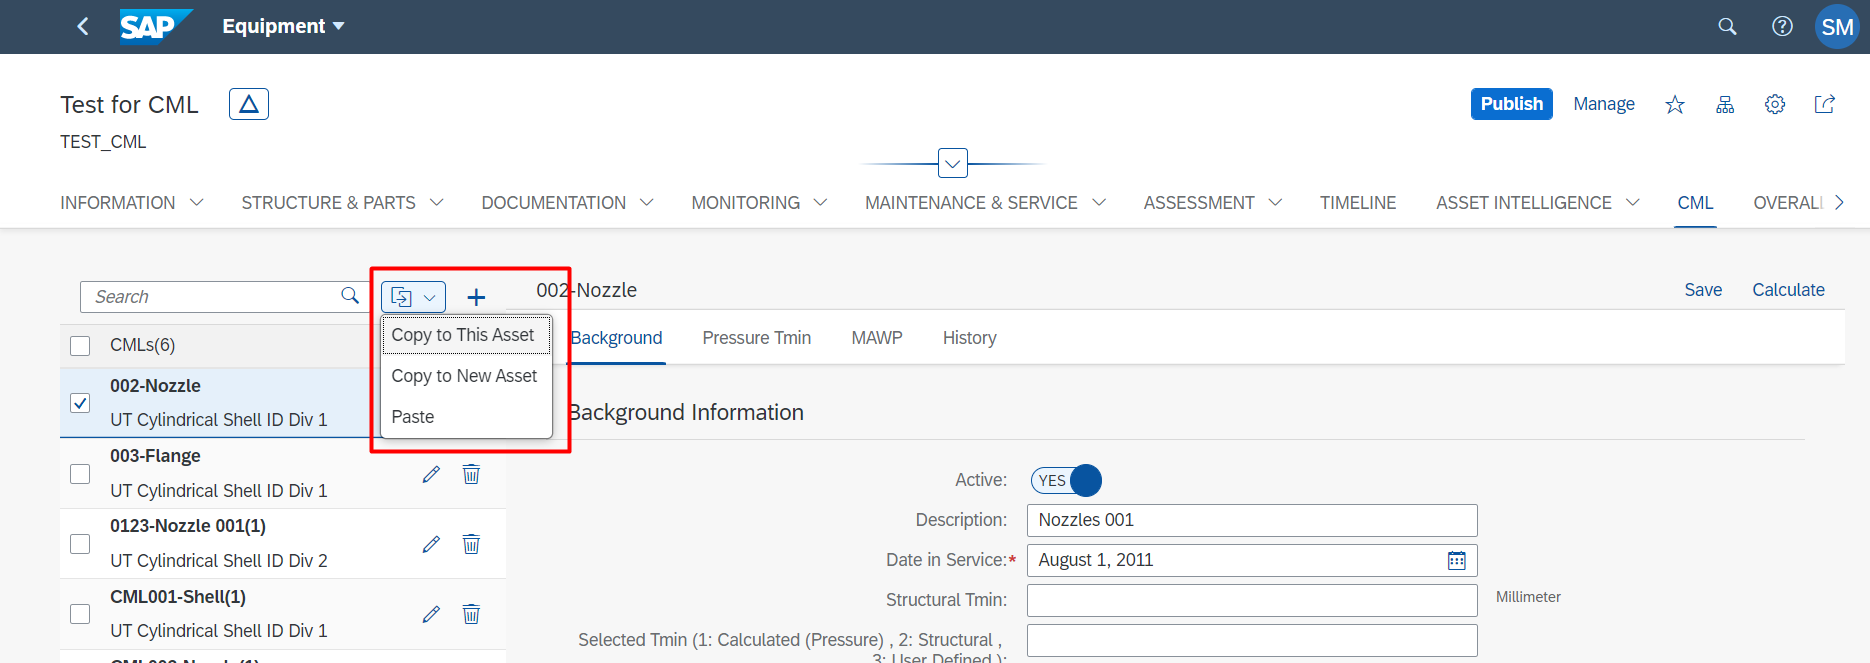
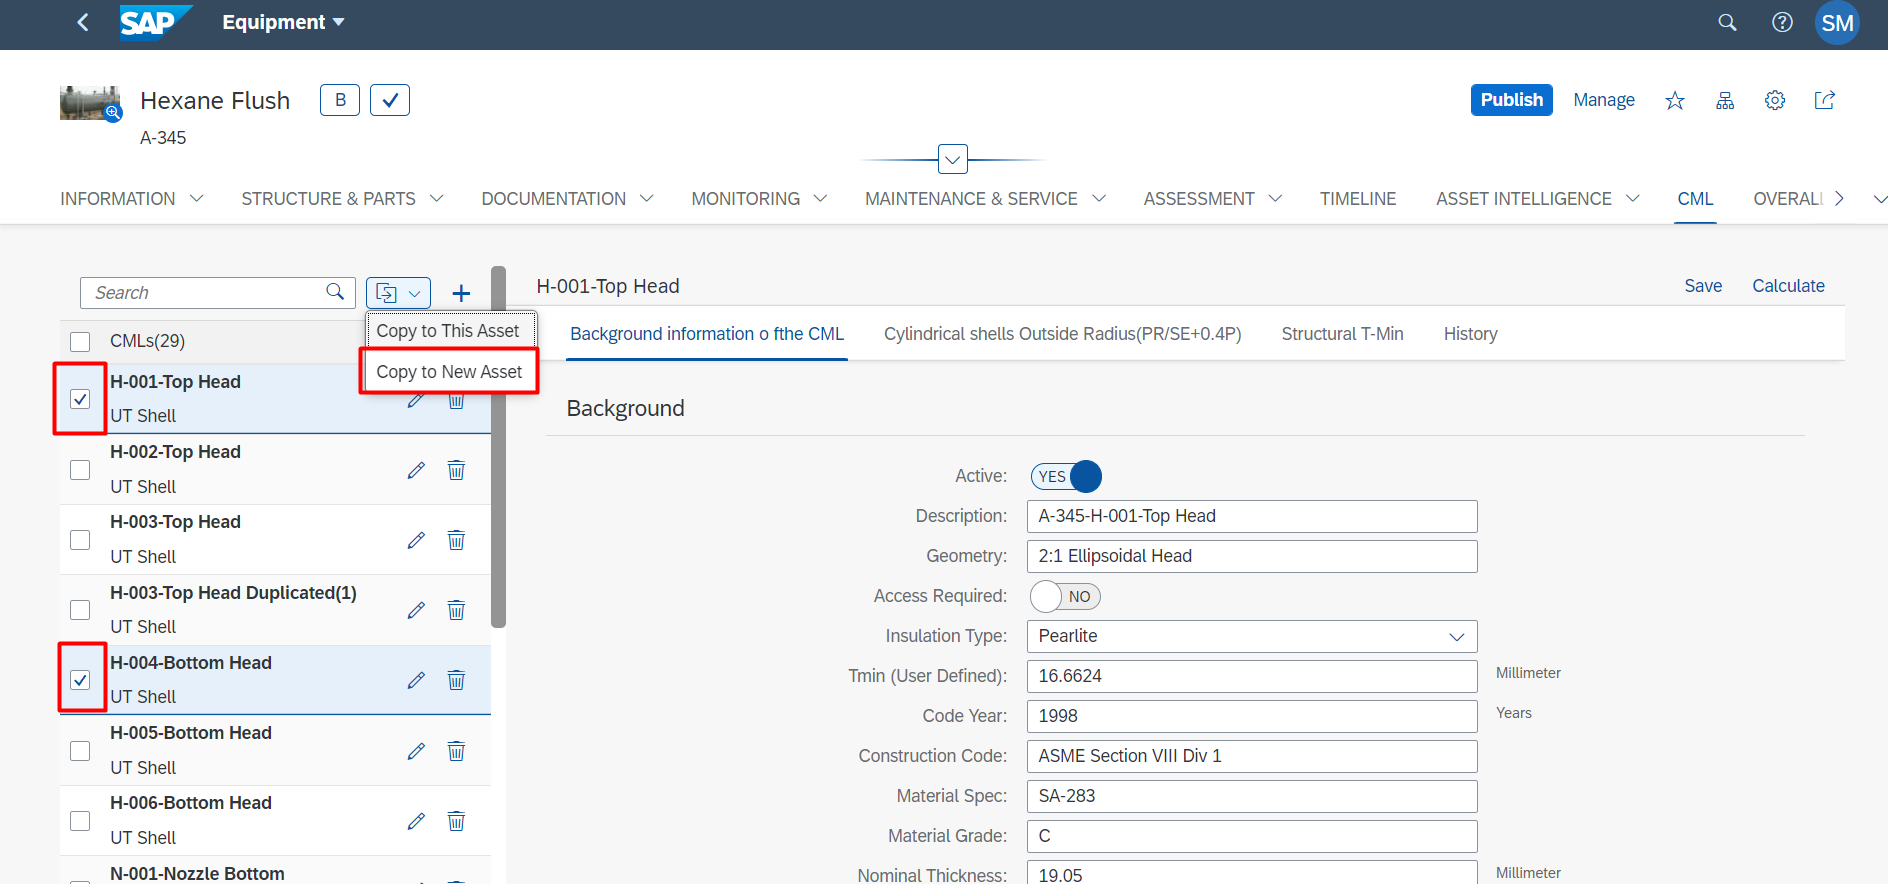
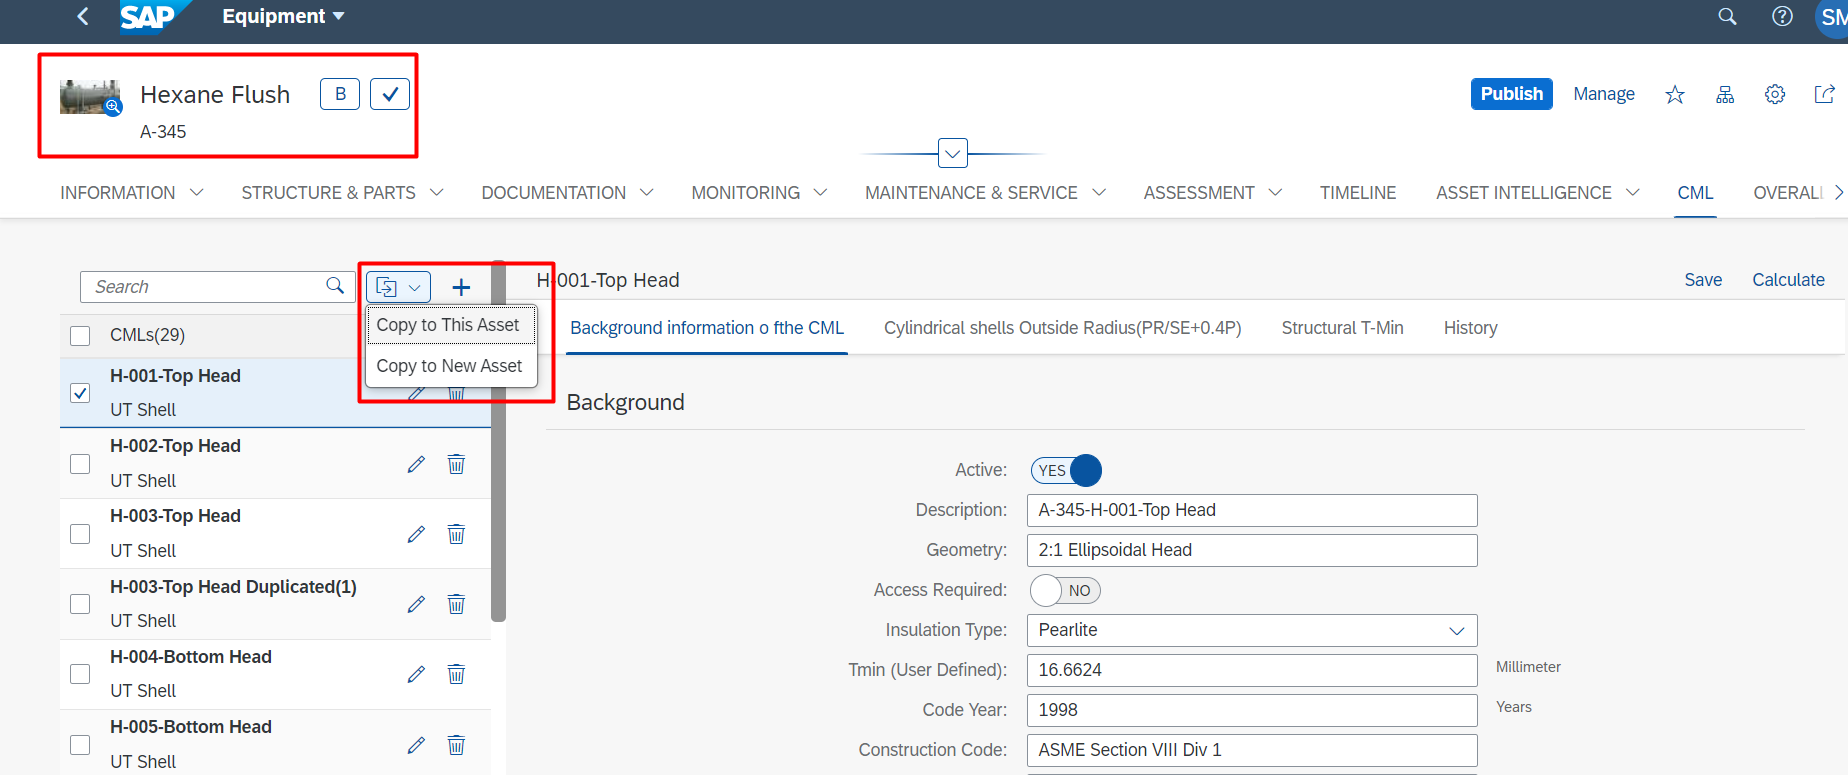
After selecting, click on the button next to search field. It will show to options – Copy to This Asset, Copy to New Asset. For Location, the options will be – Copy to This Location, Copy to New Location. If CMLs were already copied, then paste button will be visible or else it will not be visible.
Copy to This Asset:
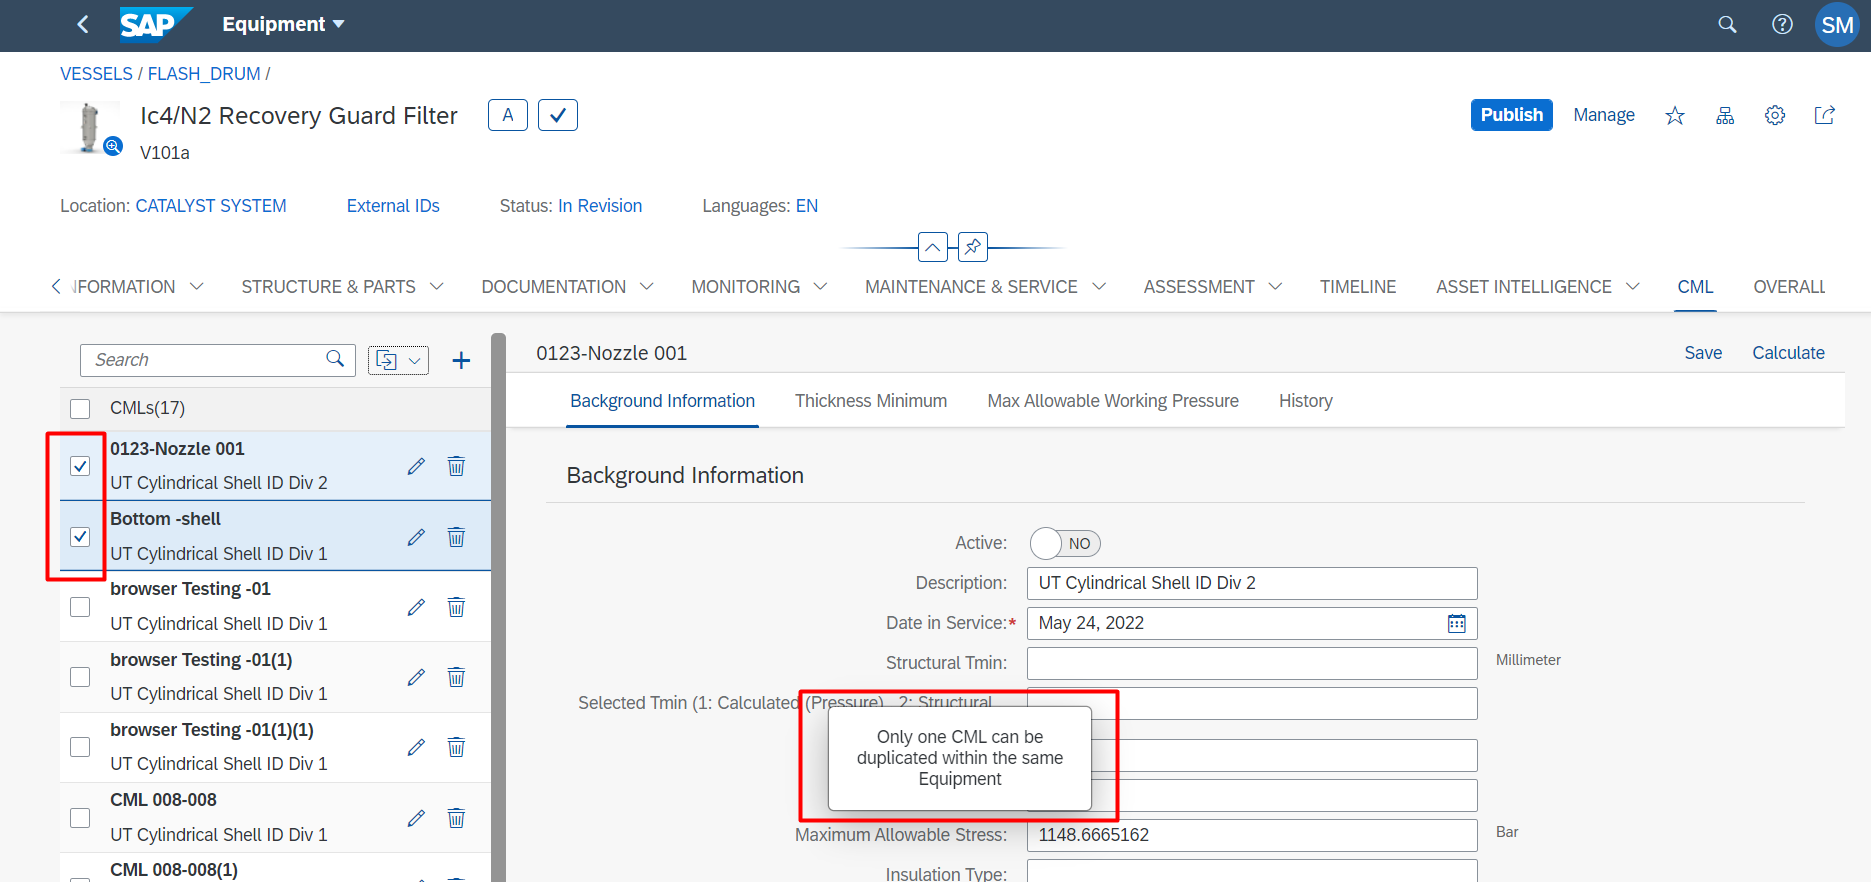
Within the same asset we can clone one CML at a time. If the use selects more than one CML and tried to clone to same asset, then below error message will be shown. This applies to location too.
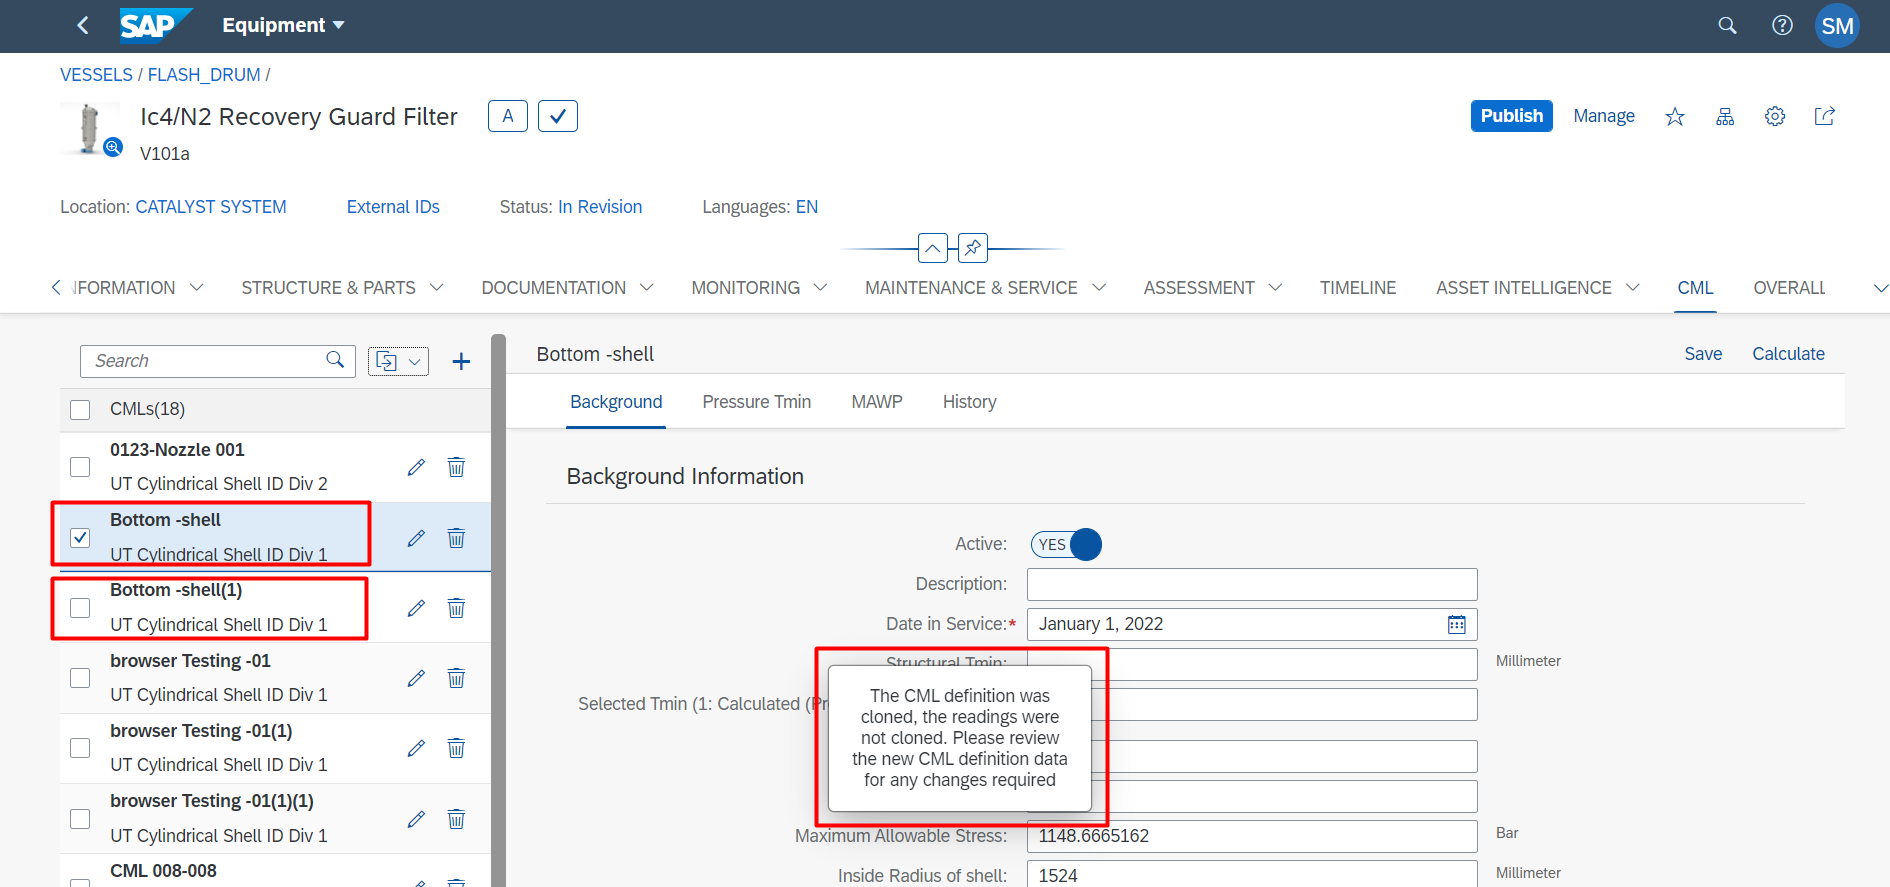
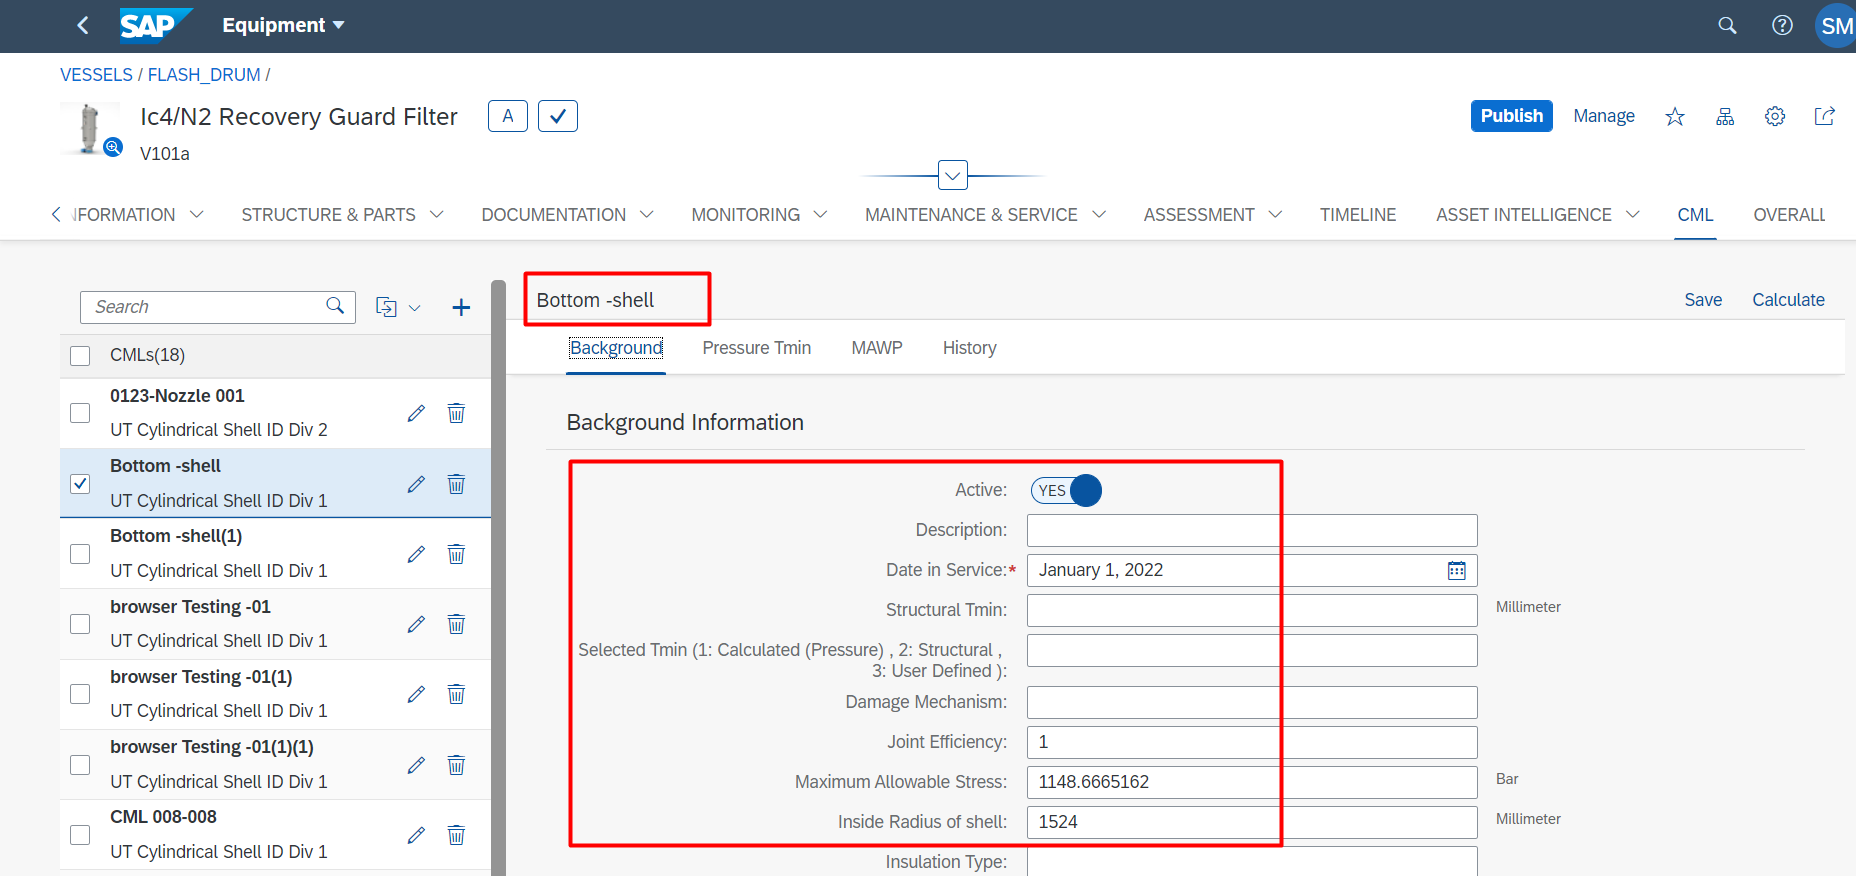
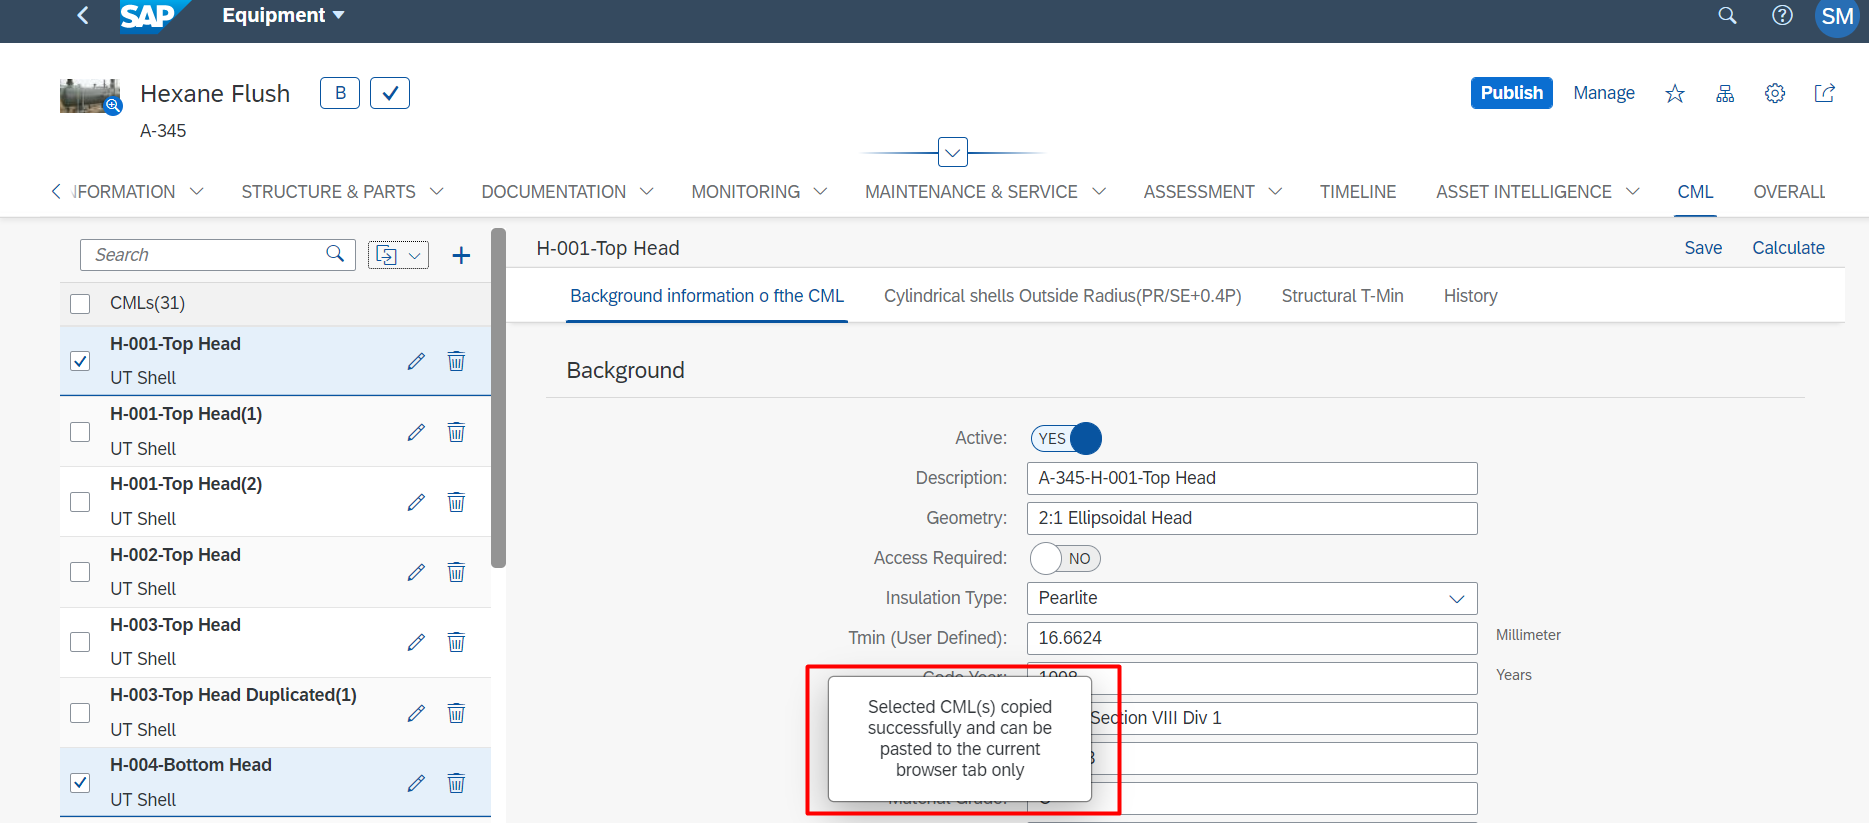
If only one CML was selected, then it will be duplicated successfully. Except history all other values will be moved to the duplicated CML. The naming convention of the duplicated item will be as follows –
At any given time, the CML name (name – description) will be unique. This applies to location too.
Selected CML:
New CML:
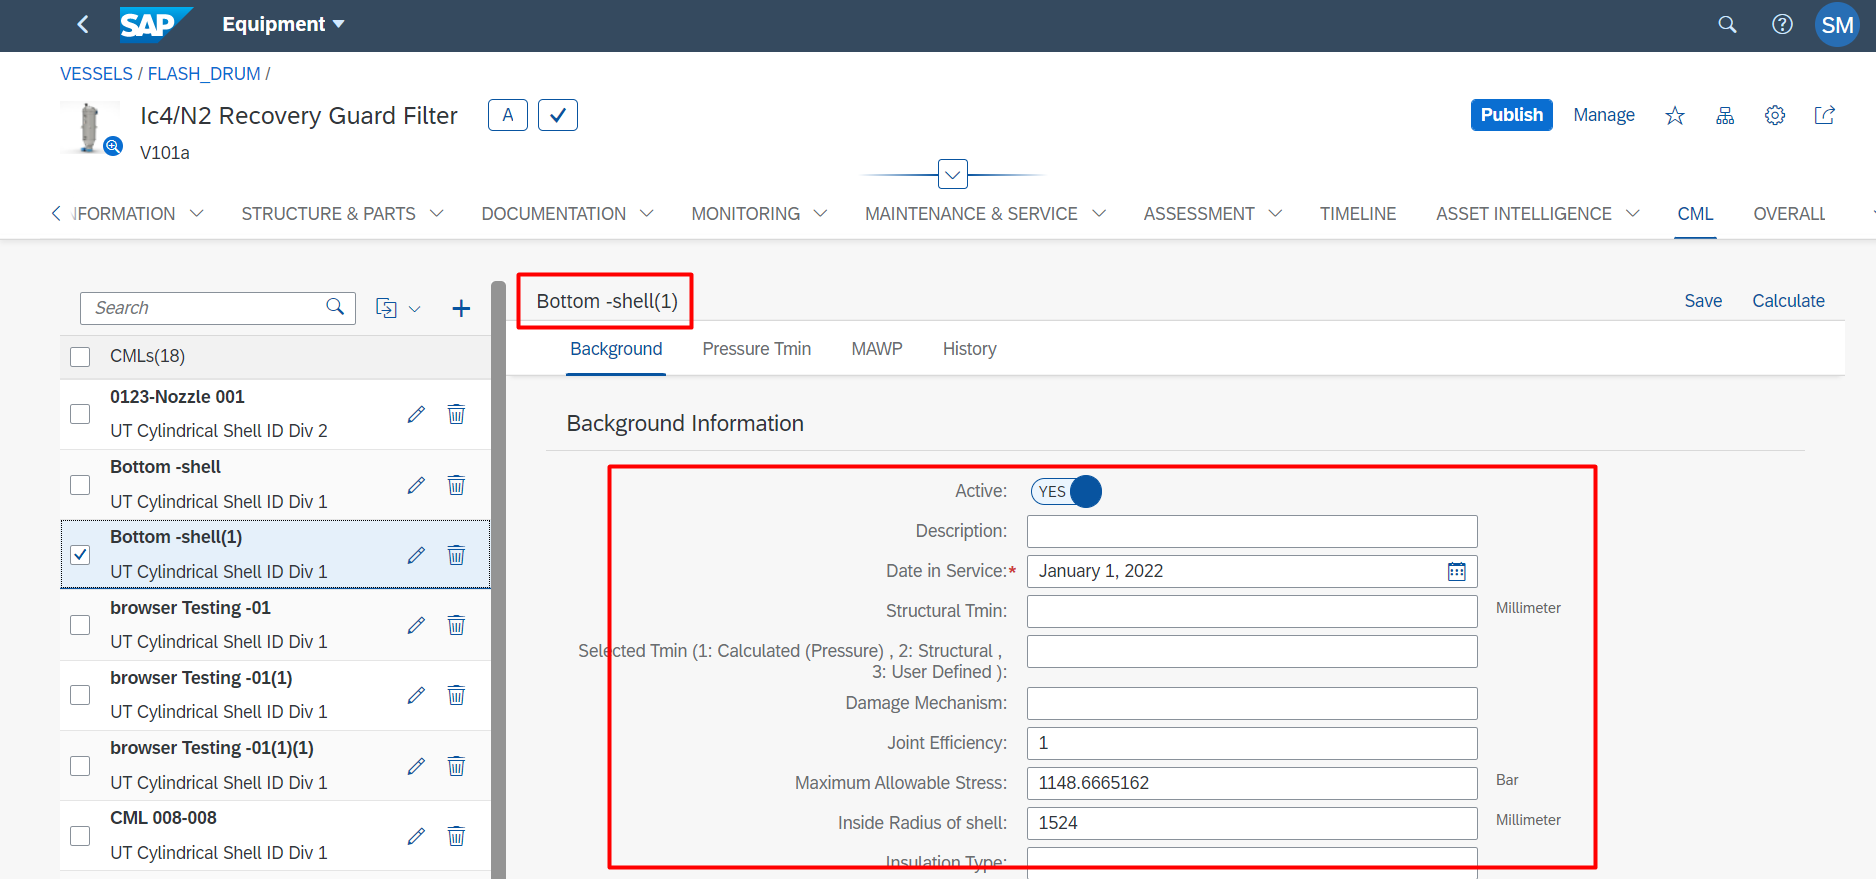
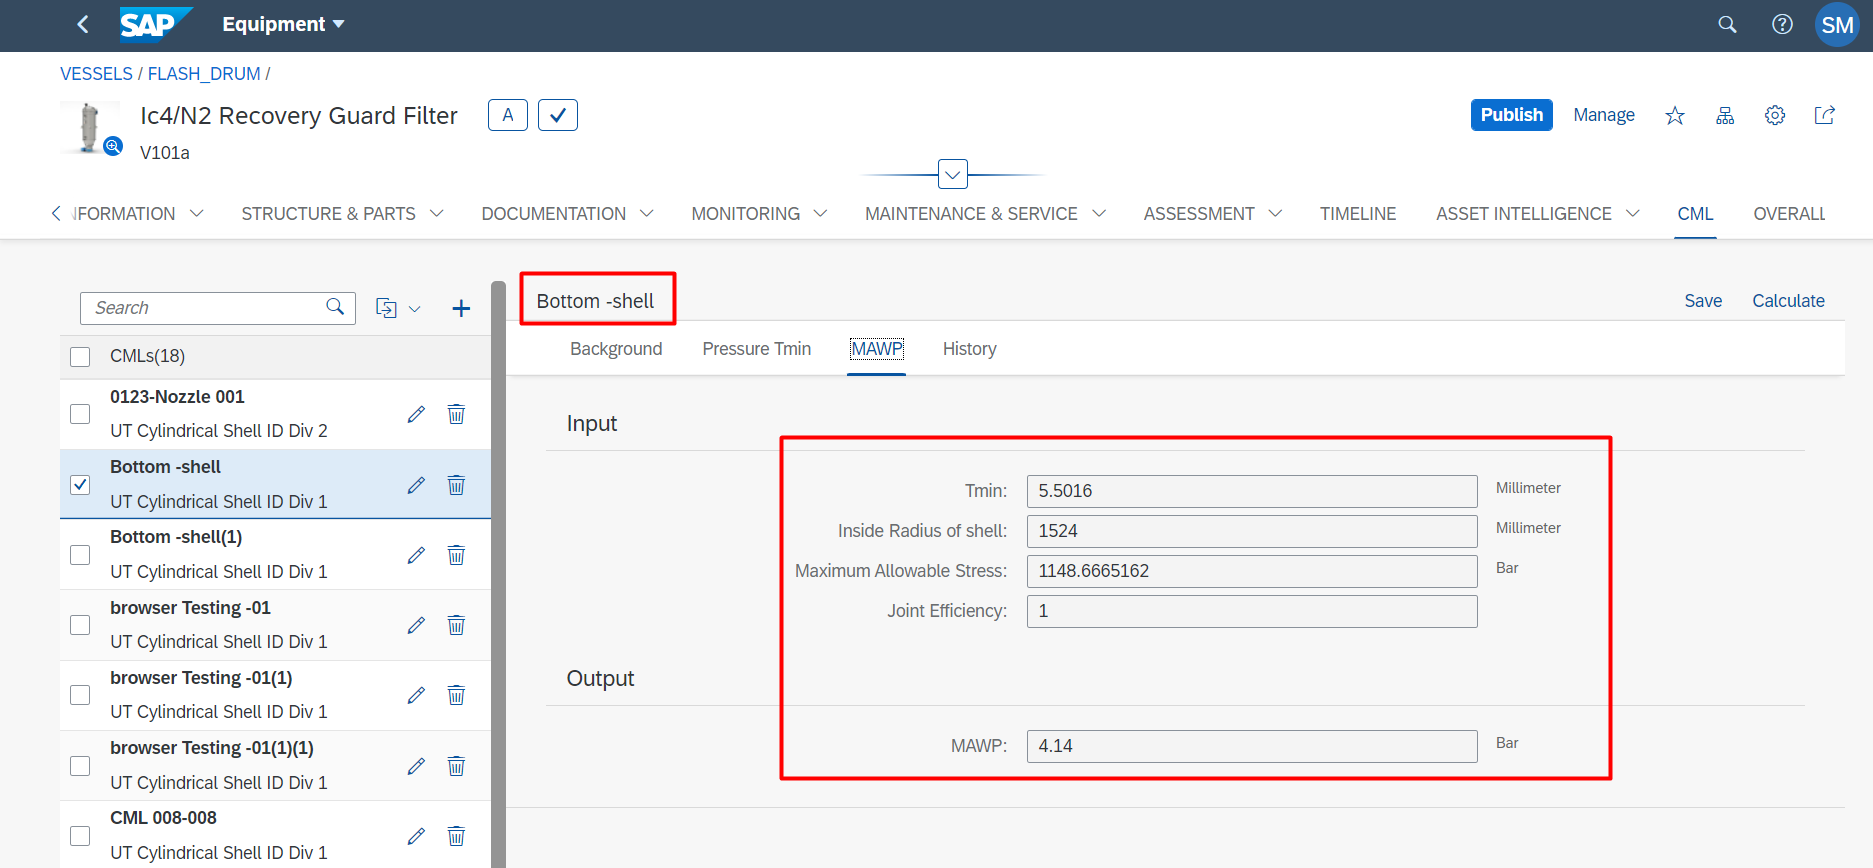
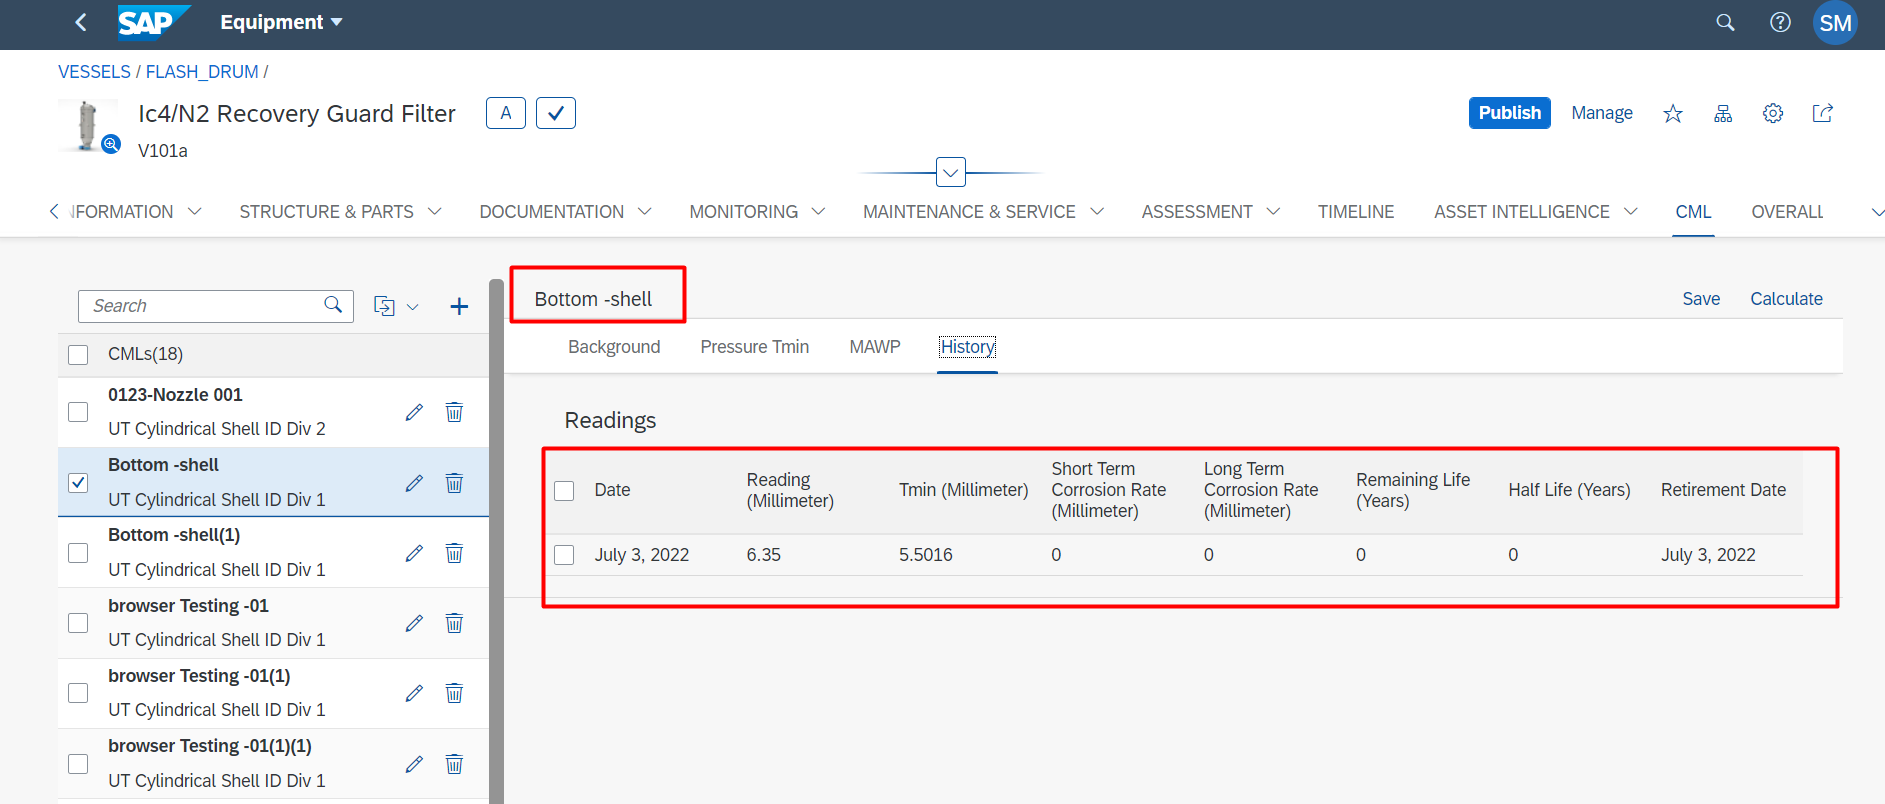
The values should be same for selected CML and new CML. New CML should not have any history.
Copy to New Asset:
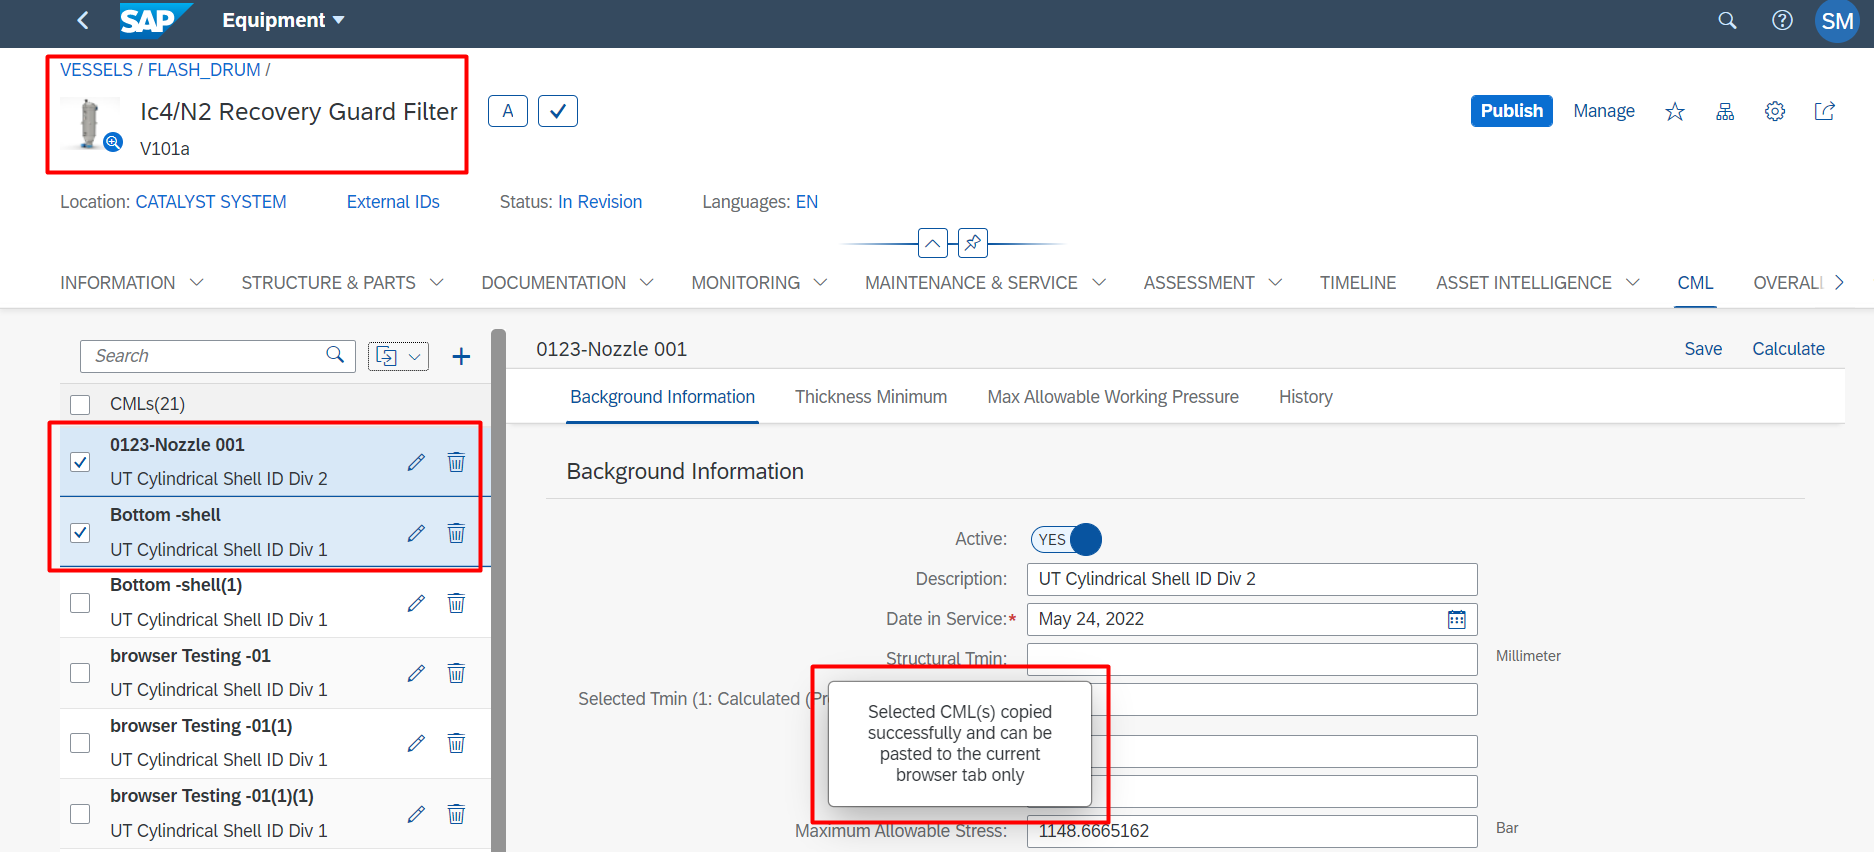
User can clone CML(s) from one Equipment to another Equipment. It also follows the same naming convention which was mentioned above. Select one or more CMLs and click on Copy to New Asset. For cloning to different equipment browser’s session storage was needed.
If storage was restricted, then below message will be shown. This applies to location too.

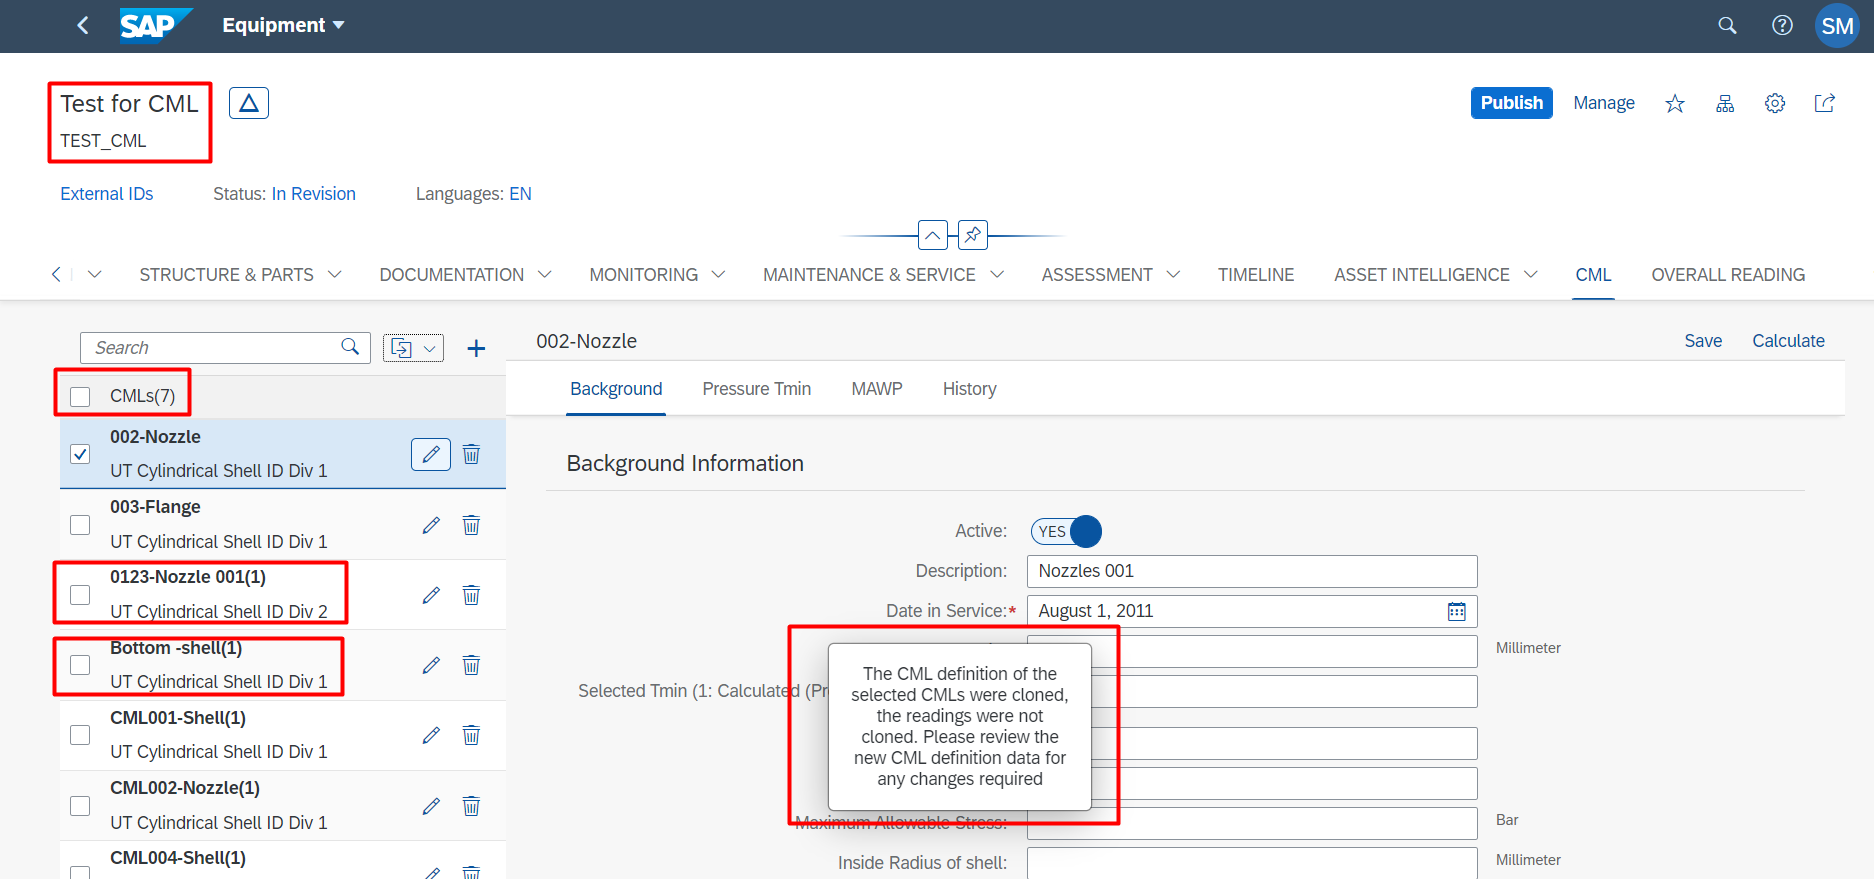
If storage was not restricted, then the selected CML(s) will be copied and below message will be shown. This applies to Location too.
Paste:
To paste the copied CML(s) navigate back to the Equipment list and select another equipment. If same equipment was selected, then paste button will not be visible. This applies to location too.
To clone CML(s) to new equipment, then the new equipment must have the required CML templates. CML(s) were already copied, now paste button will be visible. Click on the paste button.
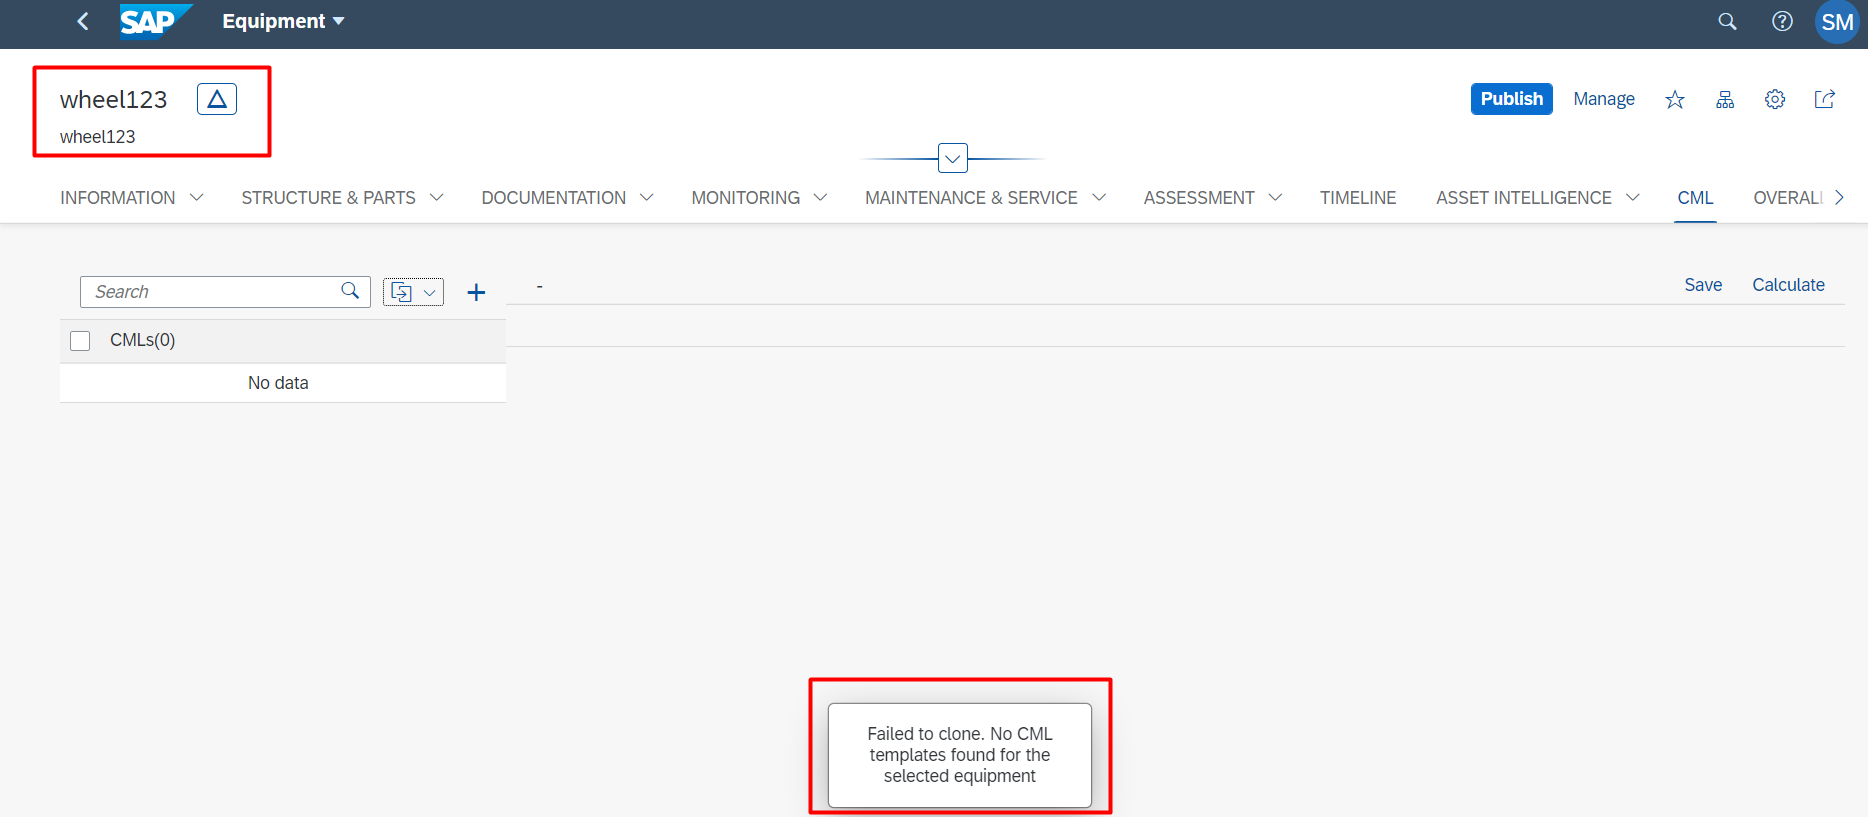
If the equipment does not have any templates, then below error message will be shown. This applies to Location too.
If the equipment has templates but do not have the required templates, then below error message will be shown. This applies to location too.

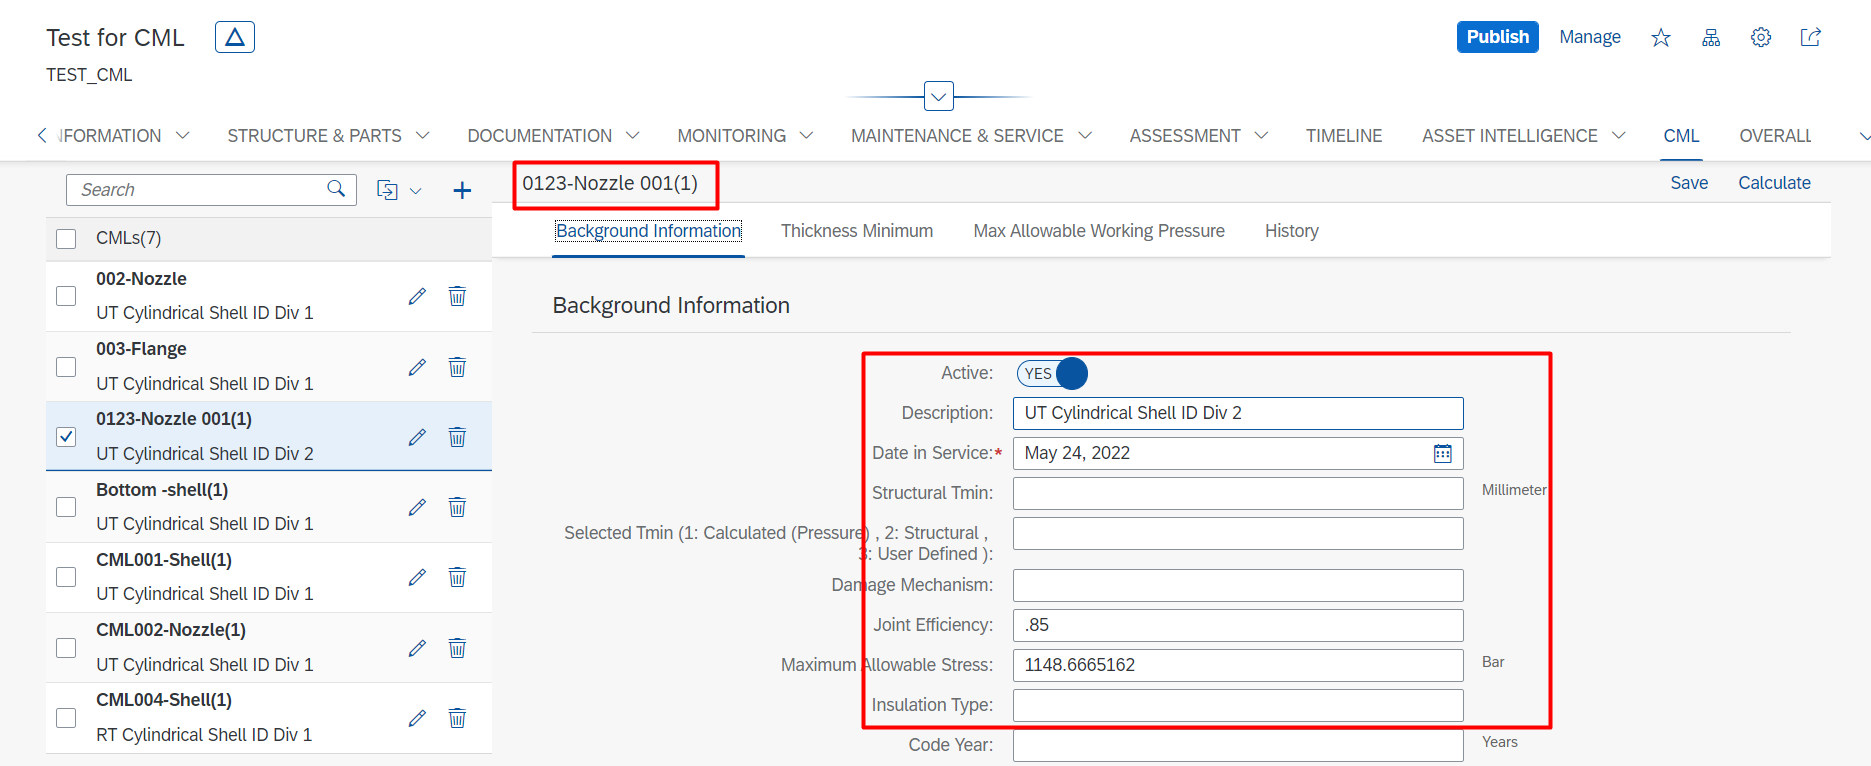
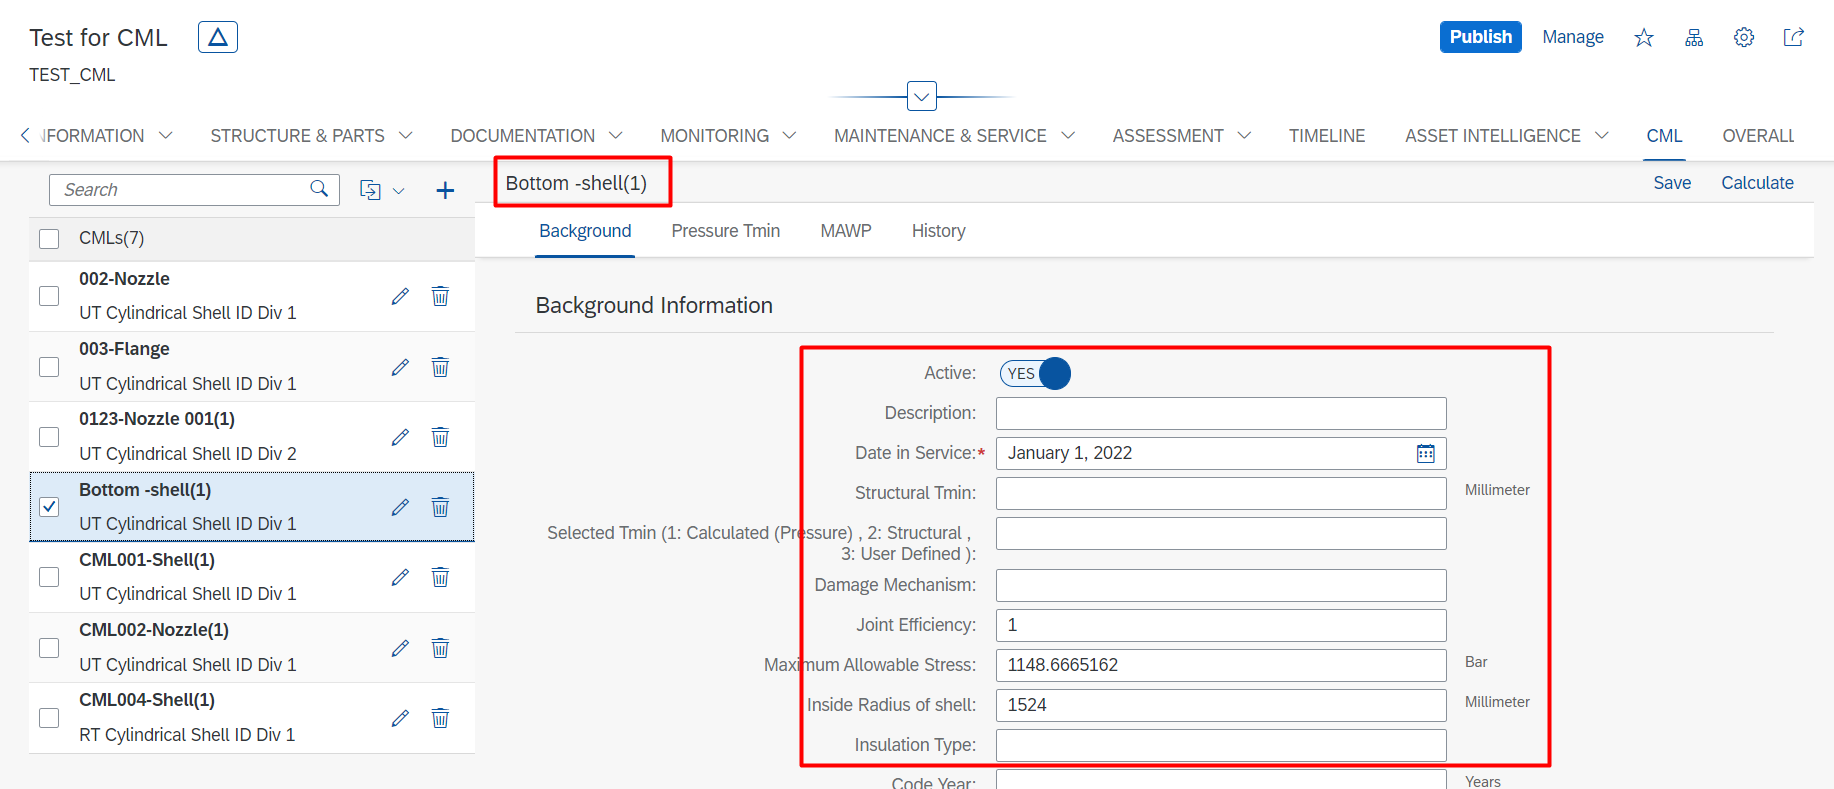
If the equipment has required templates, then the CML(s) will be cloned. This applies to location too.
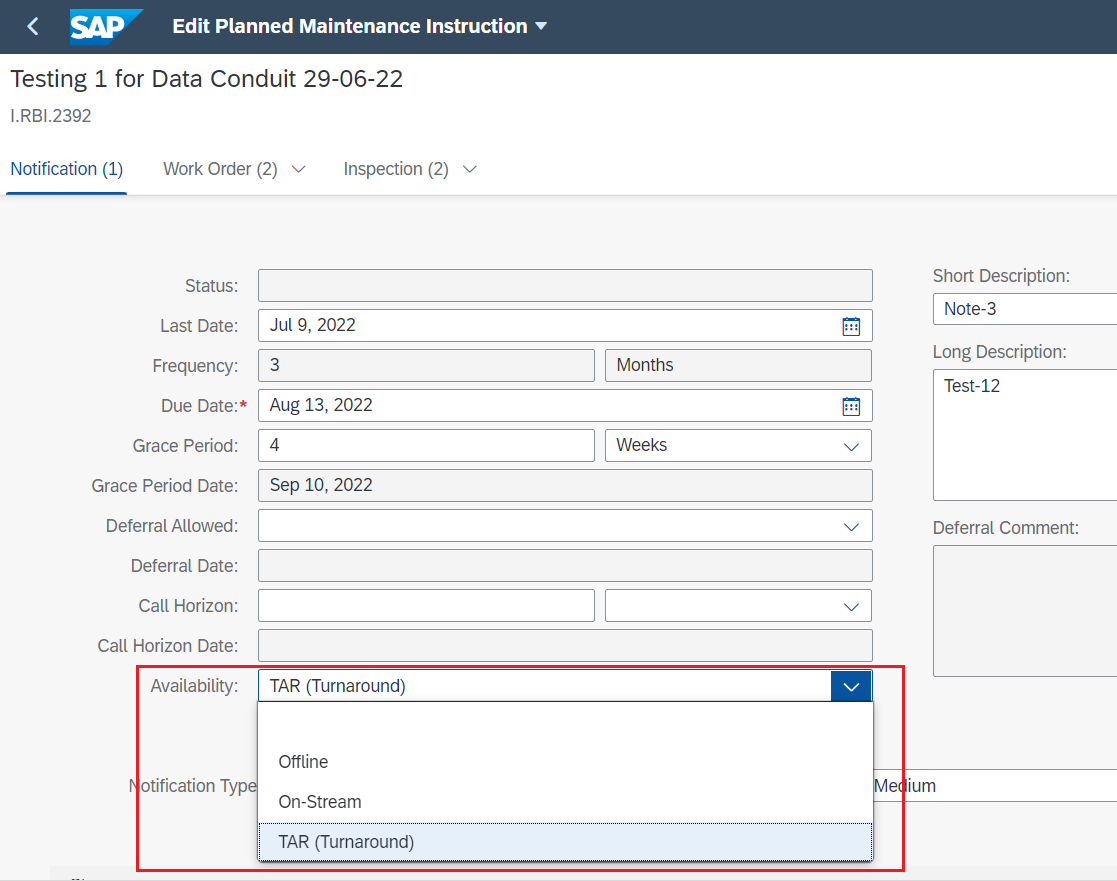
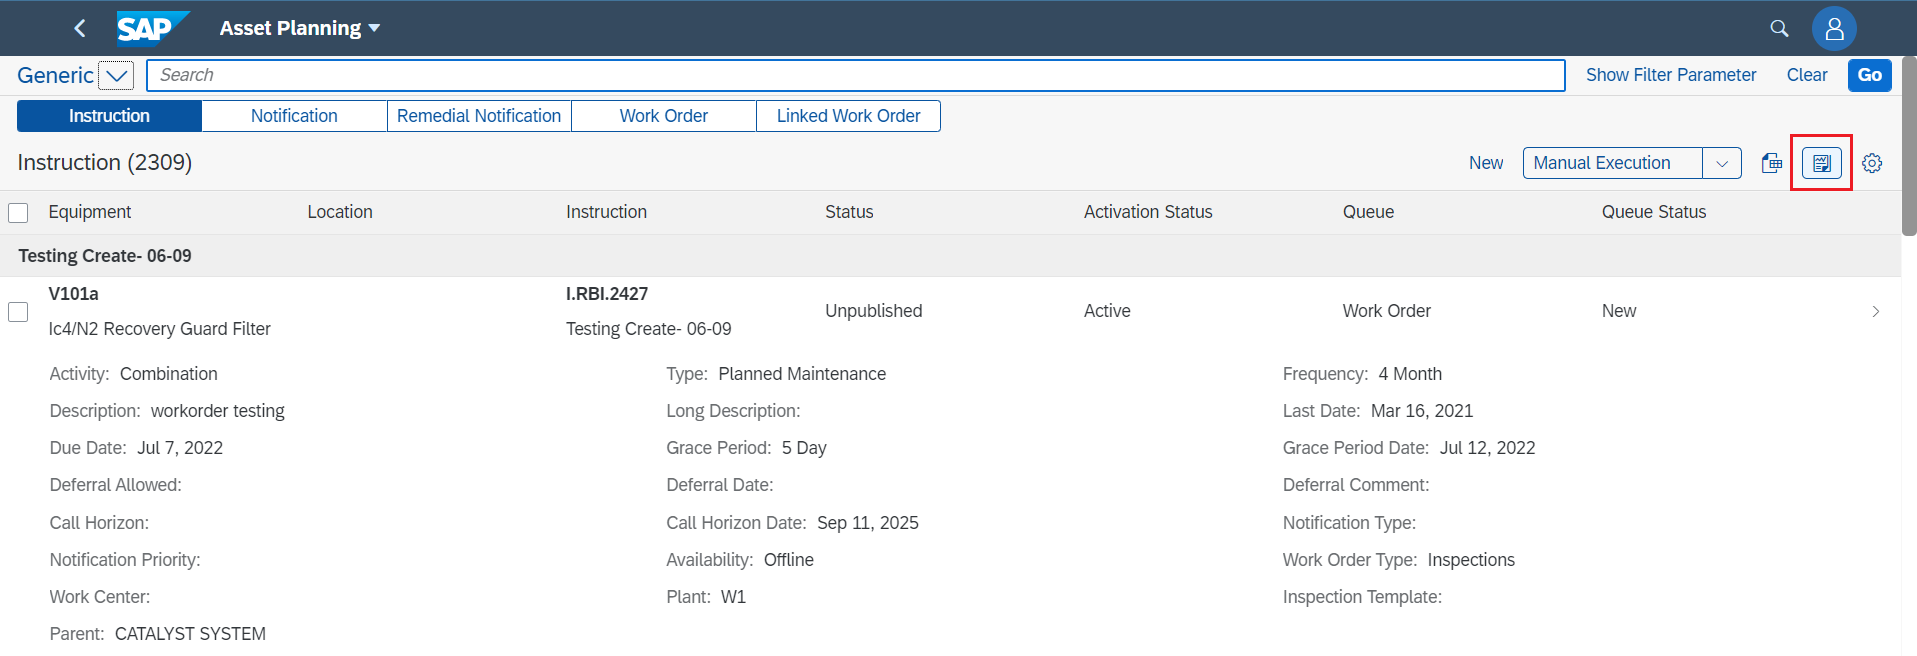
The Notification, Work Order, Inspection Tab in Asset PlanningInstruction Detail has an Availability field. It has a list of selected Picklist data ofConfiguration App – Organization Settings. Select any one of the Availability lists and save it.

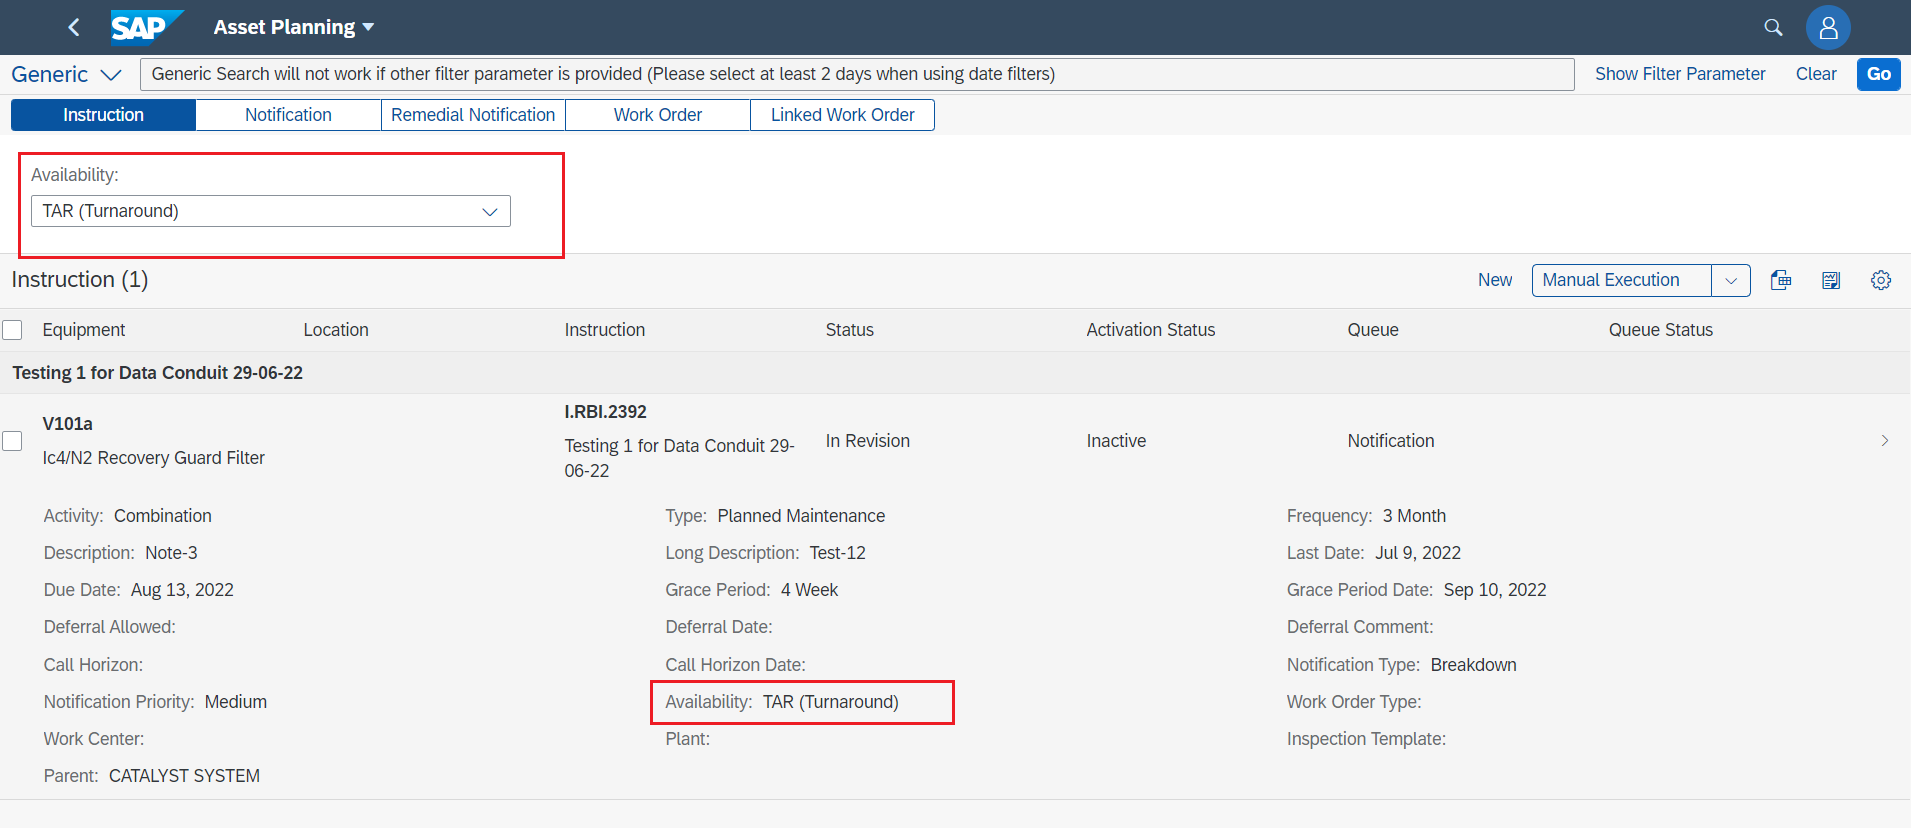
The Selected Availability will be displayed on the Asset Planning Instruction List Column.
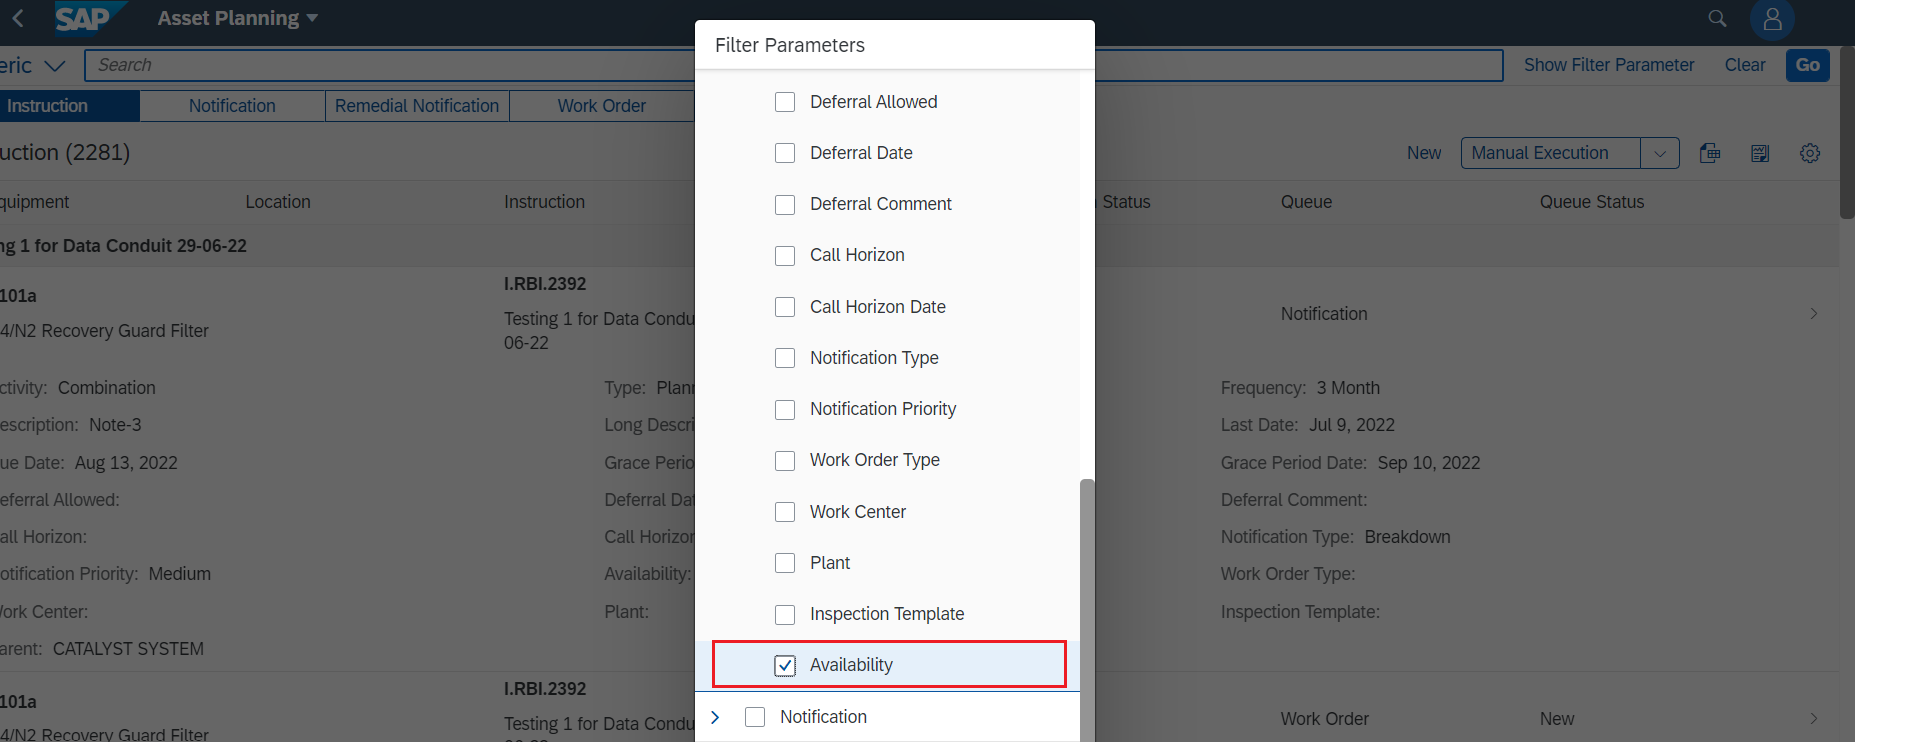
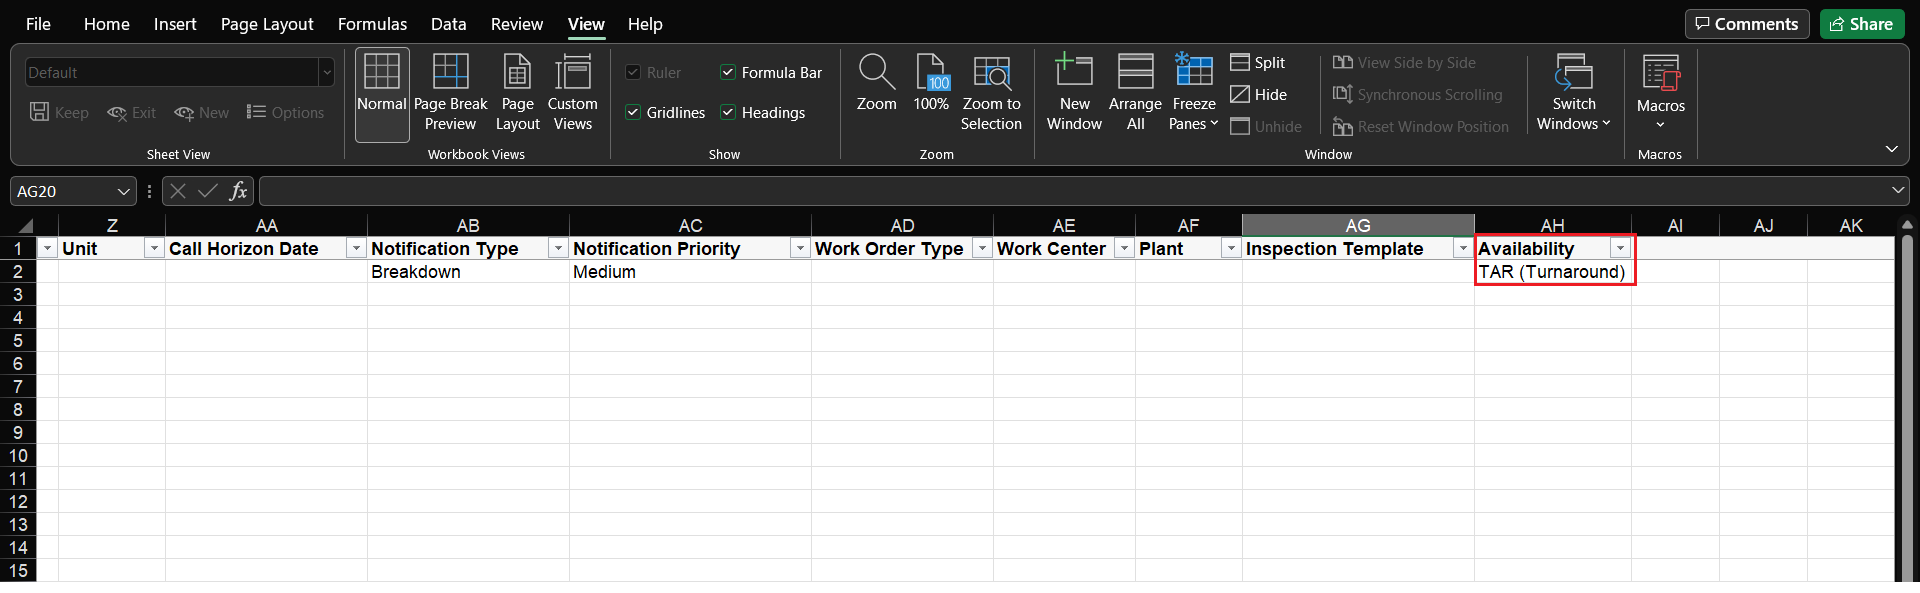
It has a filter, based on Availability select and Excel Export.
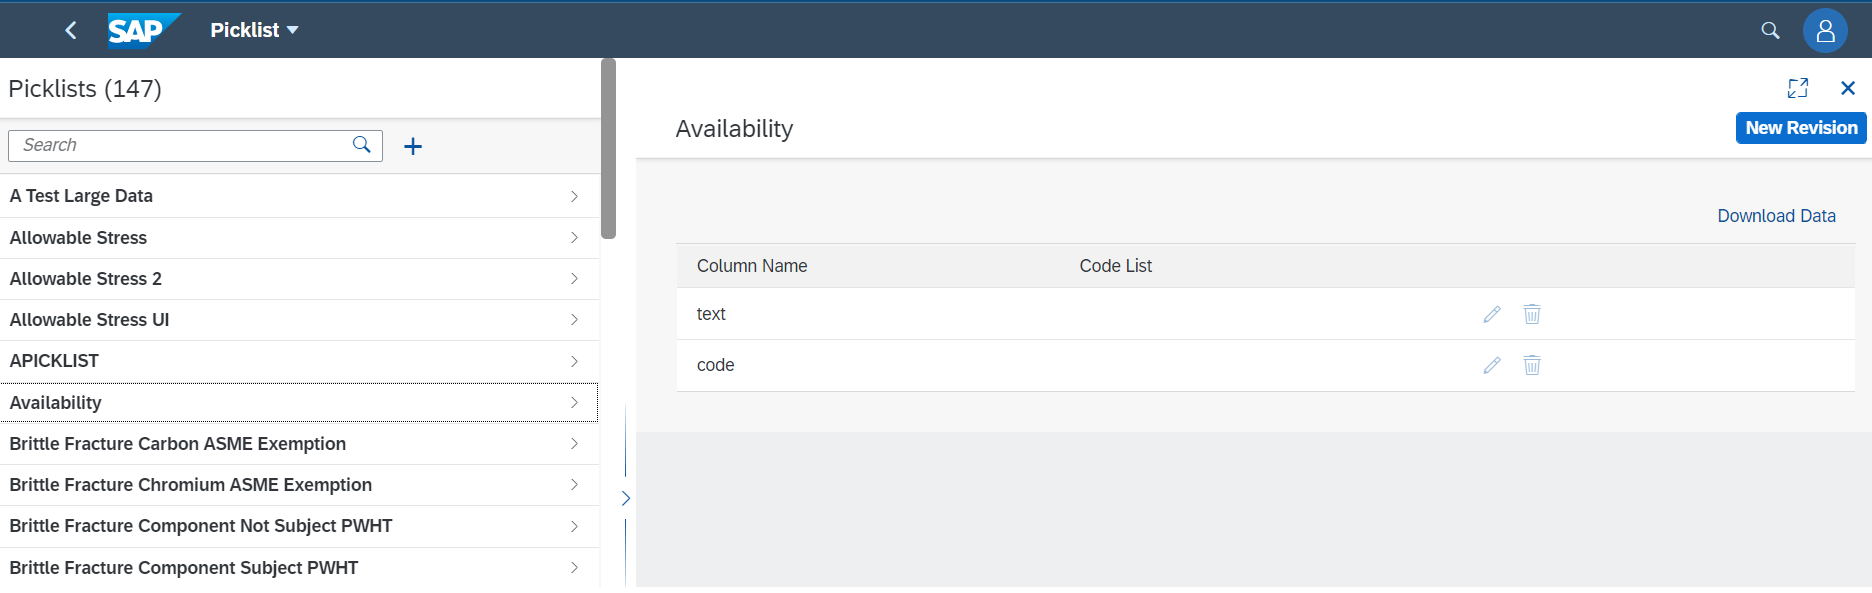
Create a Picklist with “text” and “code” and publish it.
Example:
1. text: On-Stream
code: OST
2. text: Offline
code: OFL
3. text: TAR (Turnaround)
code: TAR
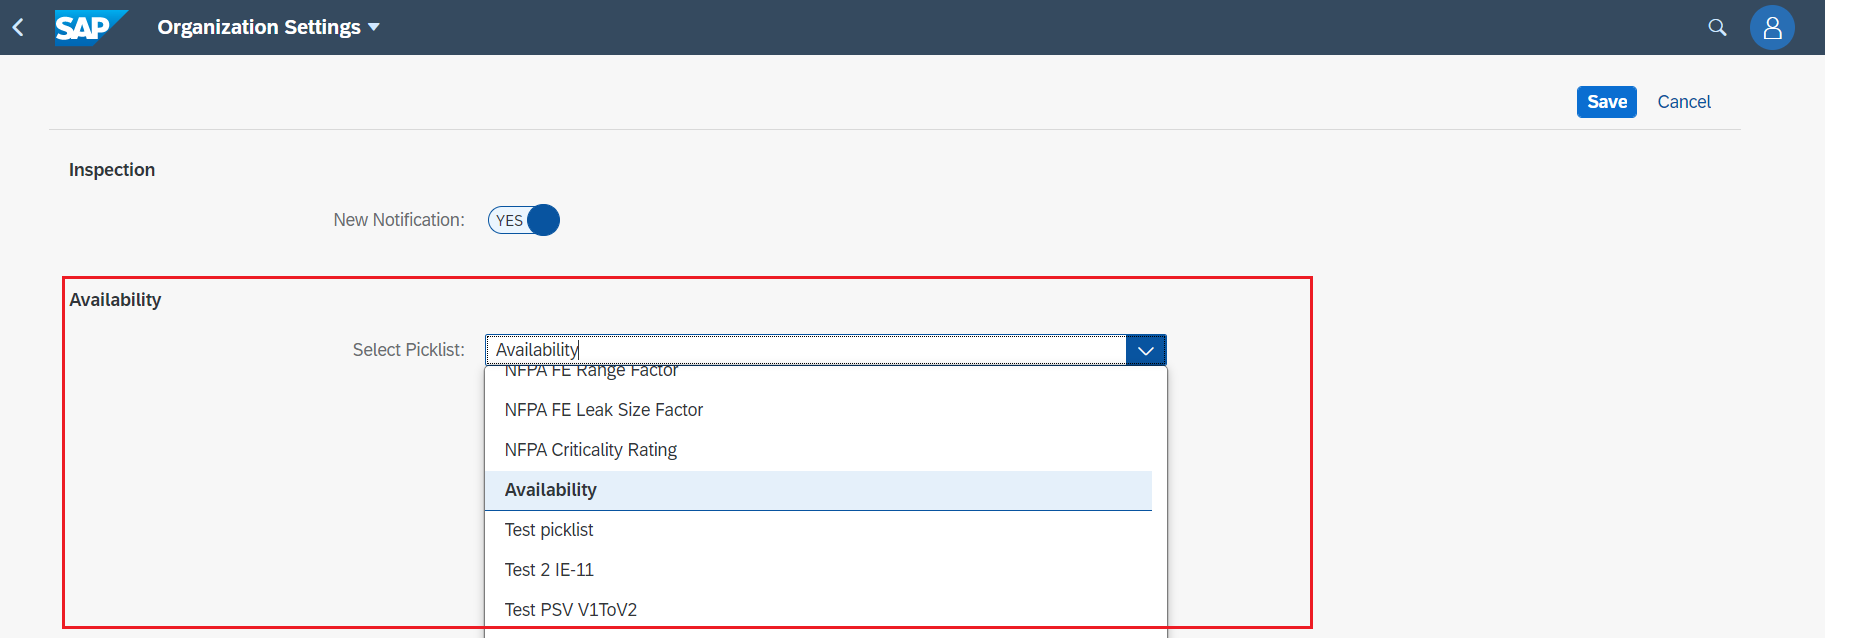
After Published, Navigate to Organization Settings, select a picklist you created for Availability, and save it.
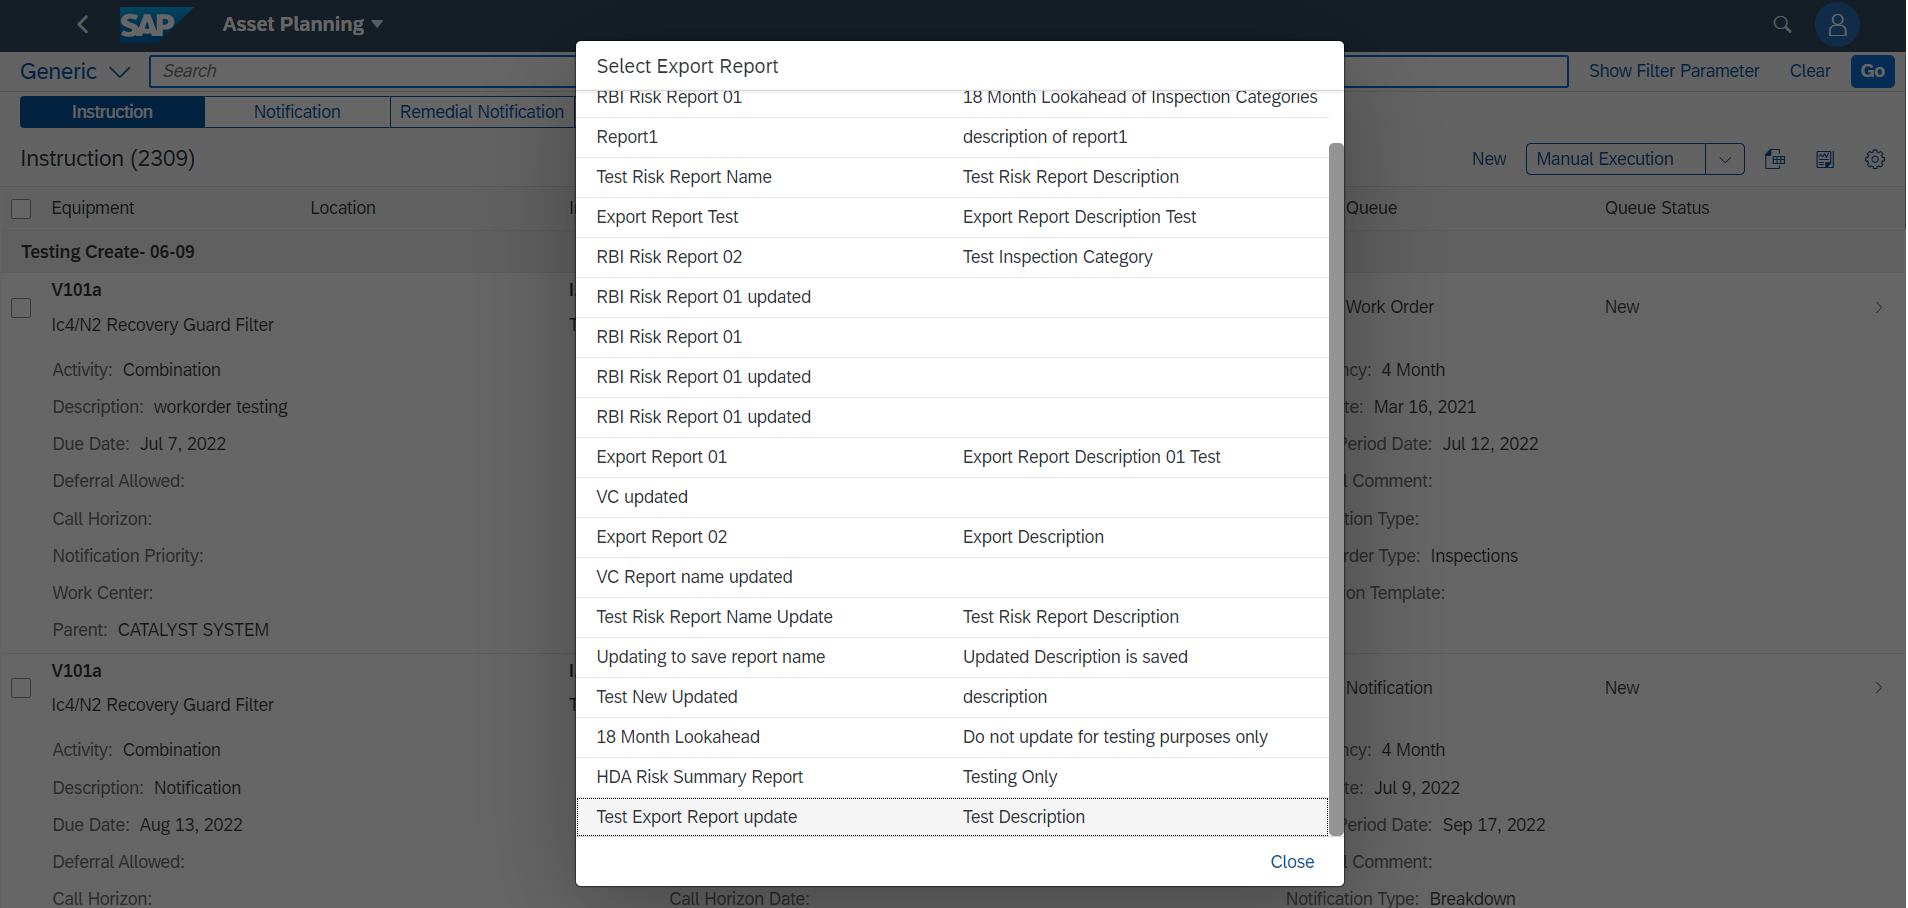
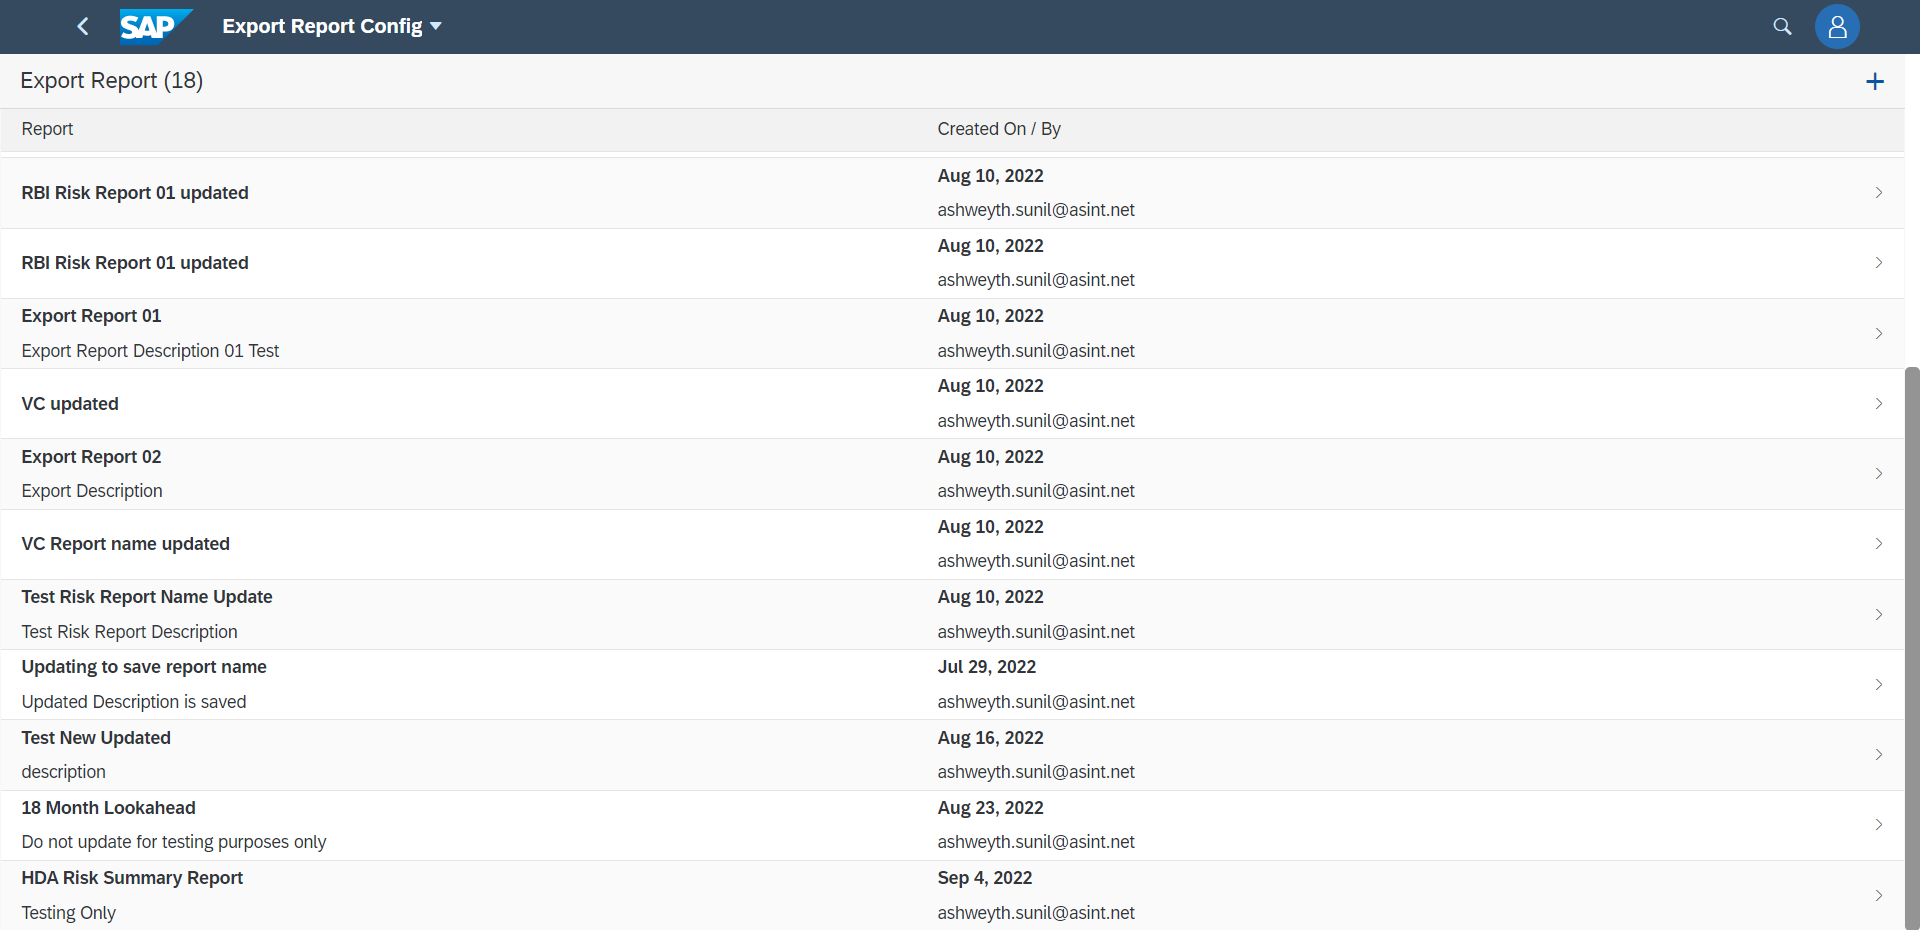
The Export Report Icon on the Asset Planning Instruction list page has a dialog, it contains a list of Export Reports.
Select the report which you want to export.
Select Location (it will Export the Report based on the location chosen). Press Ok, it asks for confirmation,Press Yes to Export.
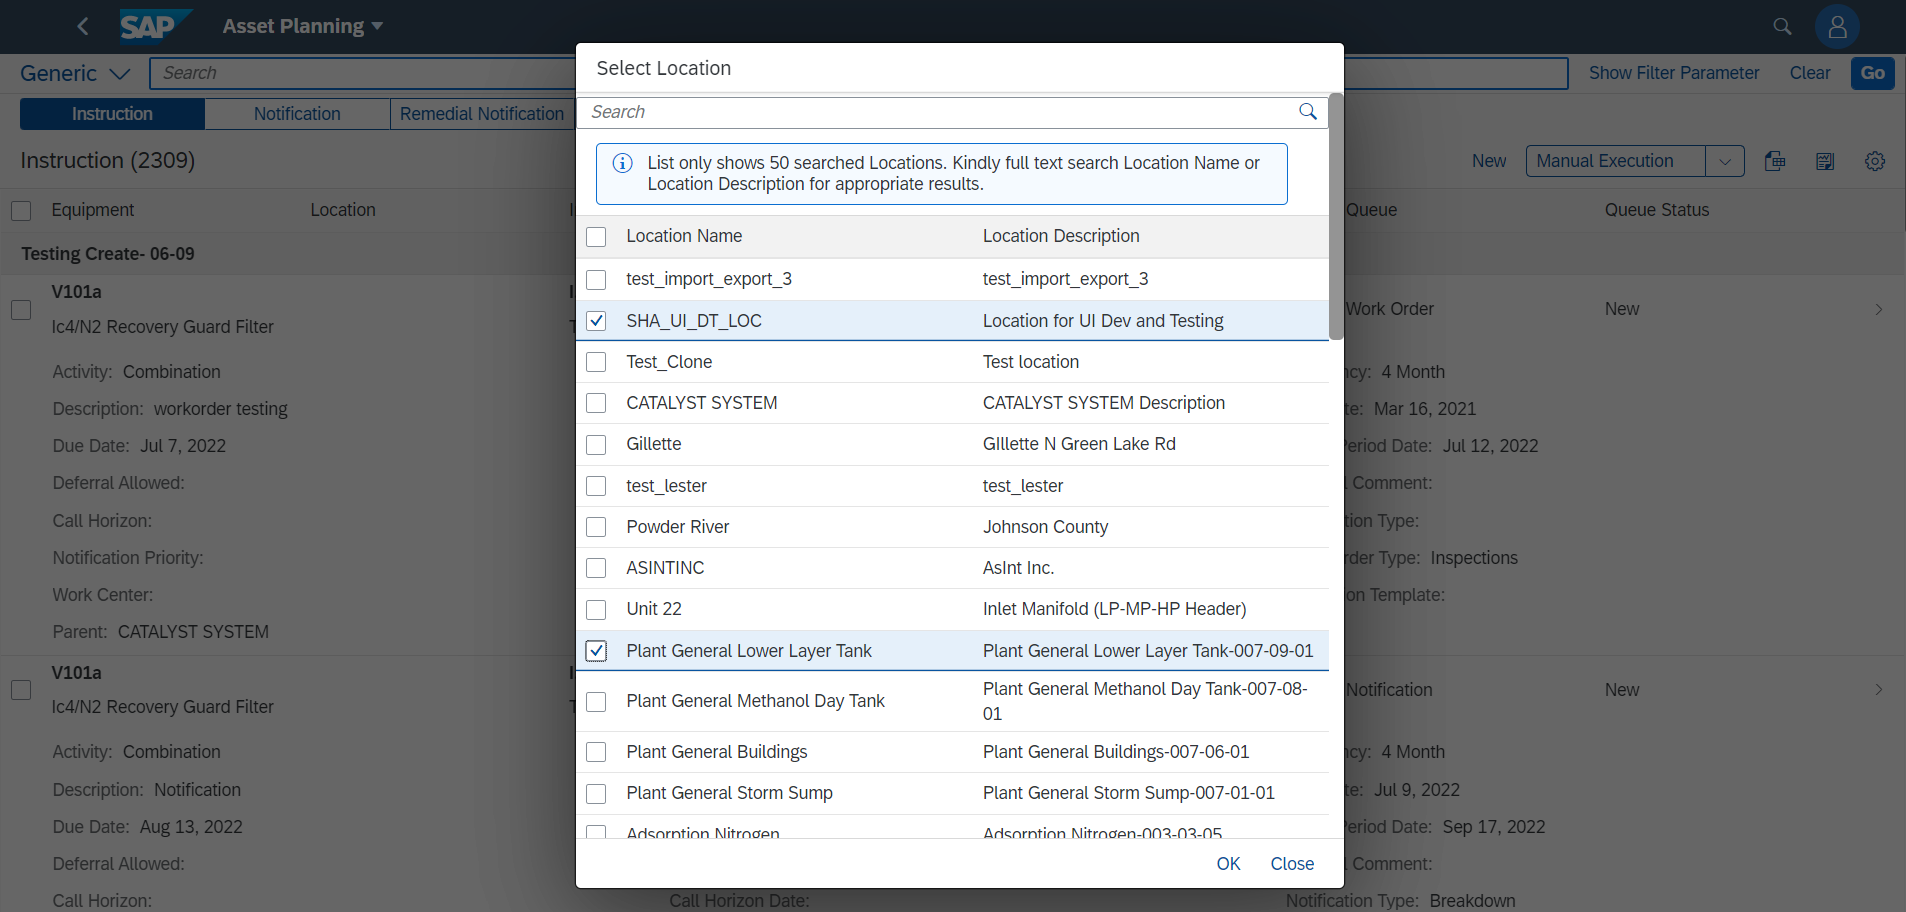
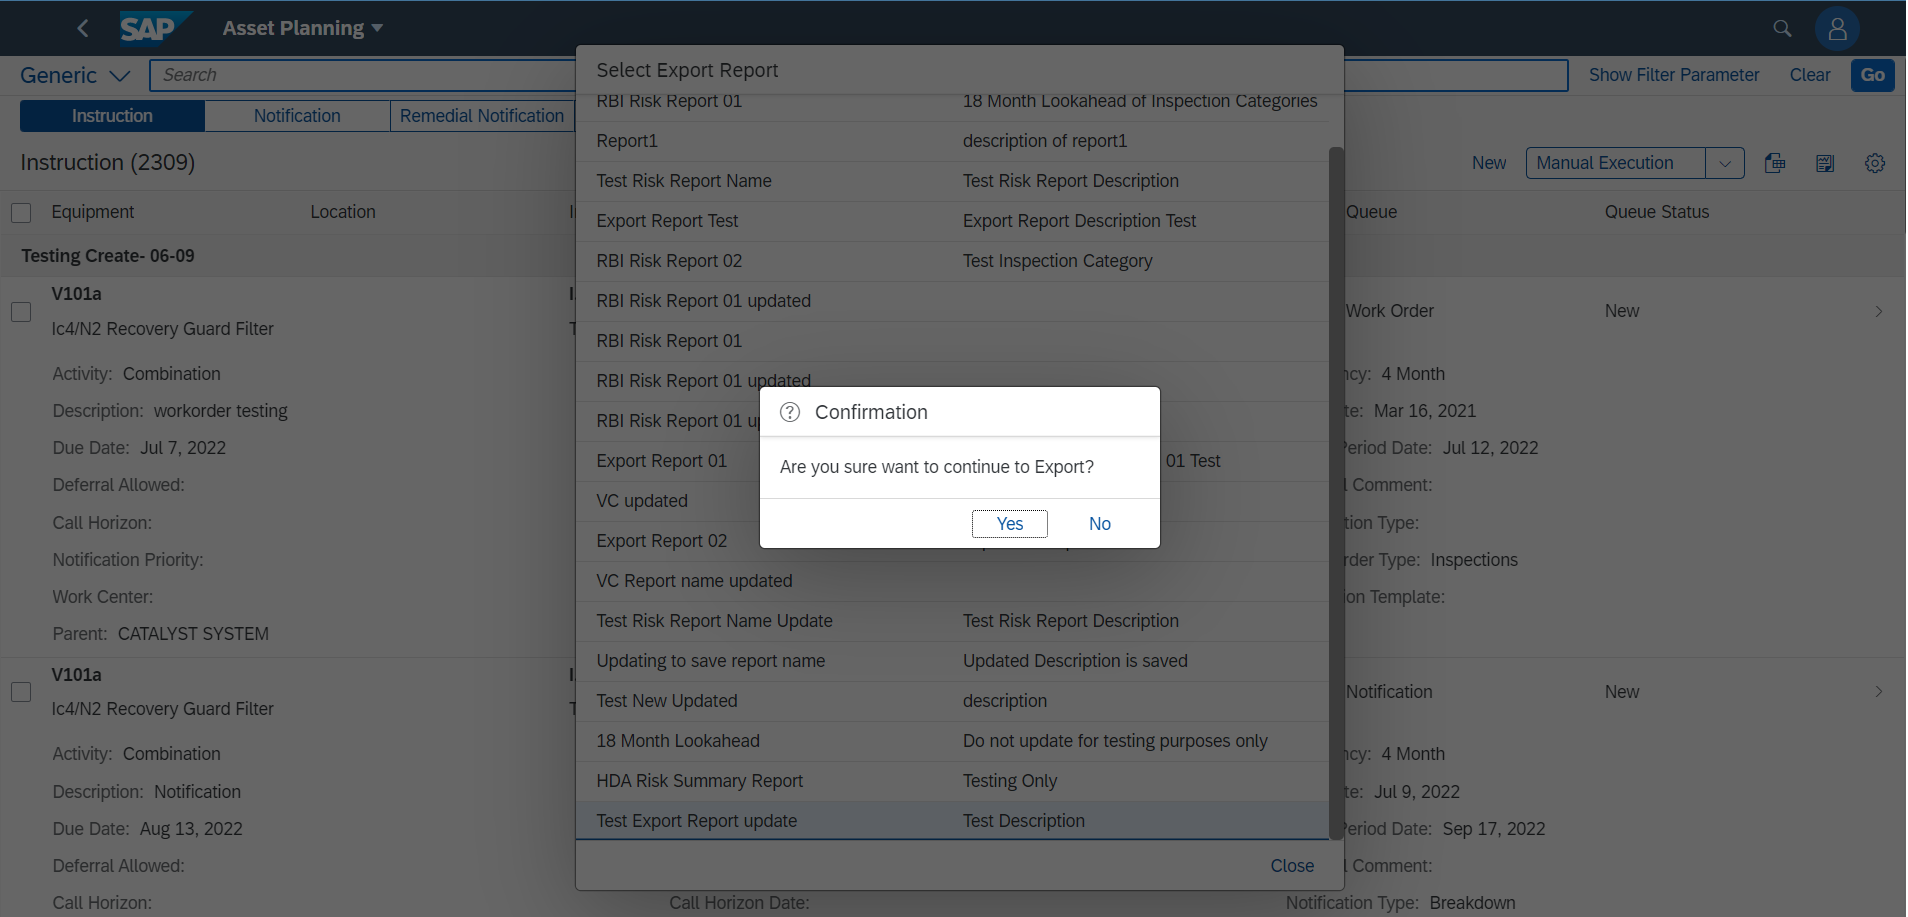
Press Ok, The Report will generate and be sent to your inbox.
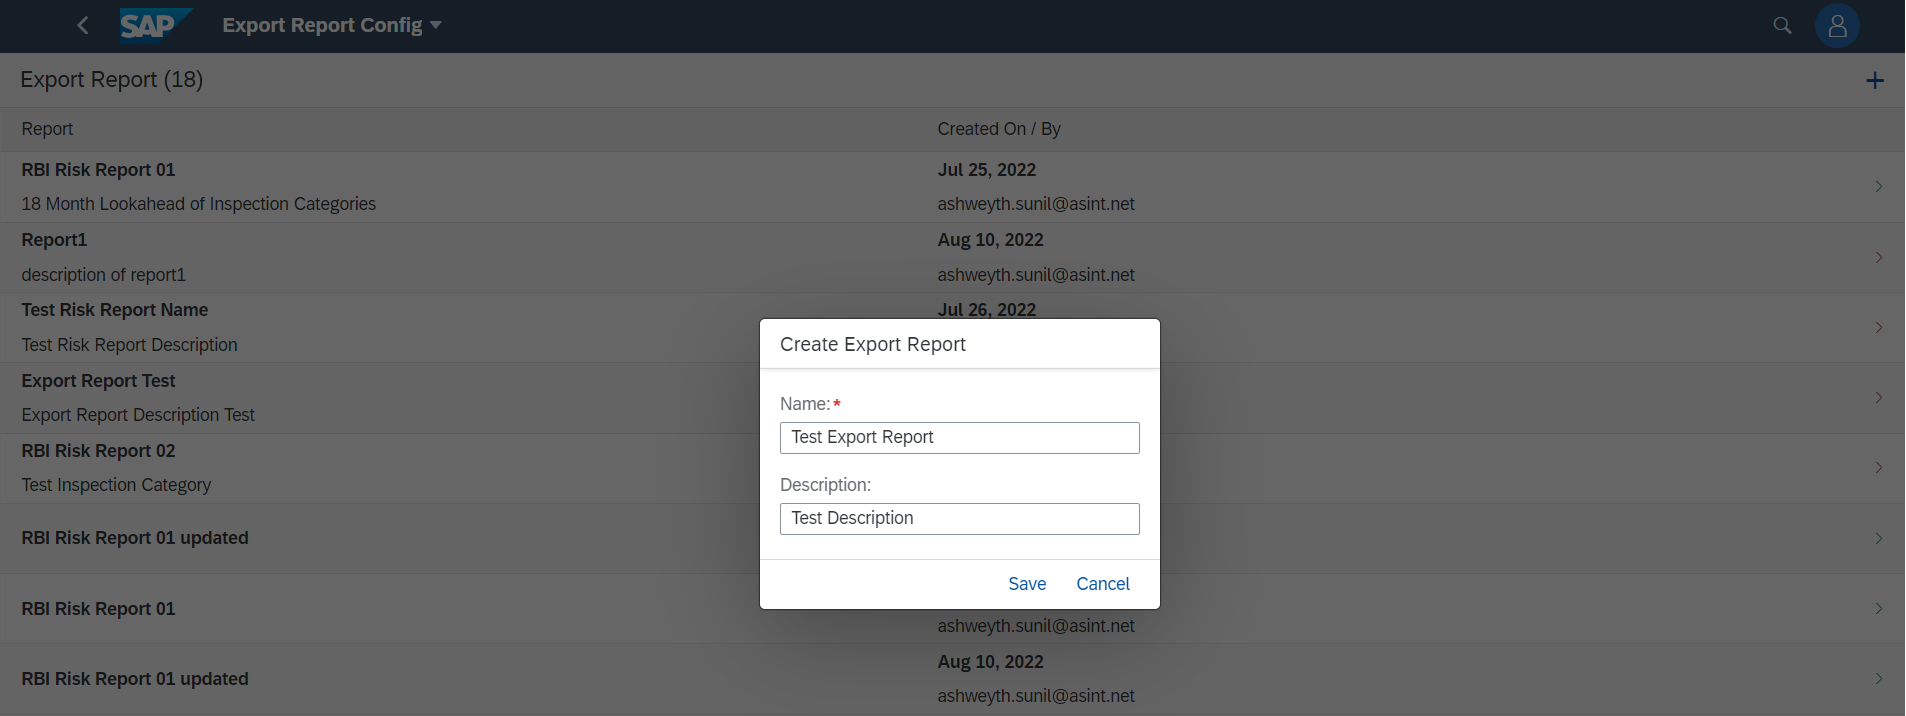
In Export Report Configuration, click + icon to create a new Export Report.
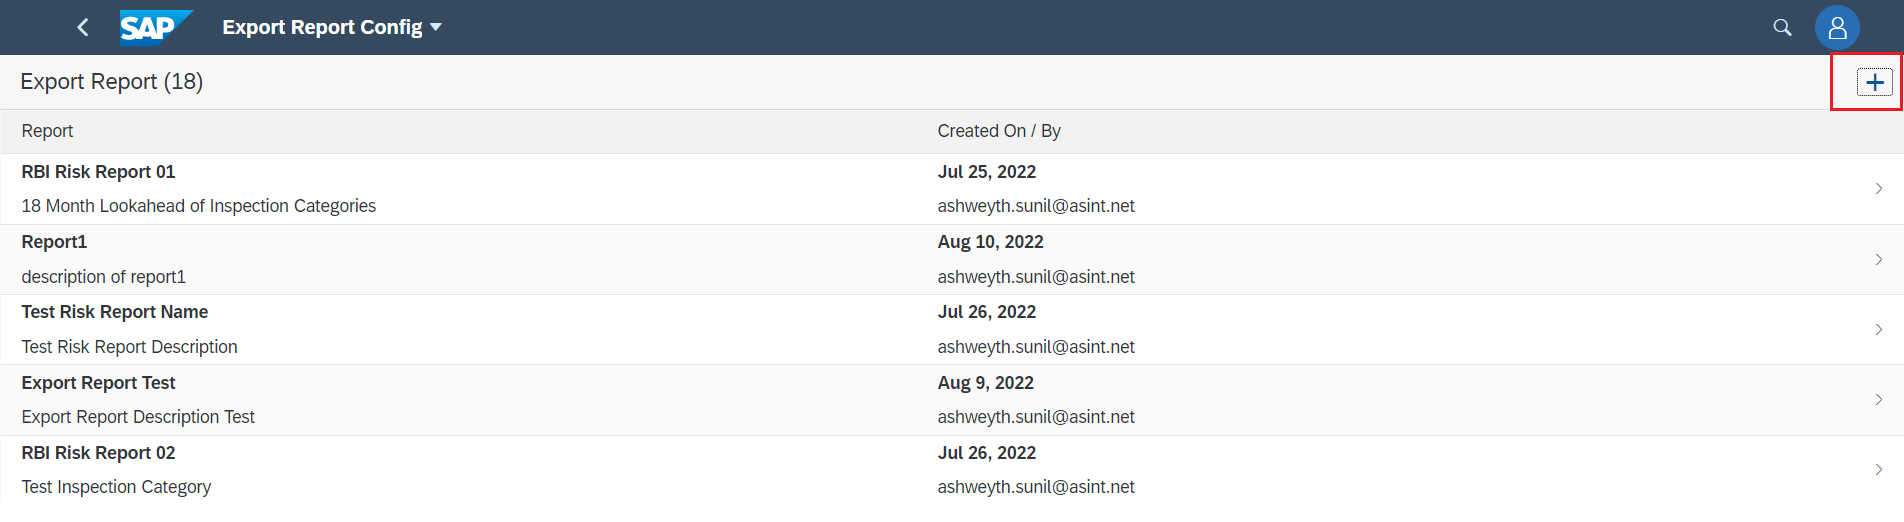
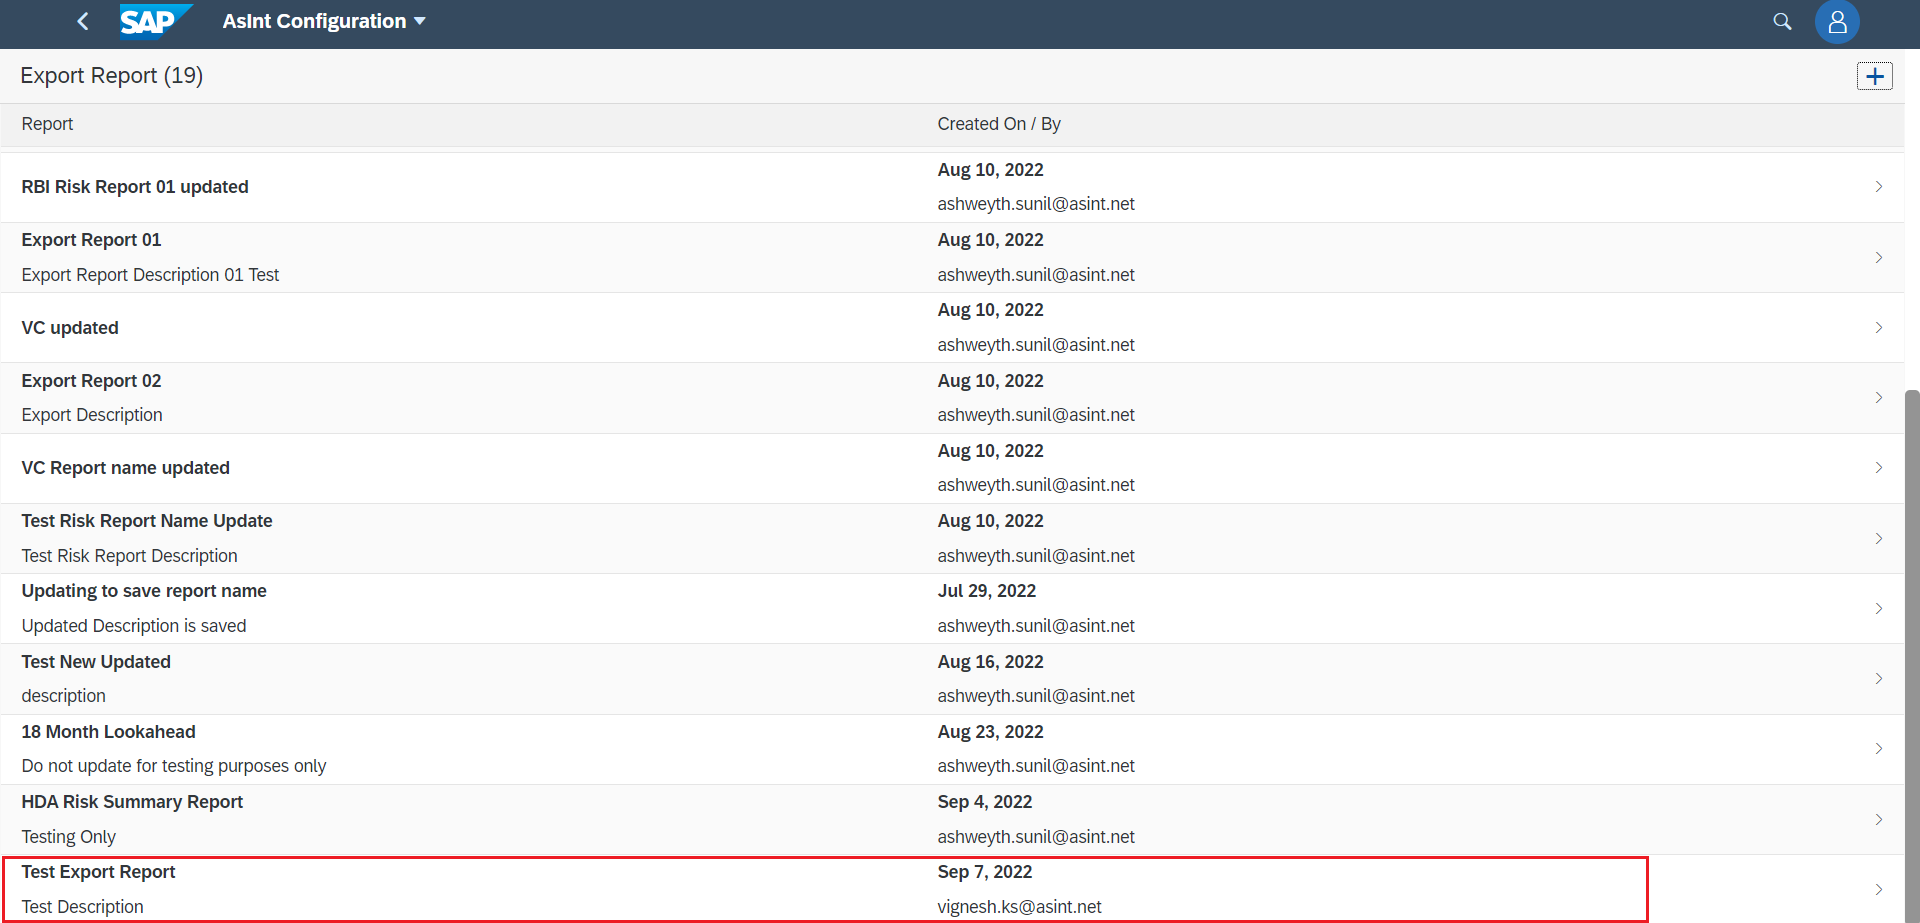
Create an Export Report and Save. It will display on the Export Report list page, click the report it will be navigated to the detail page.


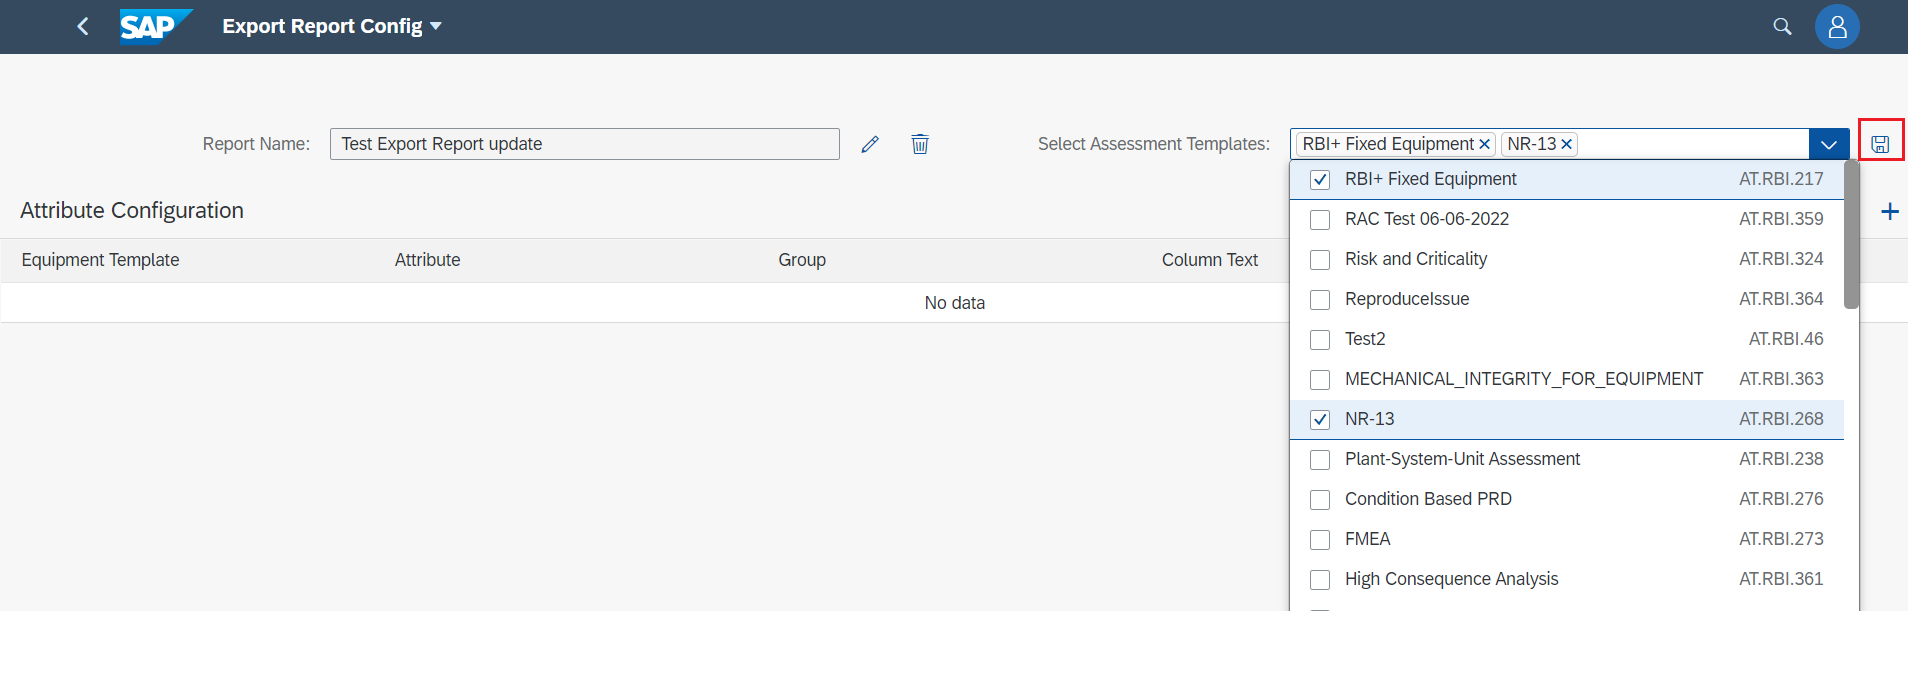
Select the Checklist Template for Attribute configuration and save it.

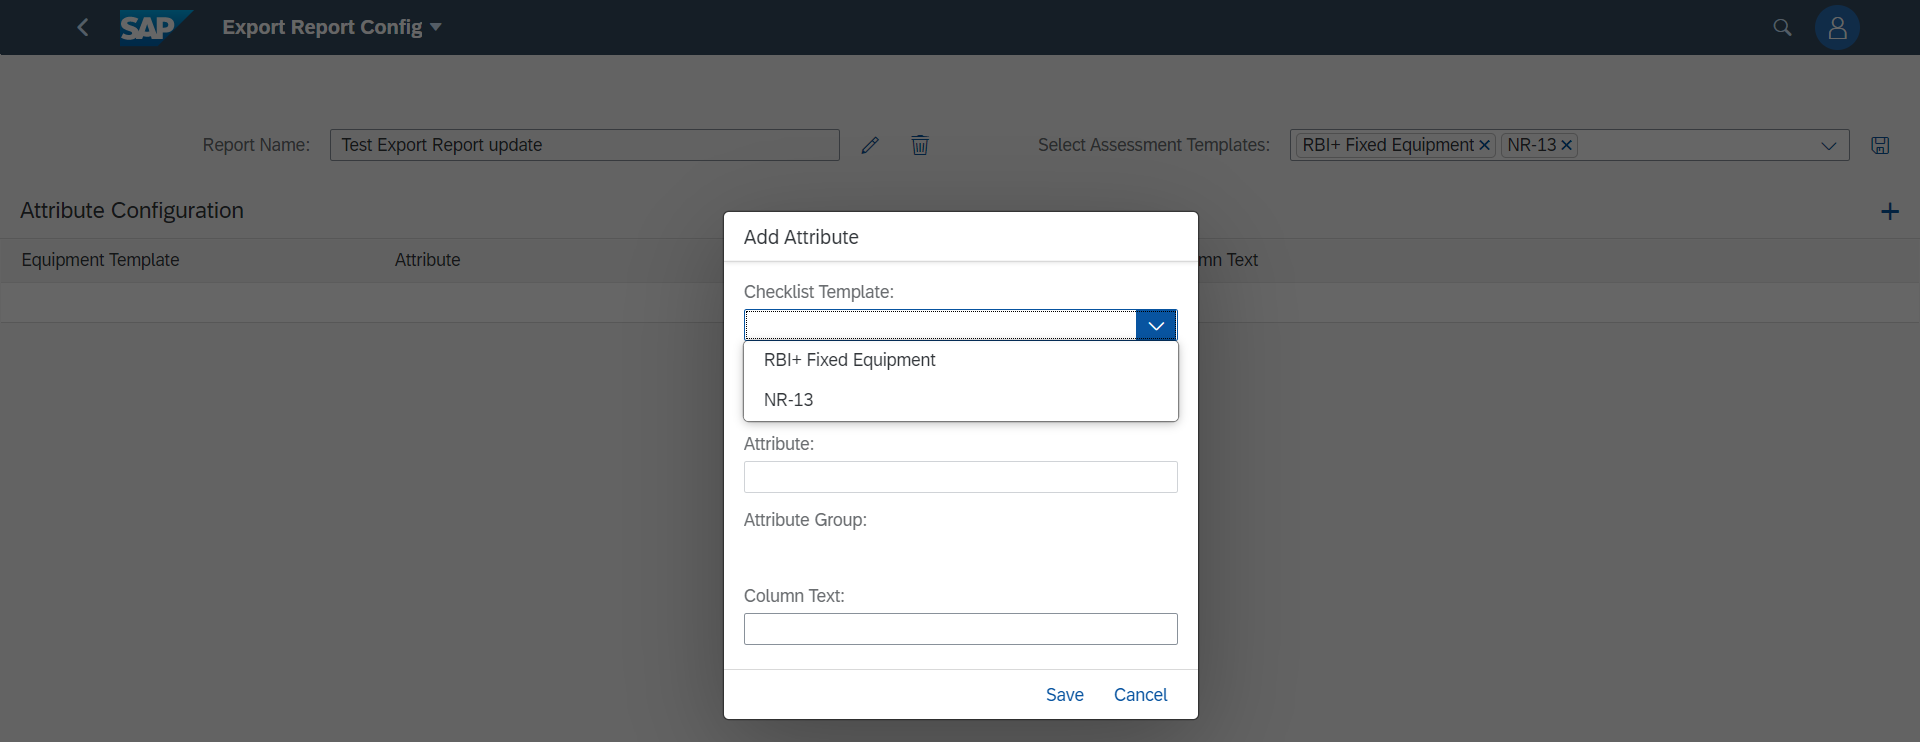
Click + icon to Add Attribute Configuration.
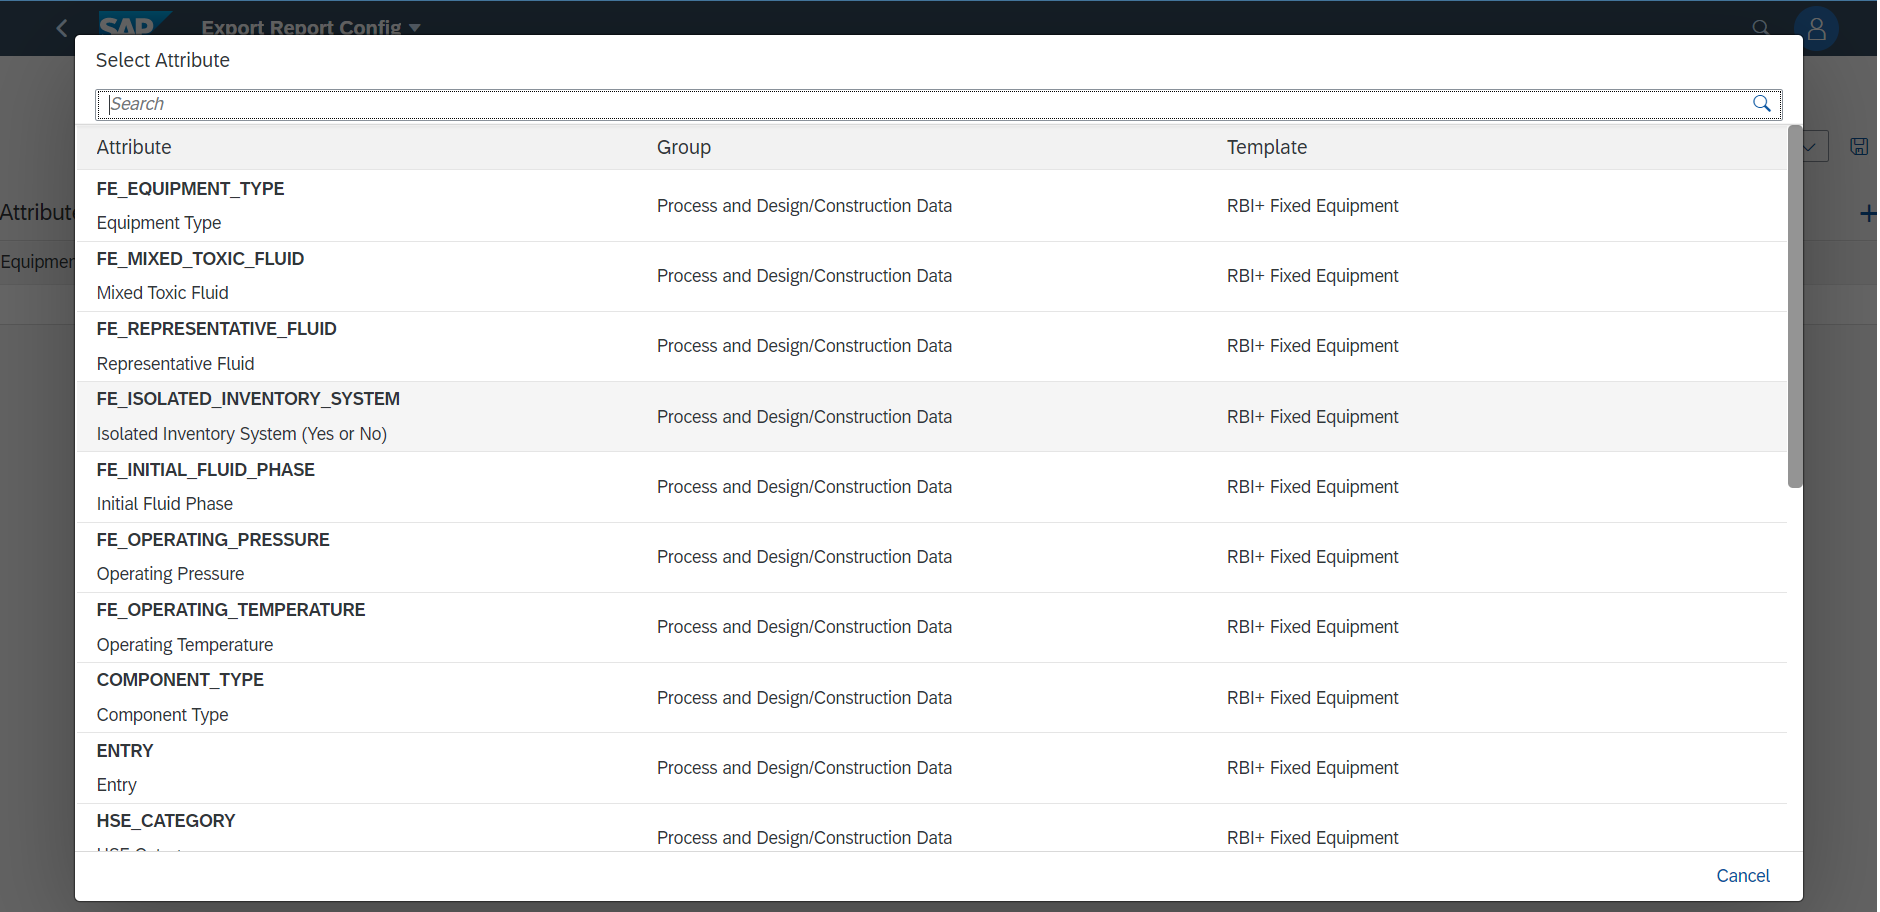
The selected checklist template will display here, choose anyone list and add the attribute configuration.
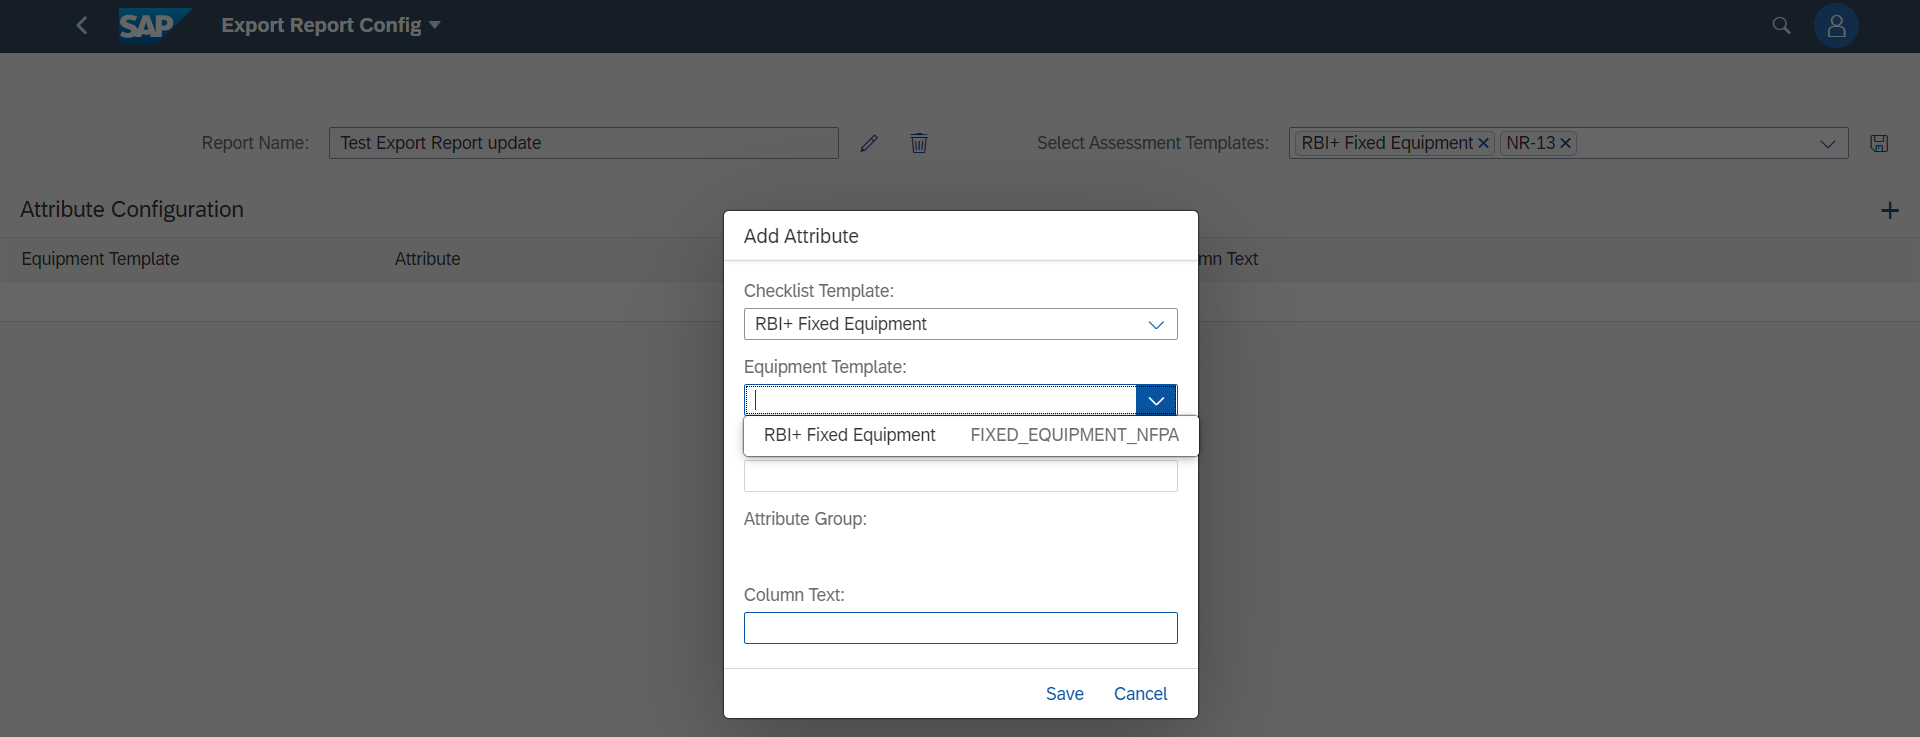
Once the Checklist template is selected, The Equipment Template Dropdown will display the list of Equipment templates of the selected checklist template. If the checklist template doesn’t have Equipment Template it will not show, must select another checklist template.
After Equipment Template is selected, the Attribute field will display the Attributes, and Attribute Groups of the Equipment Template. Select the Attribute.
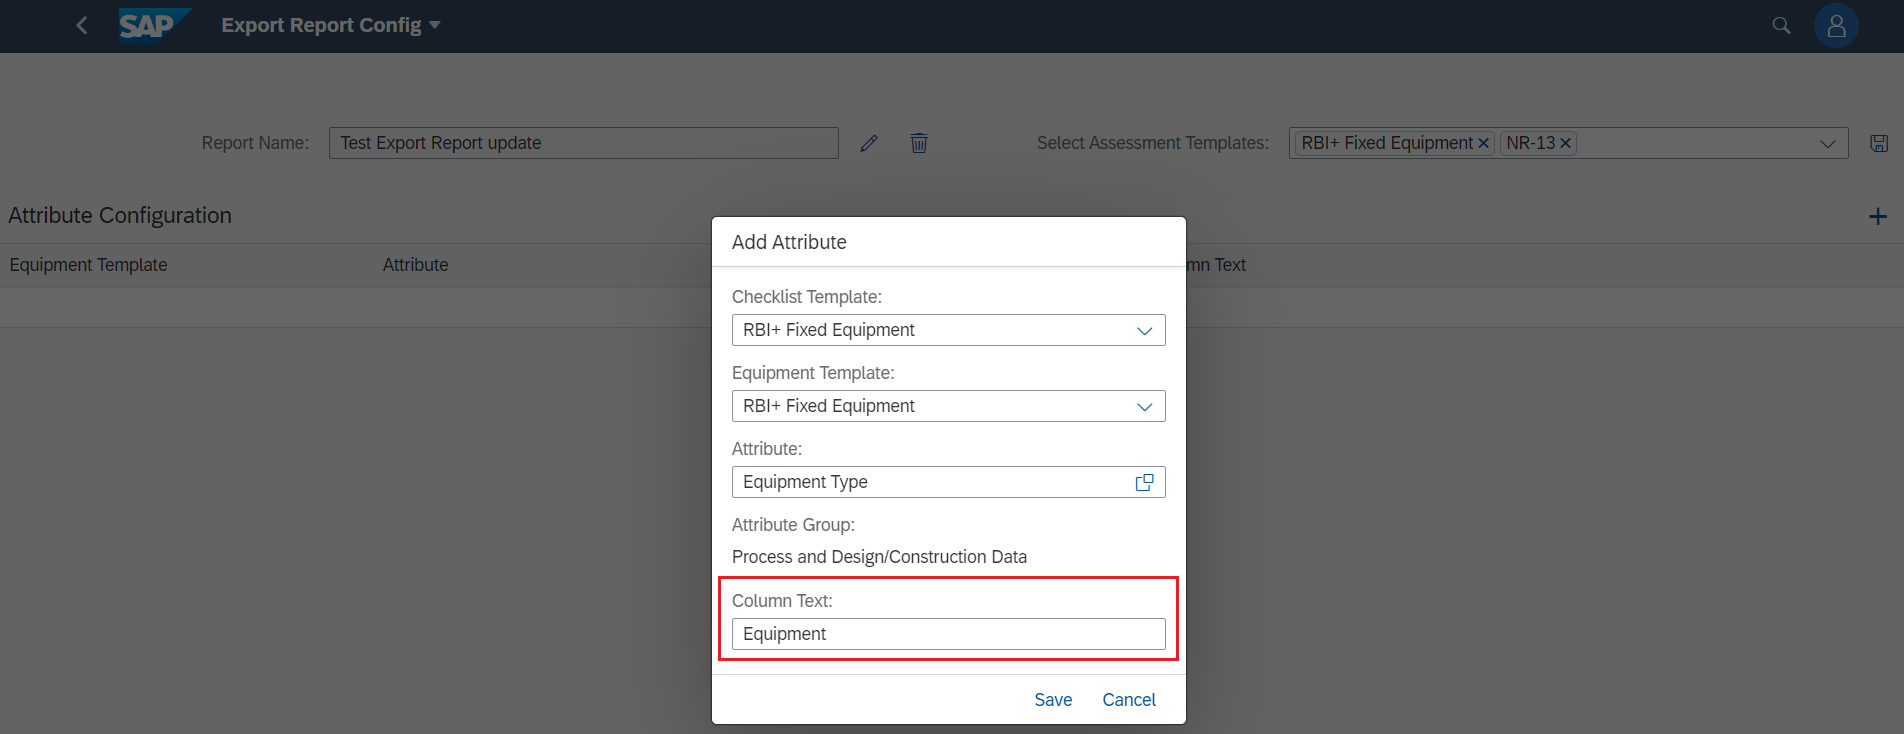
Column Text is not mandatory.
Column Text is the alternative for Attribute Name. If the column text field has any text, it will be displayed on the Attribute column instead of the Attribute Name on the Export Report Excel else it displays the Attribute Name.
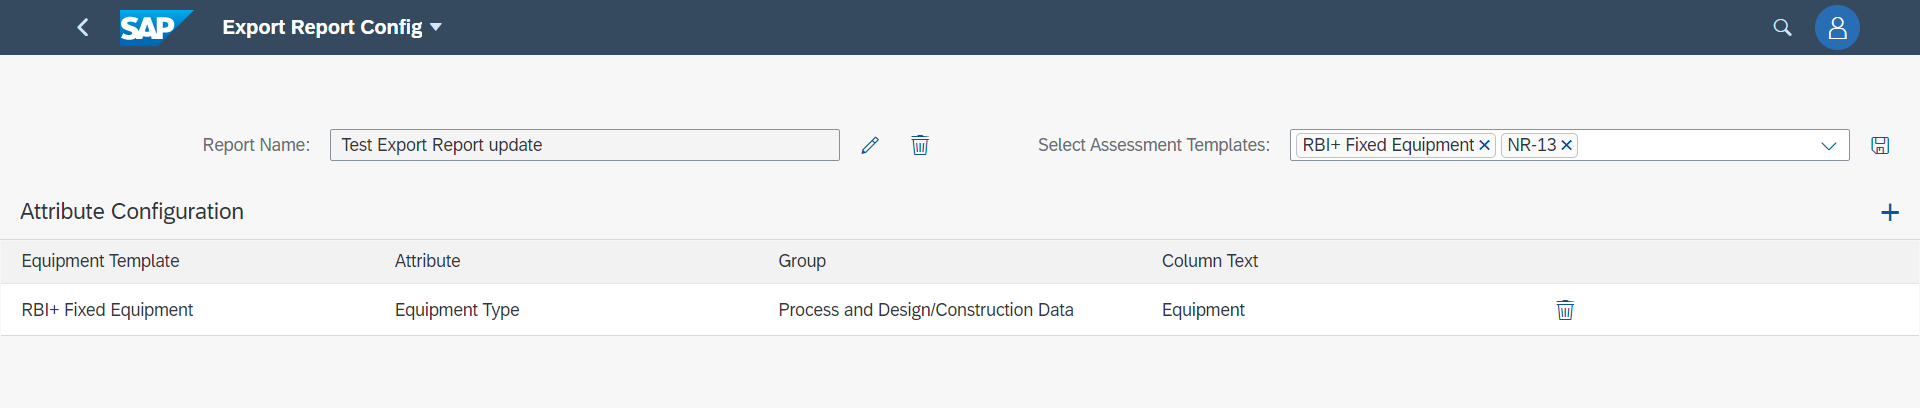
After saving the Attribute Configuration, it will display like below.
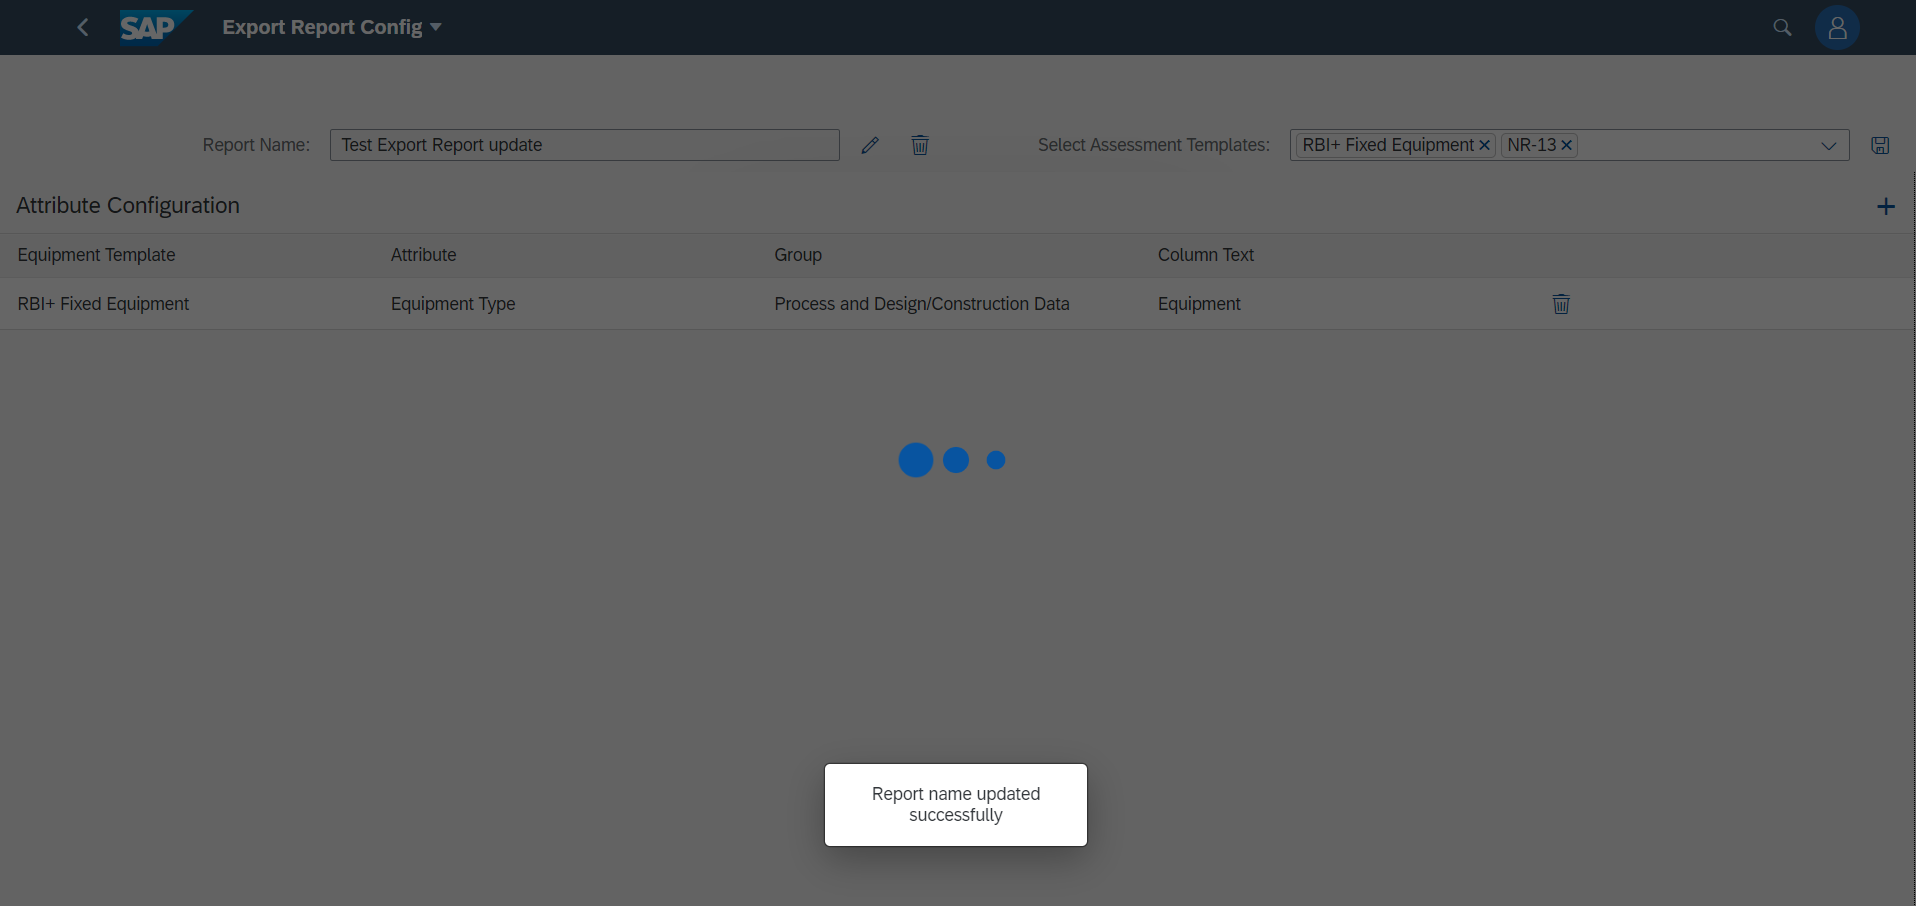
Click the icon to Edit the Report Name and save it.

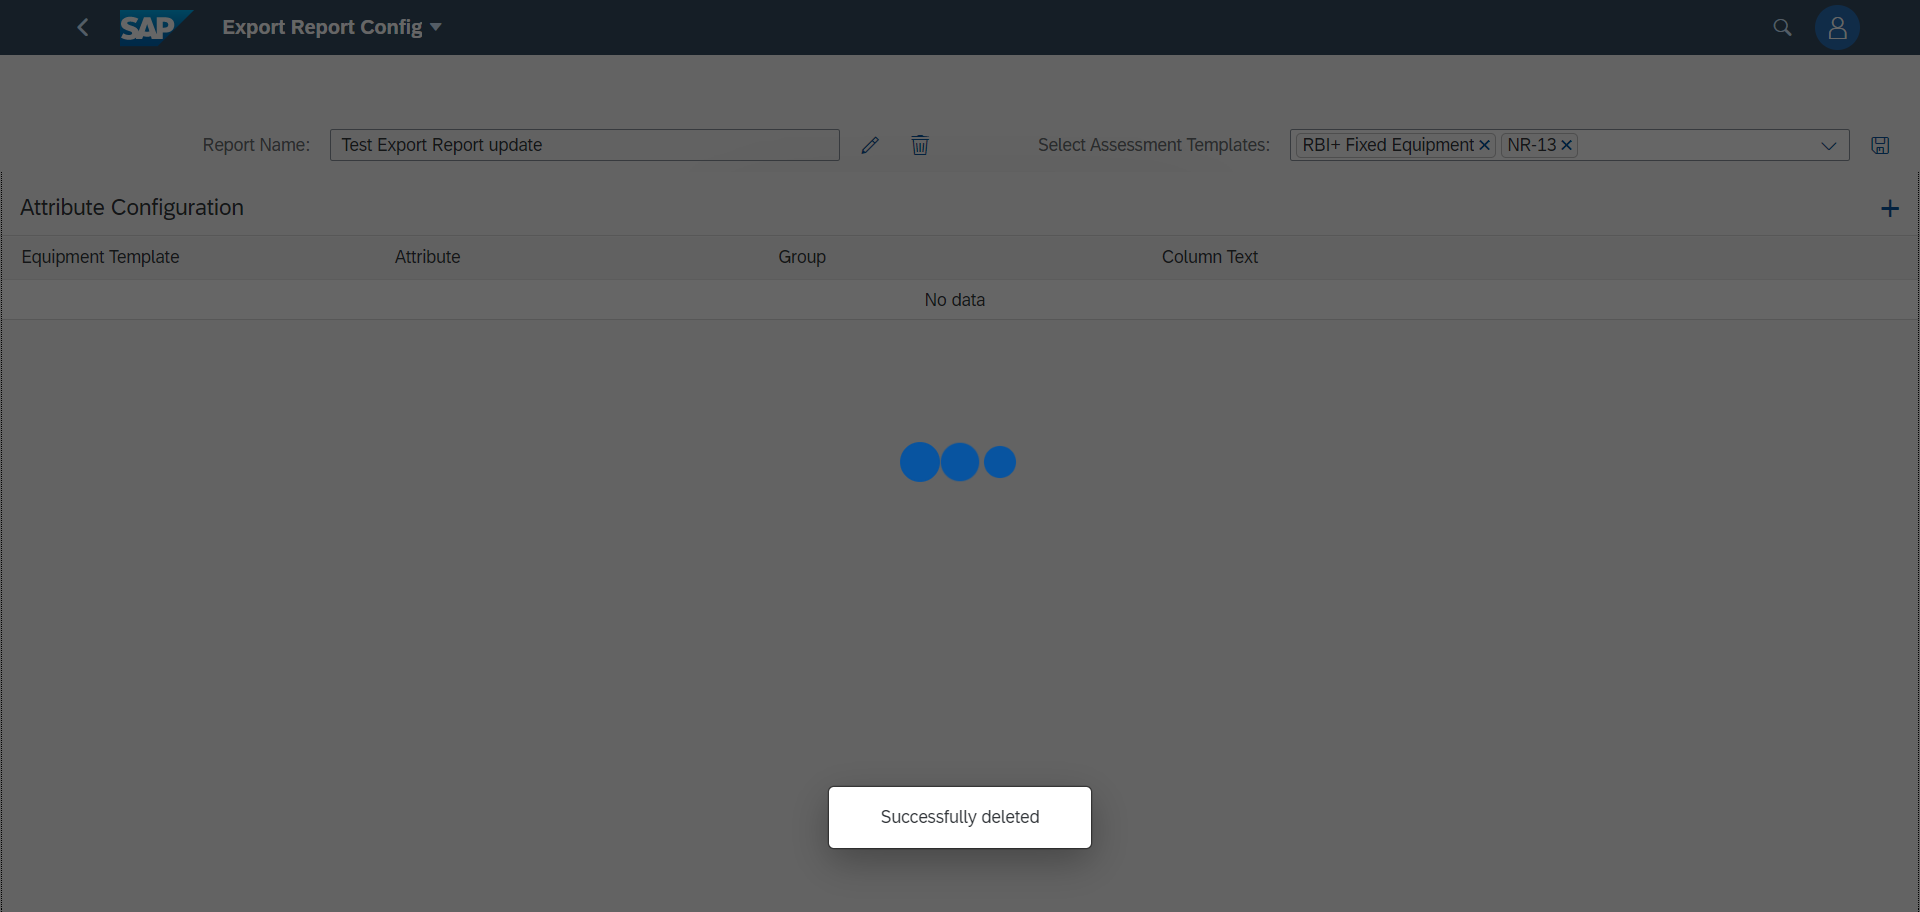
Click the icon to delete the corresponding Attribute Configuration.
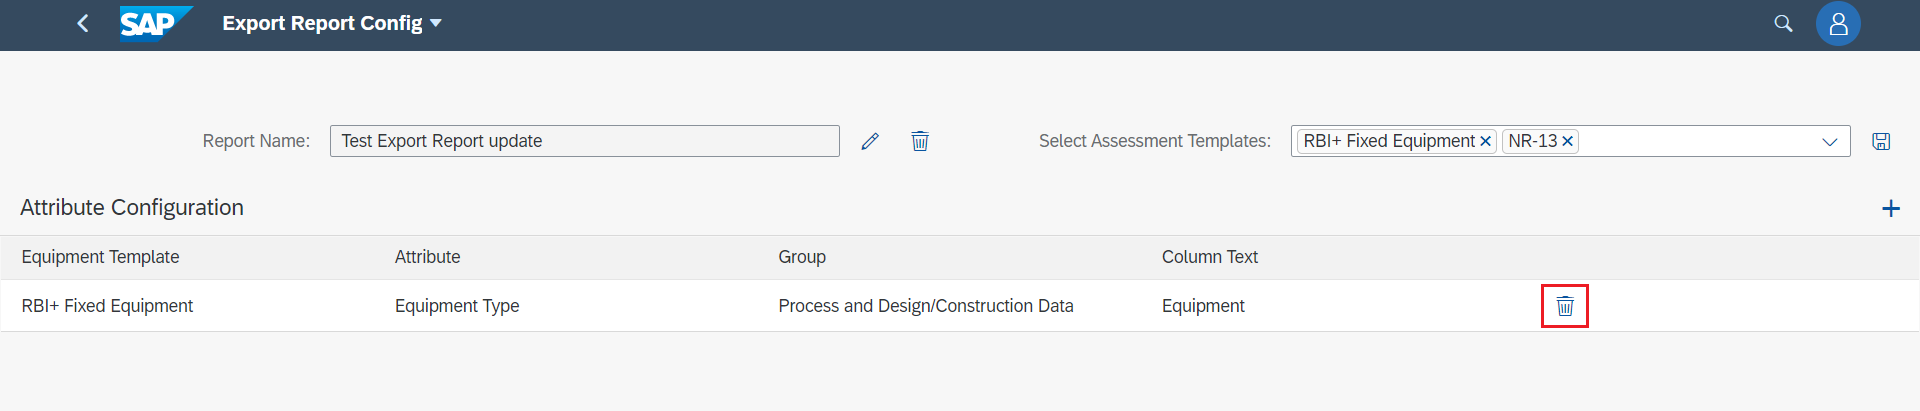
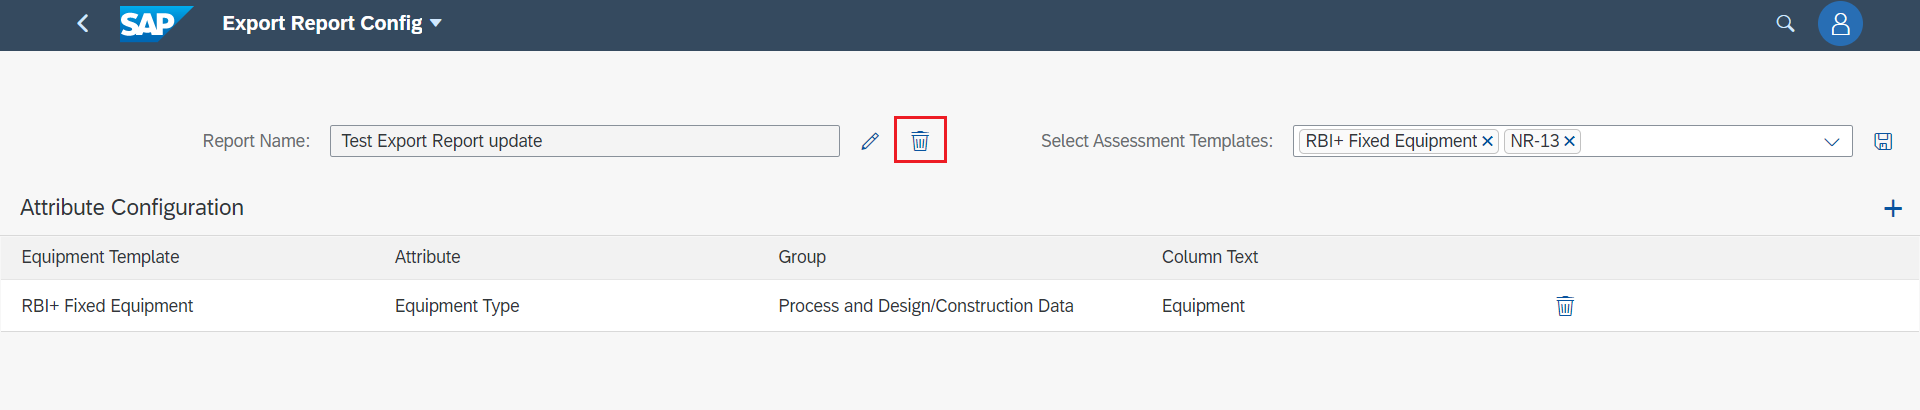
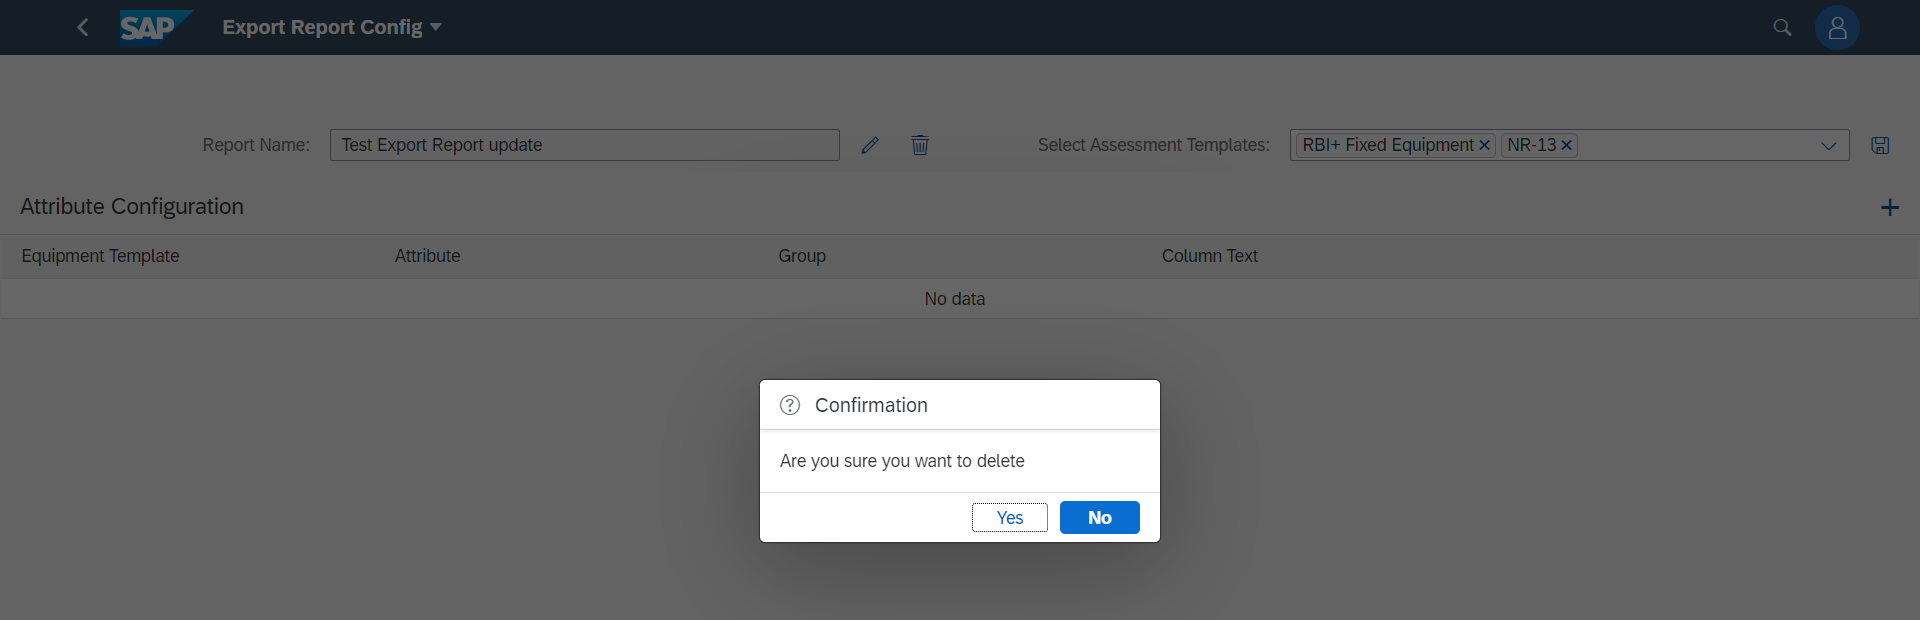
Click the icon to delete the entire Export Report.
Compared to page-6, 2nd screenshot, the newly created Export Report has been deleted.
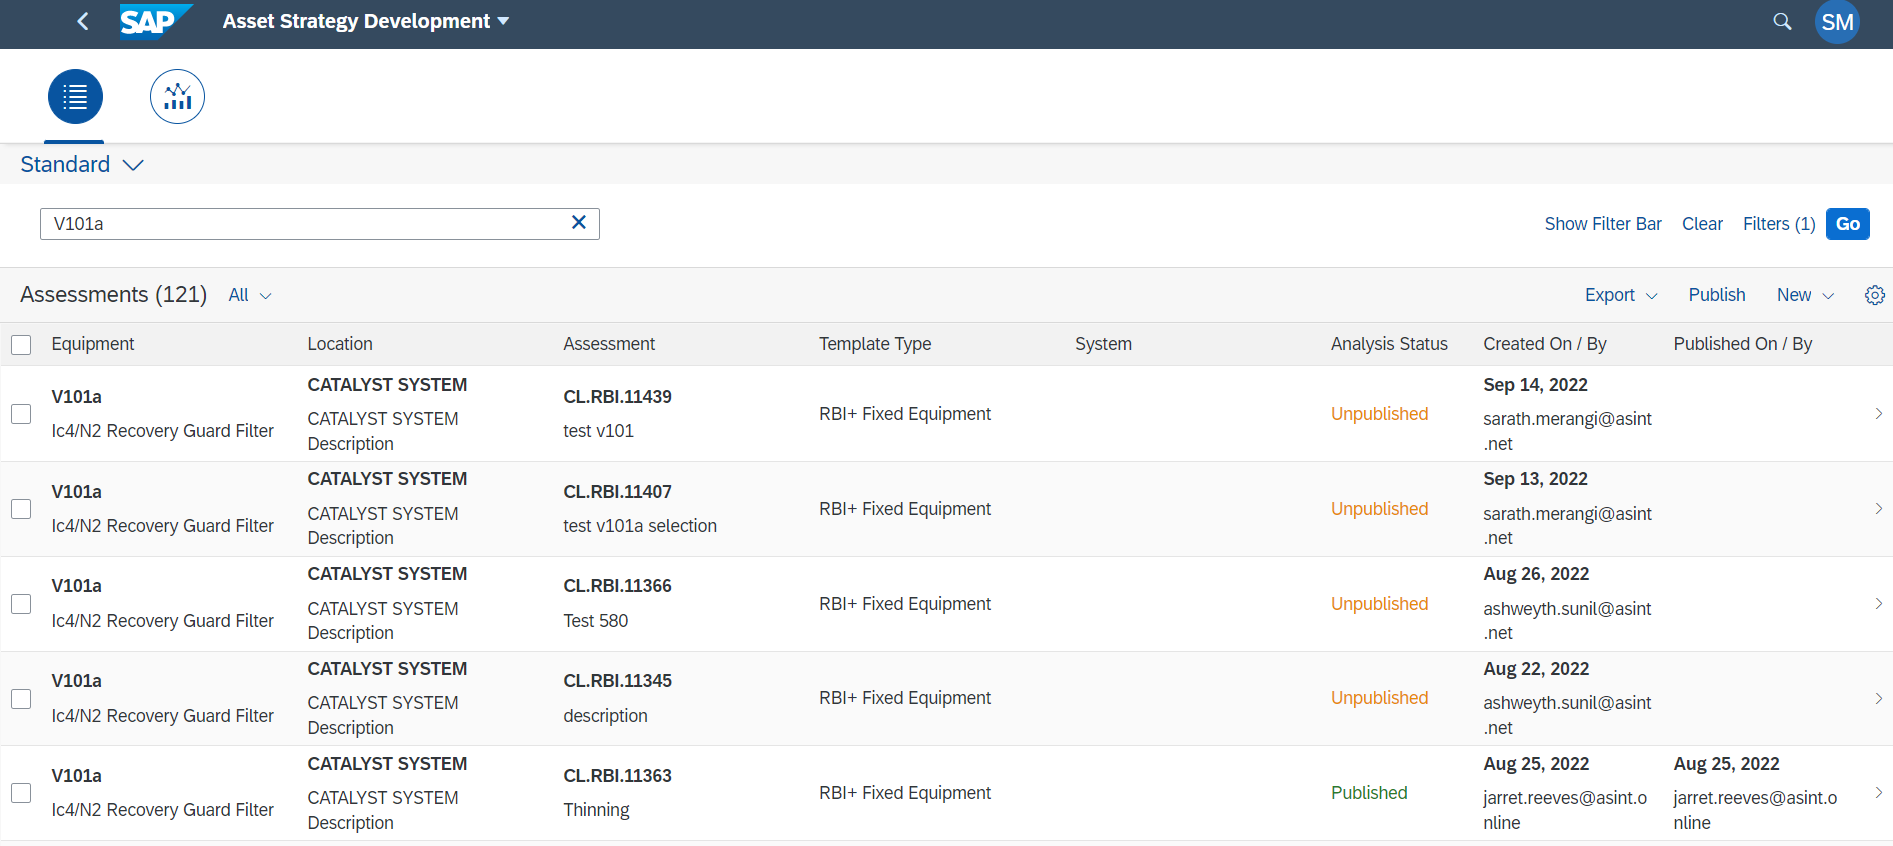
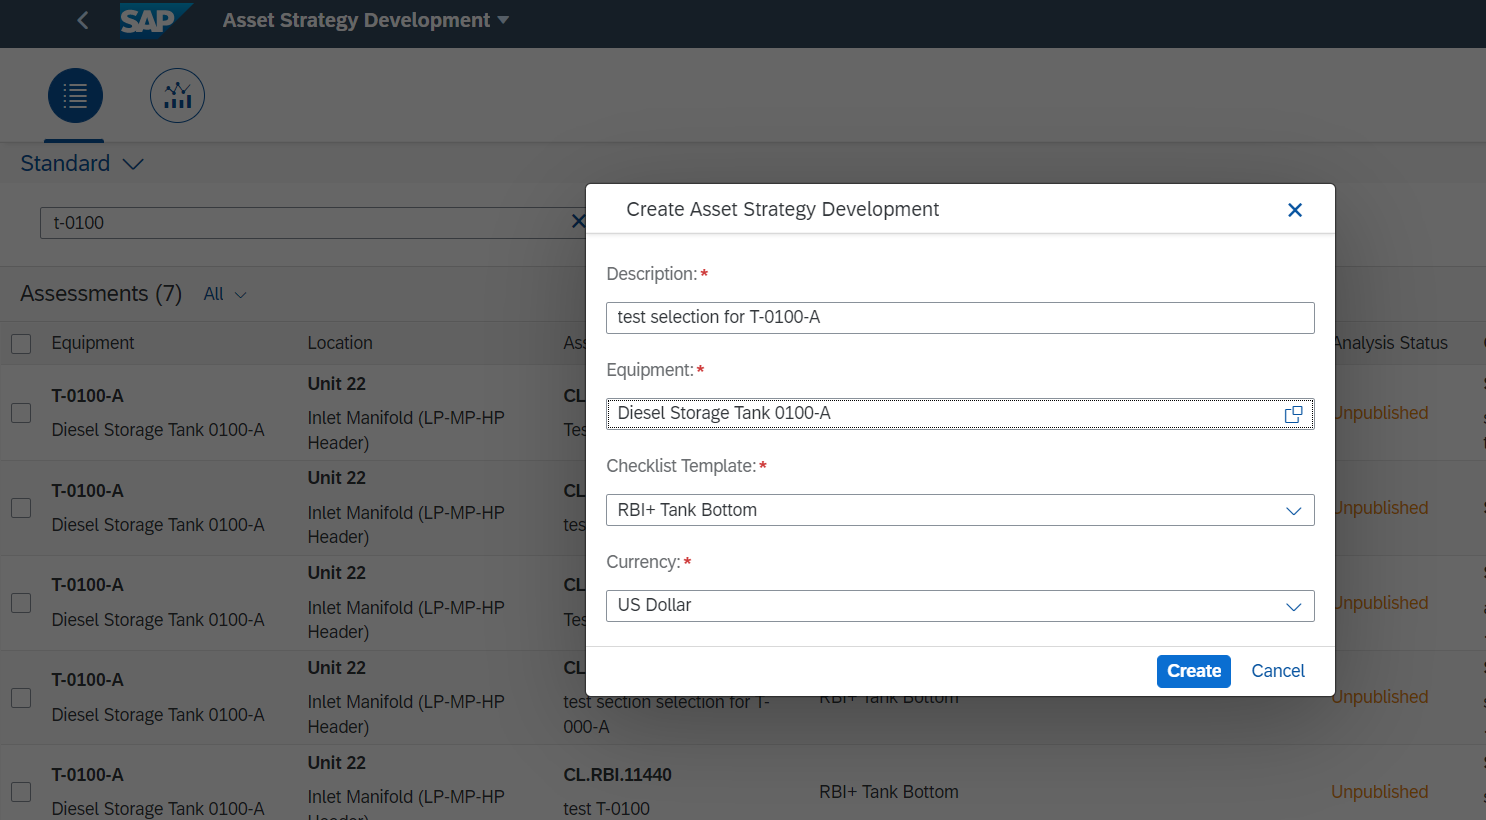
In Asset Strategy Development, at the top there is a field General Selection which will show the selected sections. Using this feature,we can persist the section selection of the asset.
While creating new assessments, the default selection will be the selection of last published assessment of that asset. If there are no published records, then the default selection will be the selection of last updated assessment of that asset.
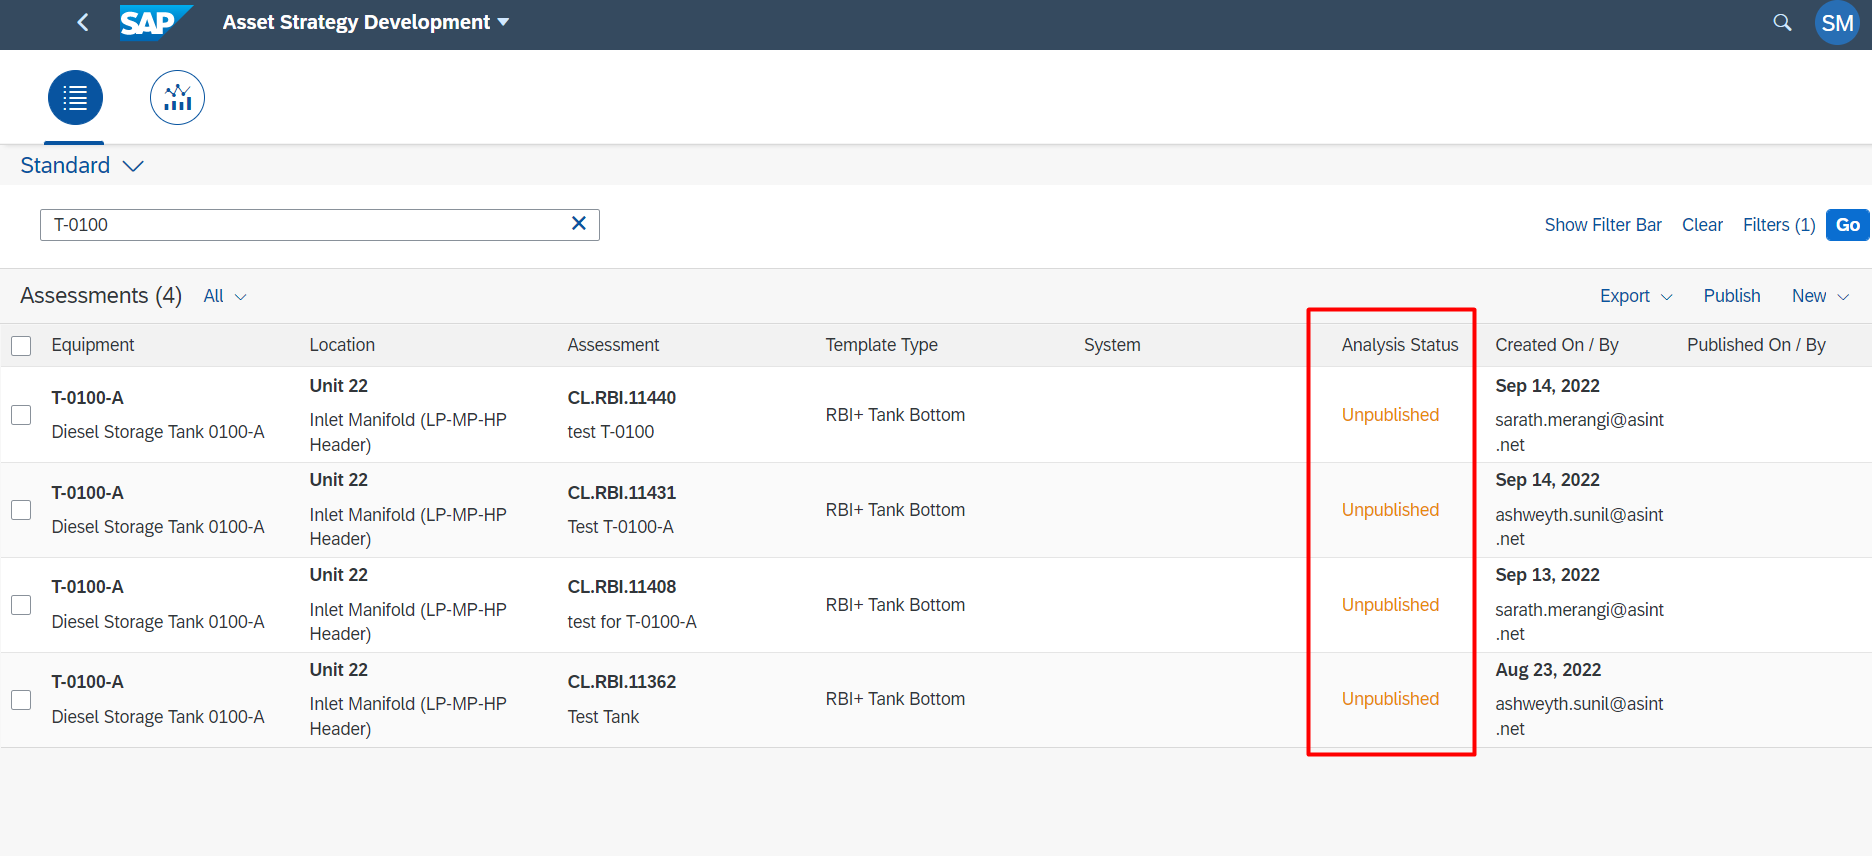
Case1: Equipment (Asset) have published records.
The below equipment has both published and unpublished records.
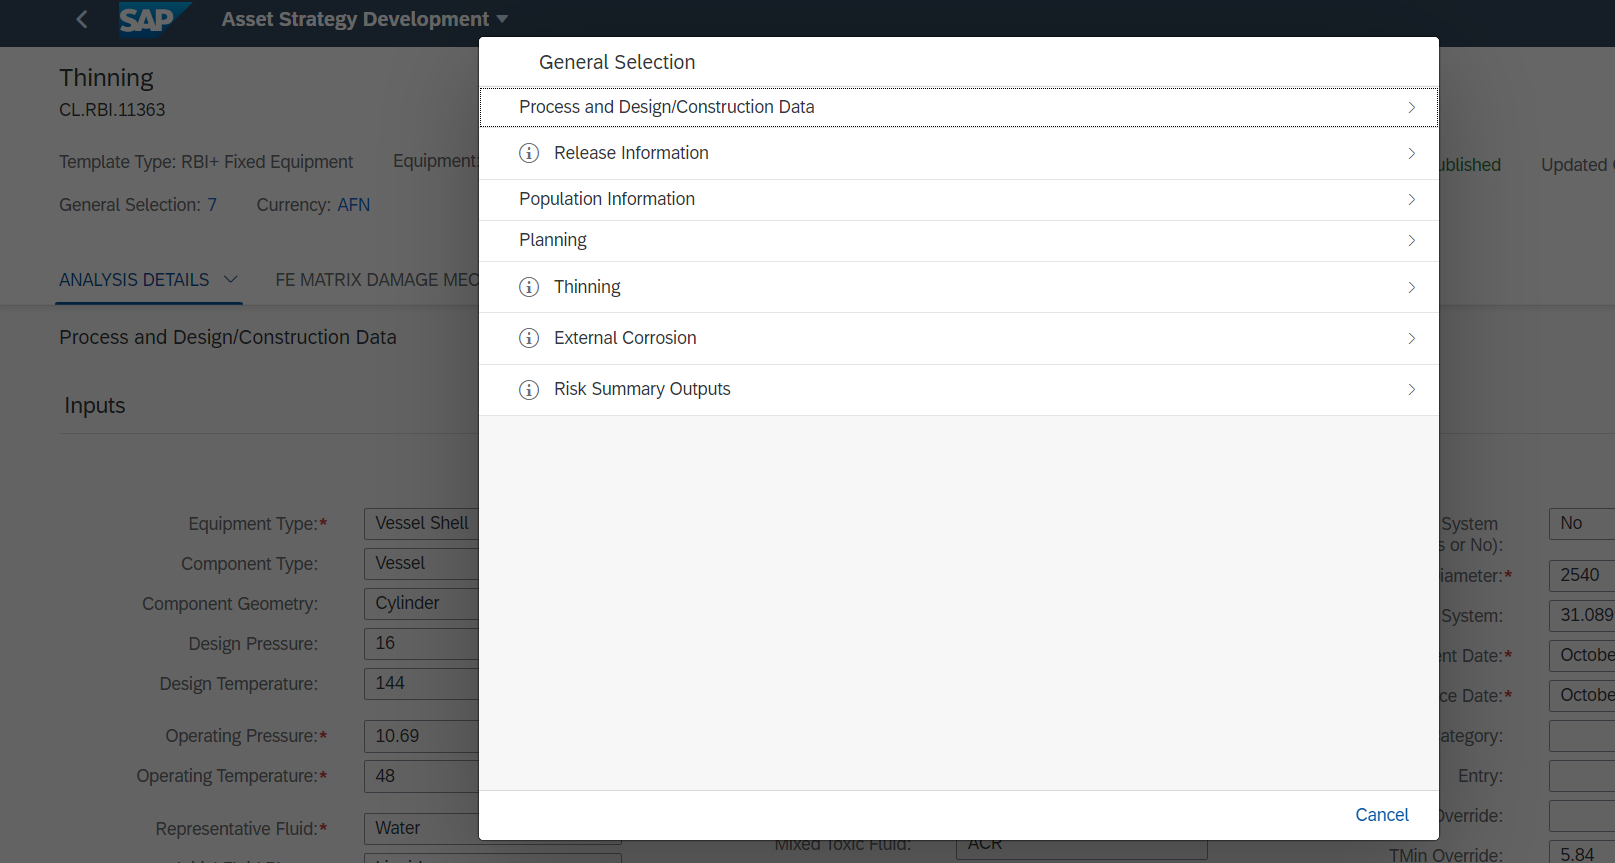
Last published assessment has 7 sections selected.

Last updated assessment has 10 sections selected.


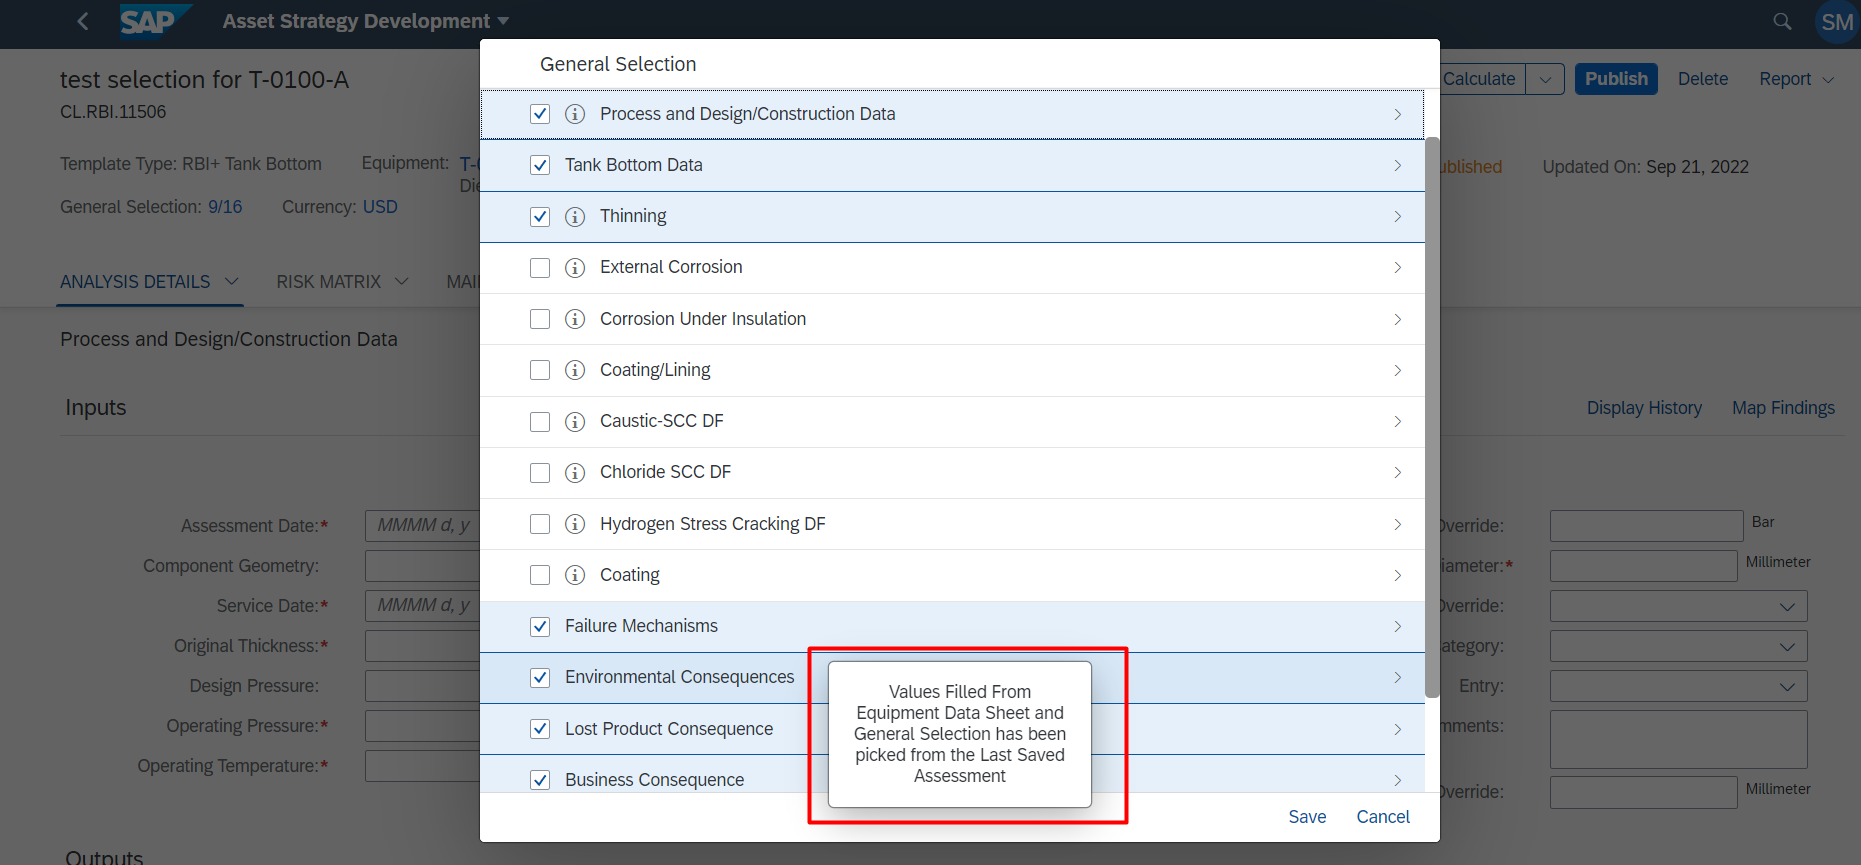
Once the assessment got created, the general selection dialog will open automatically and will have the default selection from last published assessment. The below message toast indicates whether the values are picked from last published or last saved assessment.
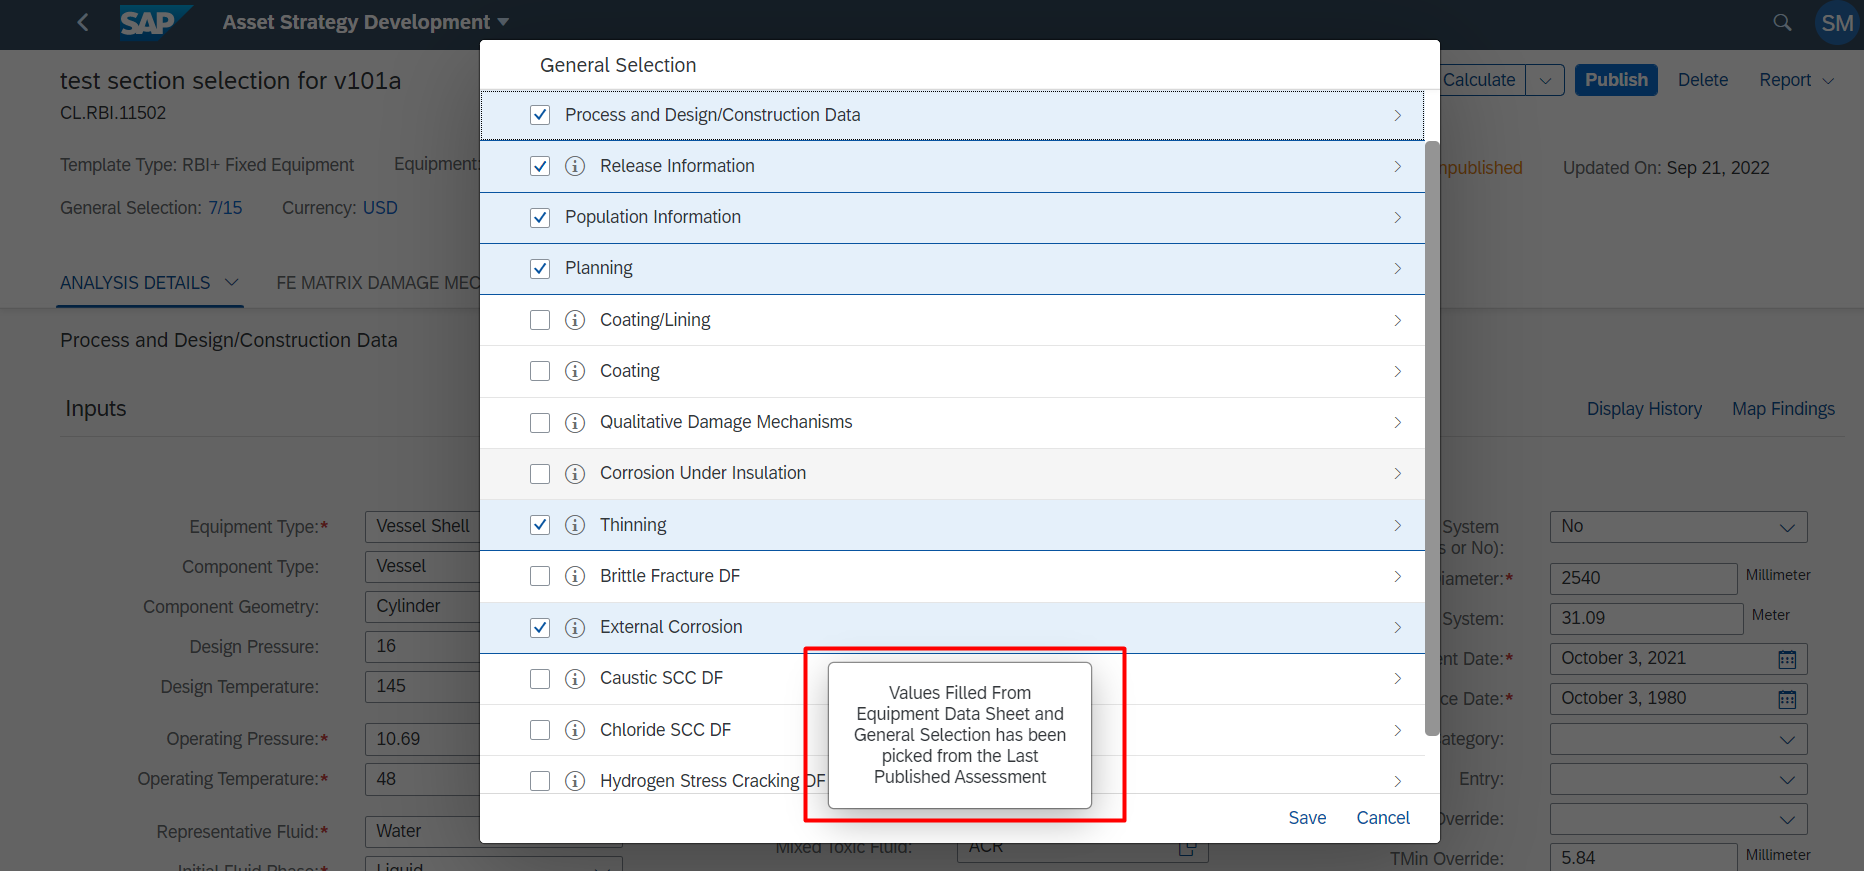
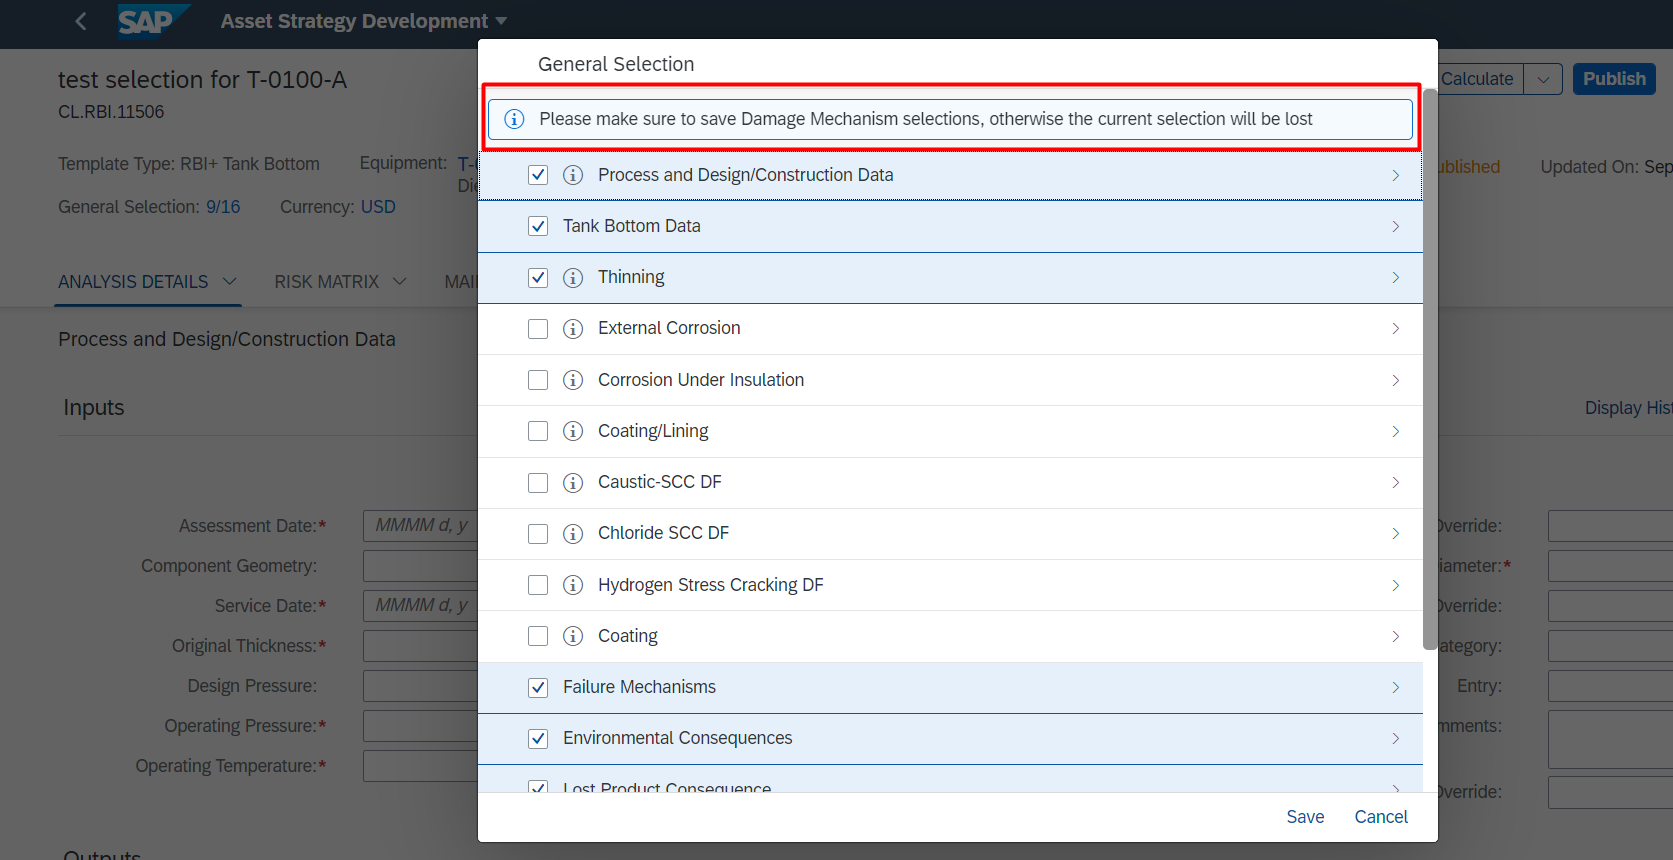
One message will be displayed at the top of the dialog to let the user know that changes will be lost if not saved. That message will be displayed only for the first time after creating a new assessment.
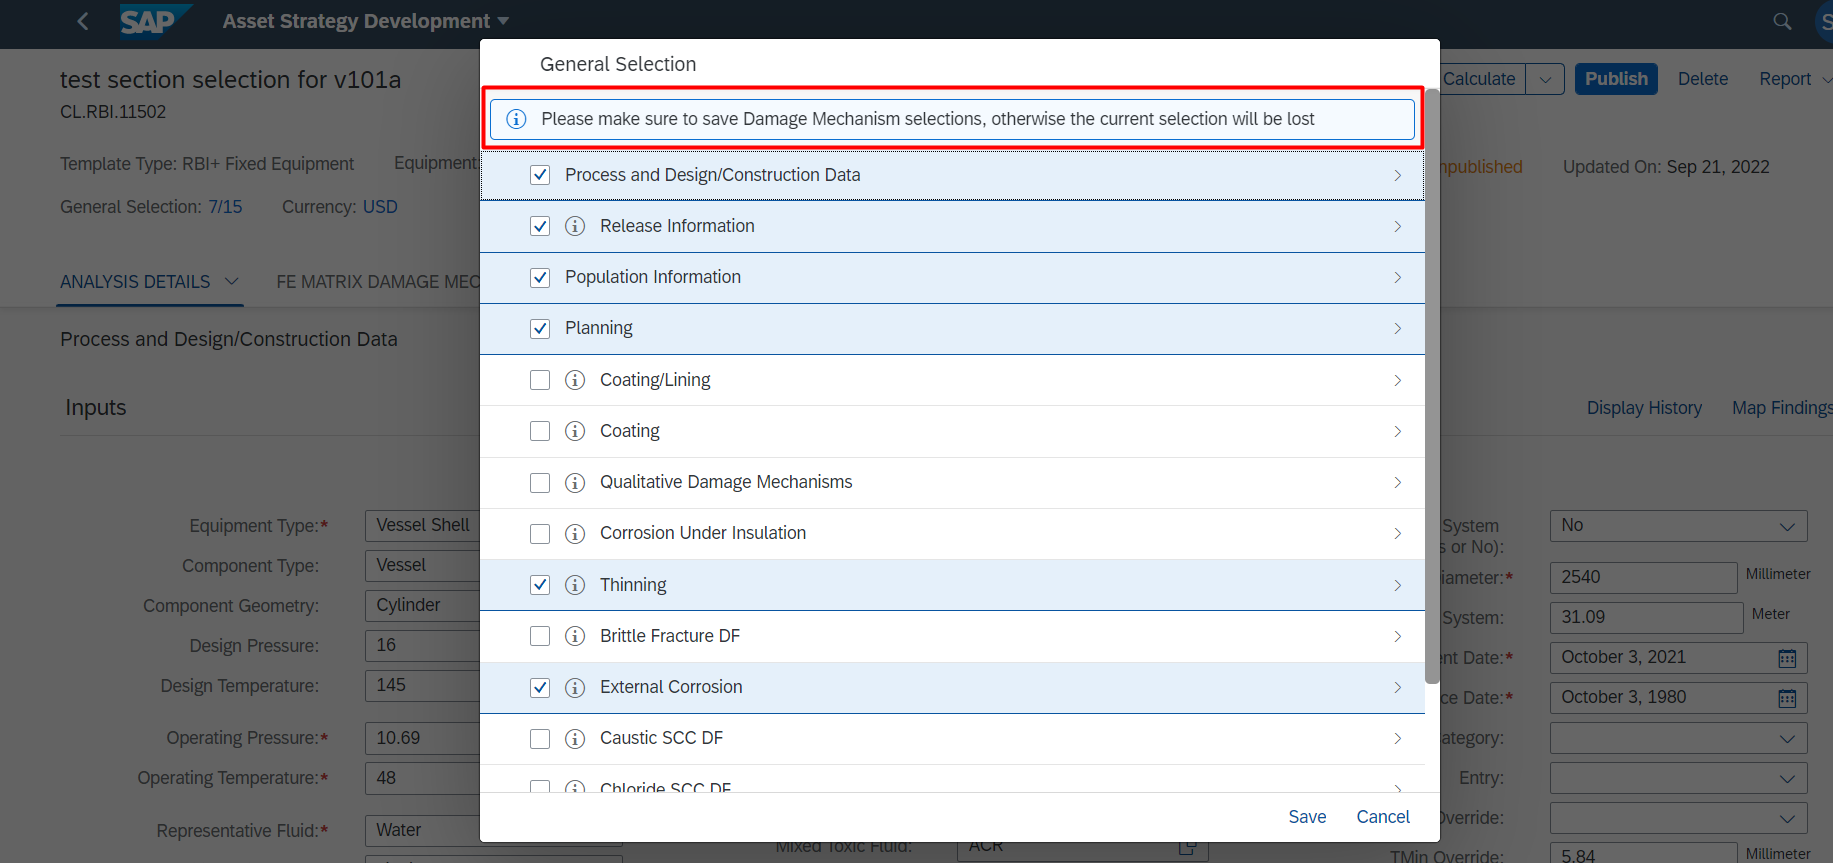

The section selection of the new assessment has 7 sections selected by default which are nothing but the sections of the last published assessment.
Case2: Equipment (Asset) has no published records.
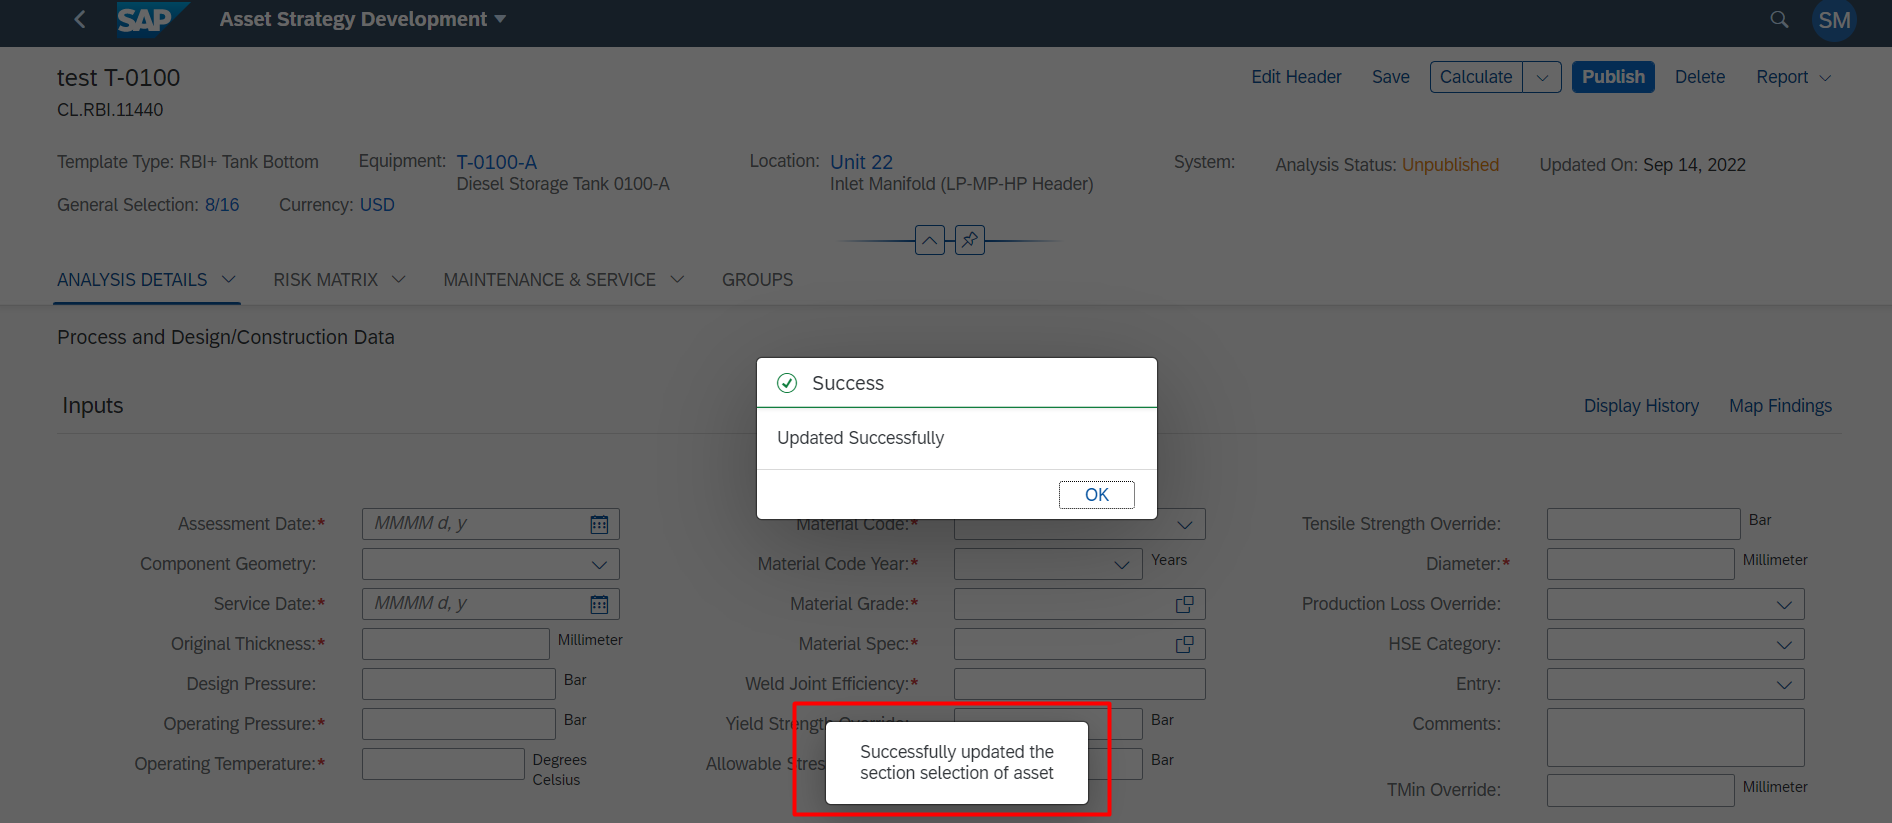
Last updated assessment has 9 sections selected. When we update the selections of the assessment, we are parallelly updating the sections of that asset as well.

Try creating new assessment for the same Equipment (Asset).
Once the assessment got created, the general selection dialog will open automatically and will have the default selection from last saved assessment. The below message toast indicates whether the values are picked from last published or last saved assessment.
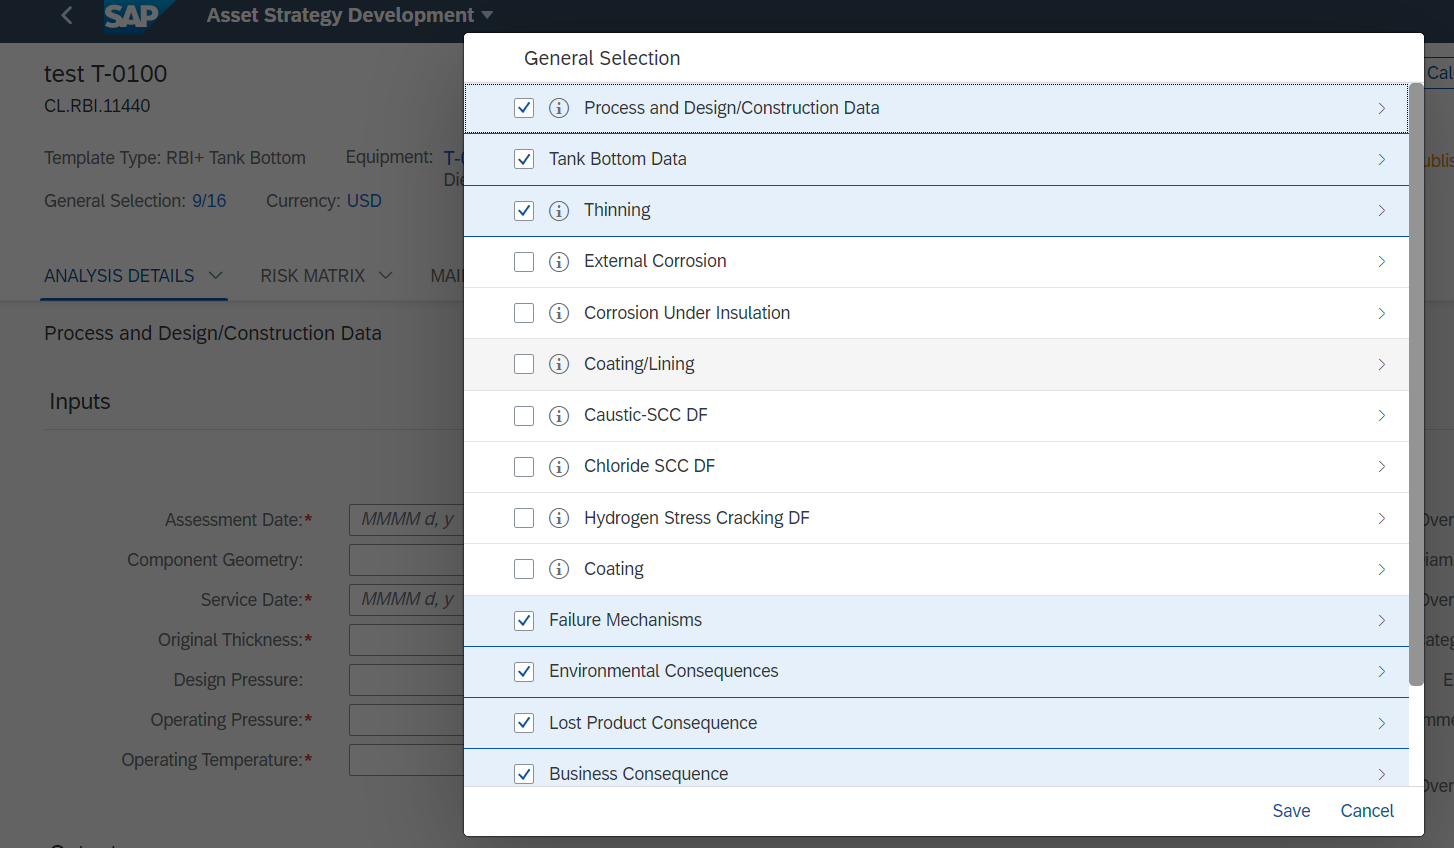
One message will be displayed at the top of the dialog to let the user know that changes will be lost if not saved. That message will be displayed only for the first time after creating a new assessment.

The section selection of the new assessment has 9 sections selected by default which are nothing but the sections of the last updated assessment.
Transition logic has been modified to calculate beyond the Target Date till we reach a Transition Date where we reach an unacceptable level of Damage Factor or when we run out of material thickness. An unacceptable Damage Factor can be a transition to INSP-2 Category from INSP-1 or a transition to INSP-3 Category.
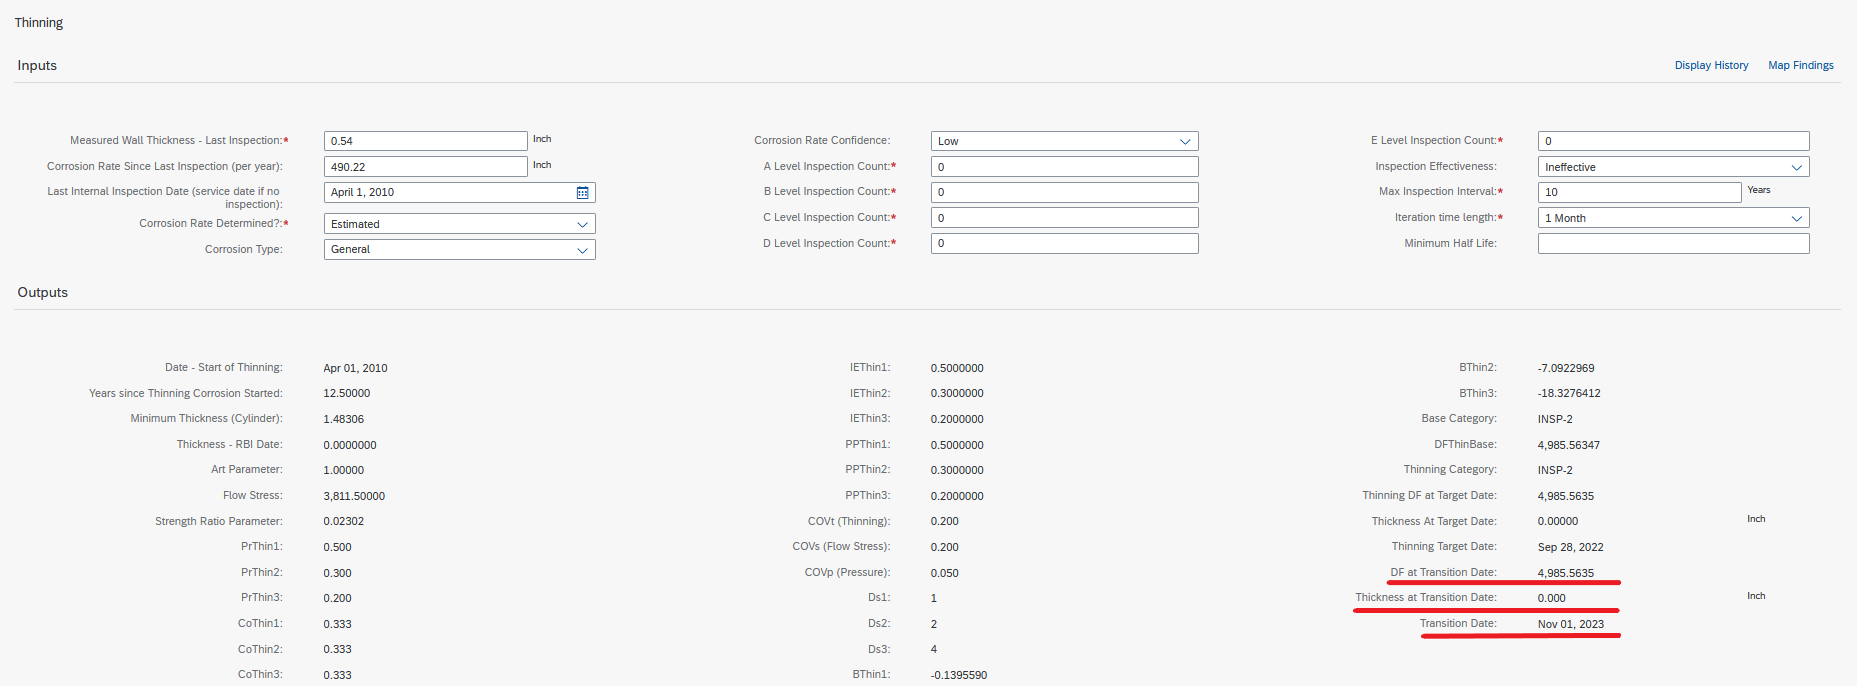
Added new outputs:
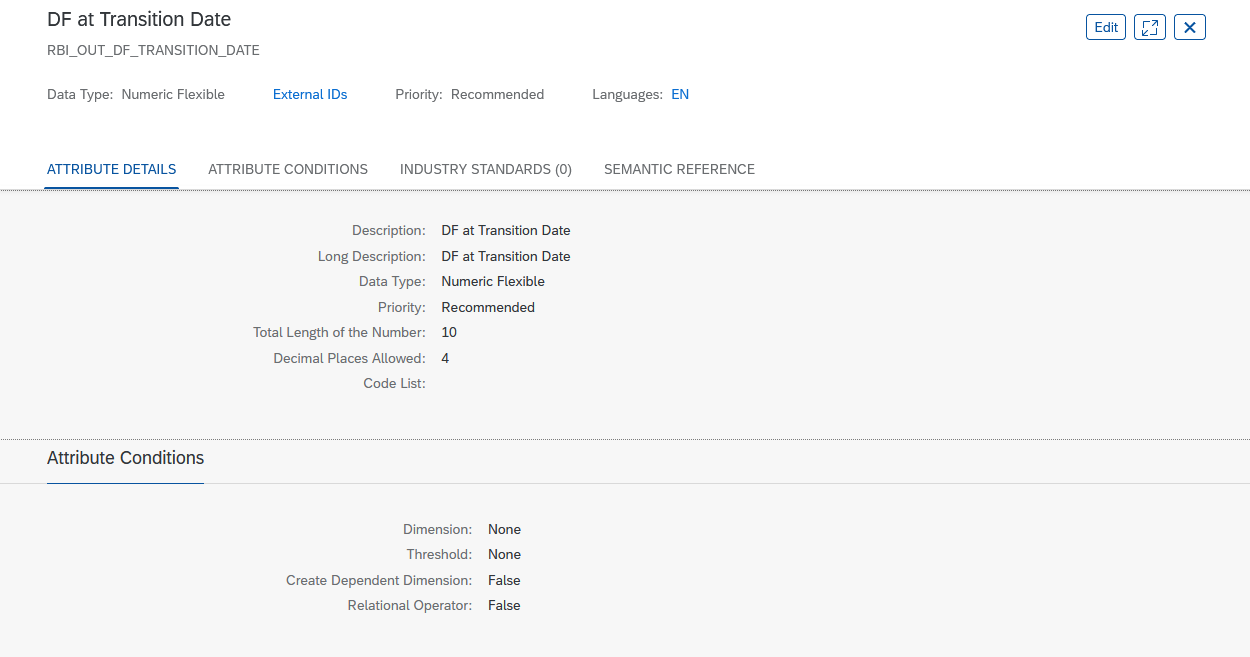
· DF at Transition Date – Damage Factor at the date of Transition
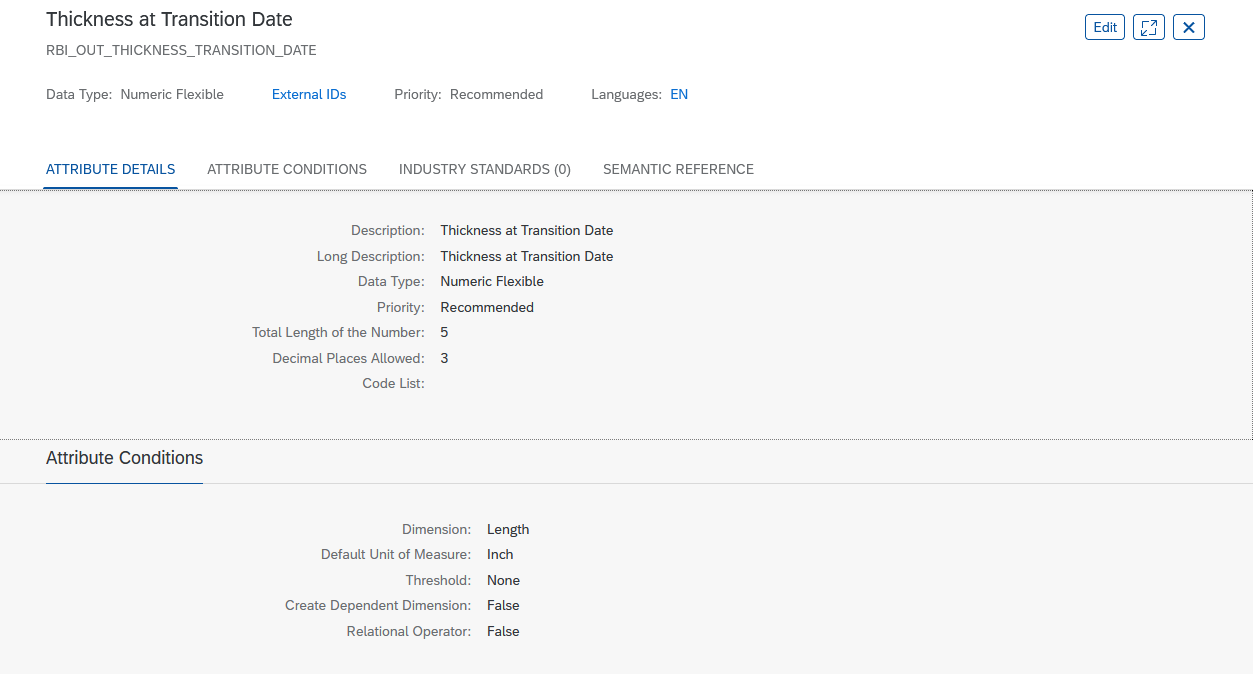
· Thickness at Transition Date – The Thickness remaining at the date of Transition
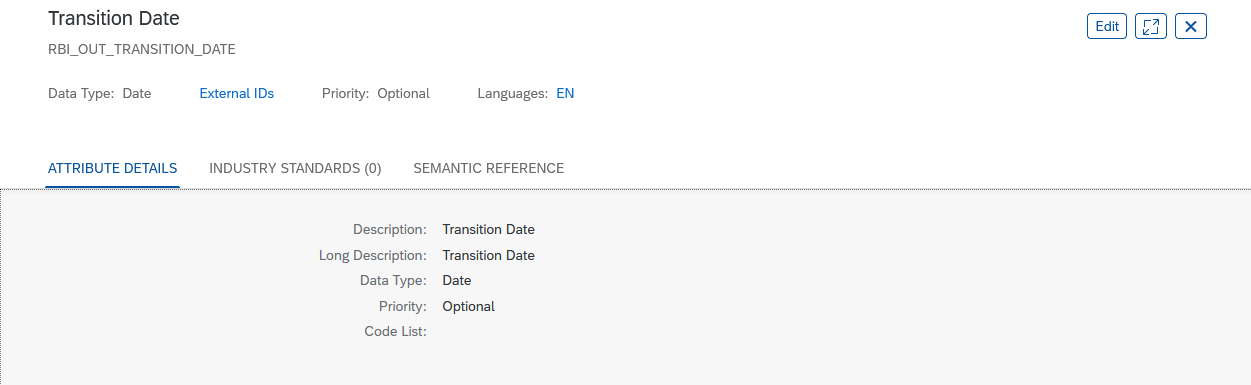
· Thickness Date –The date on which the transition occurred
Note: Here the Thickness at Transition Date is 0.000 this is the case where we run out of material as it corrodes, so as we transition the Damage Factor Values do not increase further if the thickness is zero.
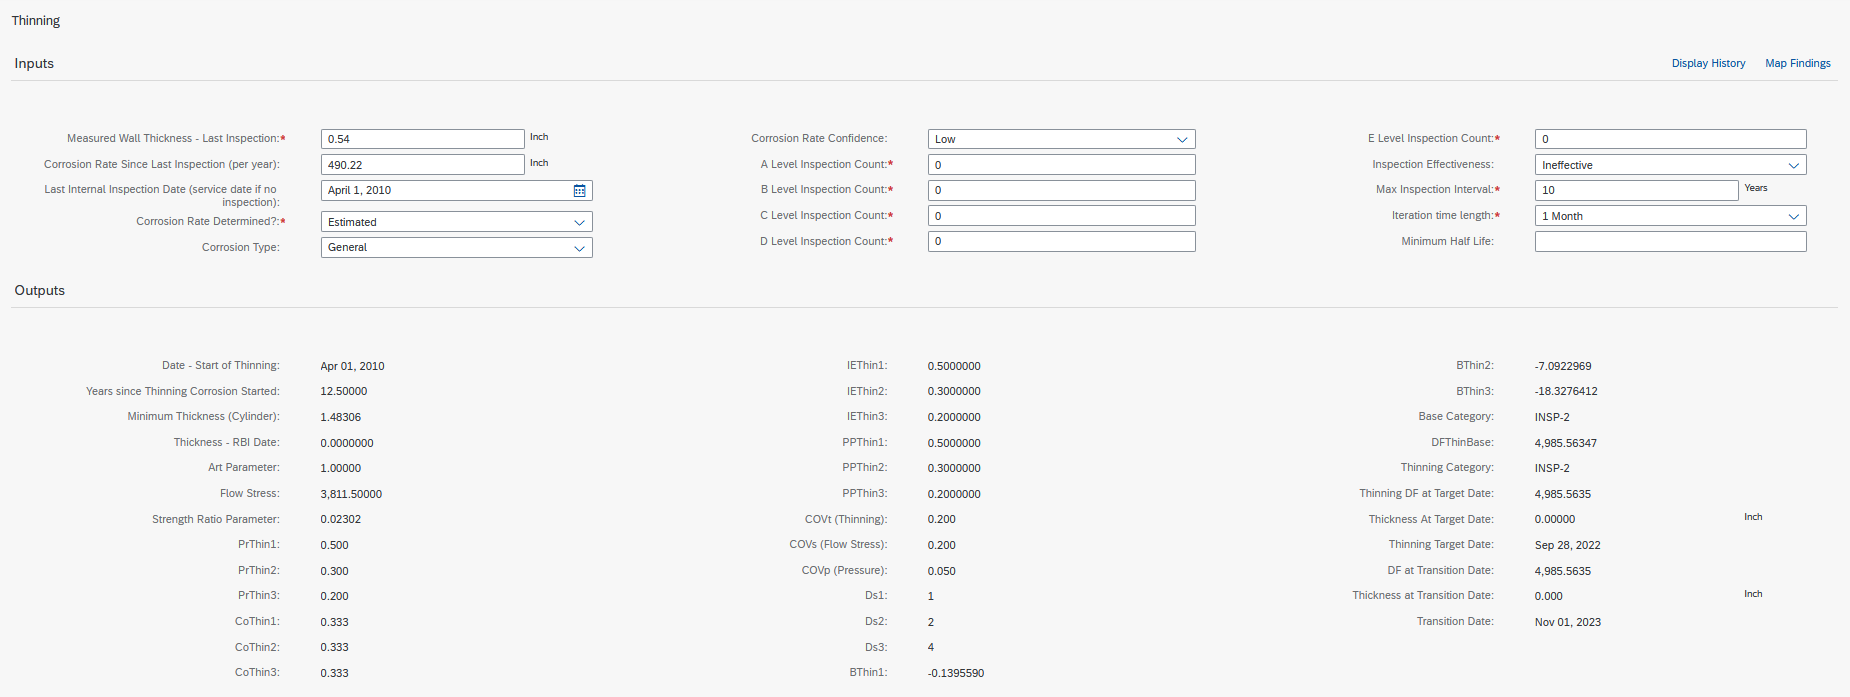
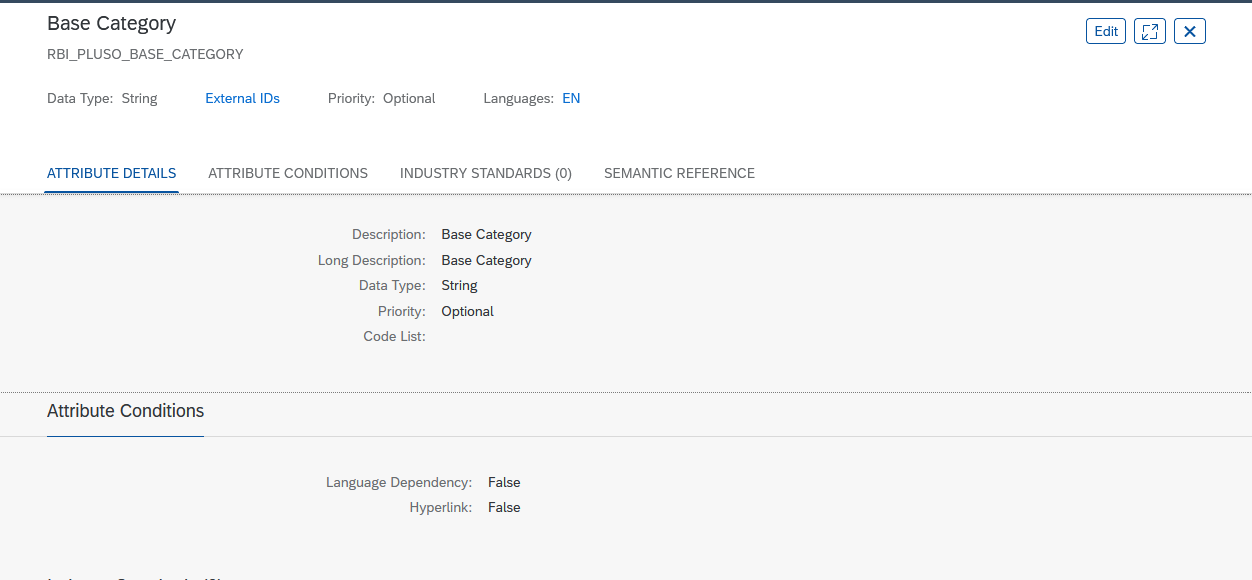
Also, optionally we can show the Base Category value which will be the Inspection Category at the start of the transition process.
Also, optionally we can show the Base Category value which will be the Inspection Category at the start of the transition process.
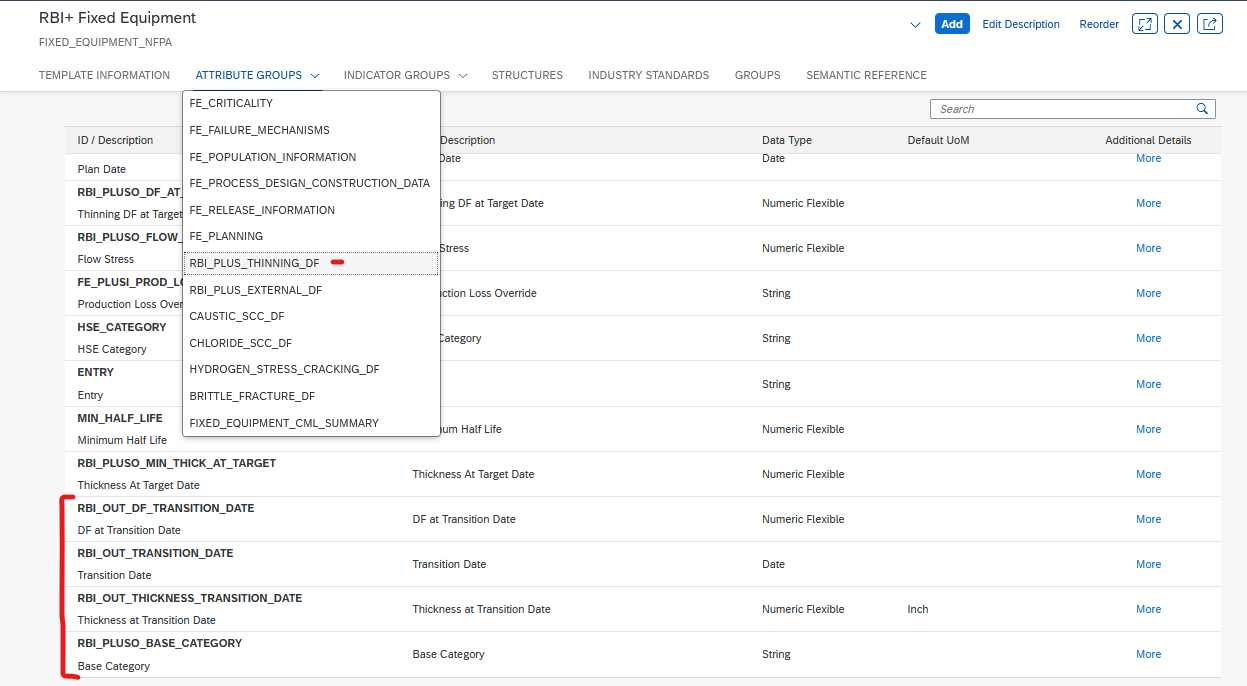
Configuration will apply to RBI+ Fixed Equipment, refer AsInt Dev.
New Attributes Added:
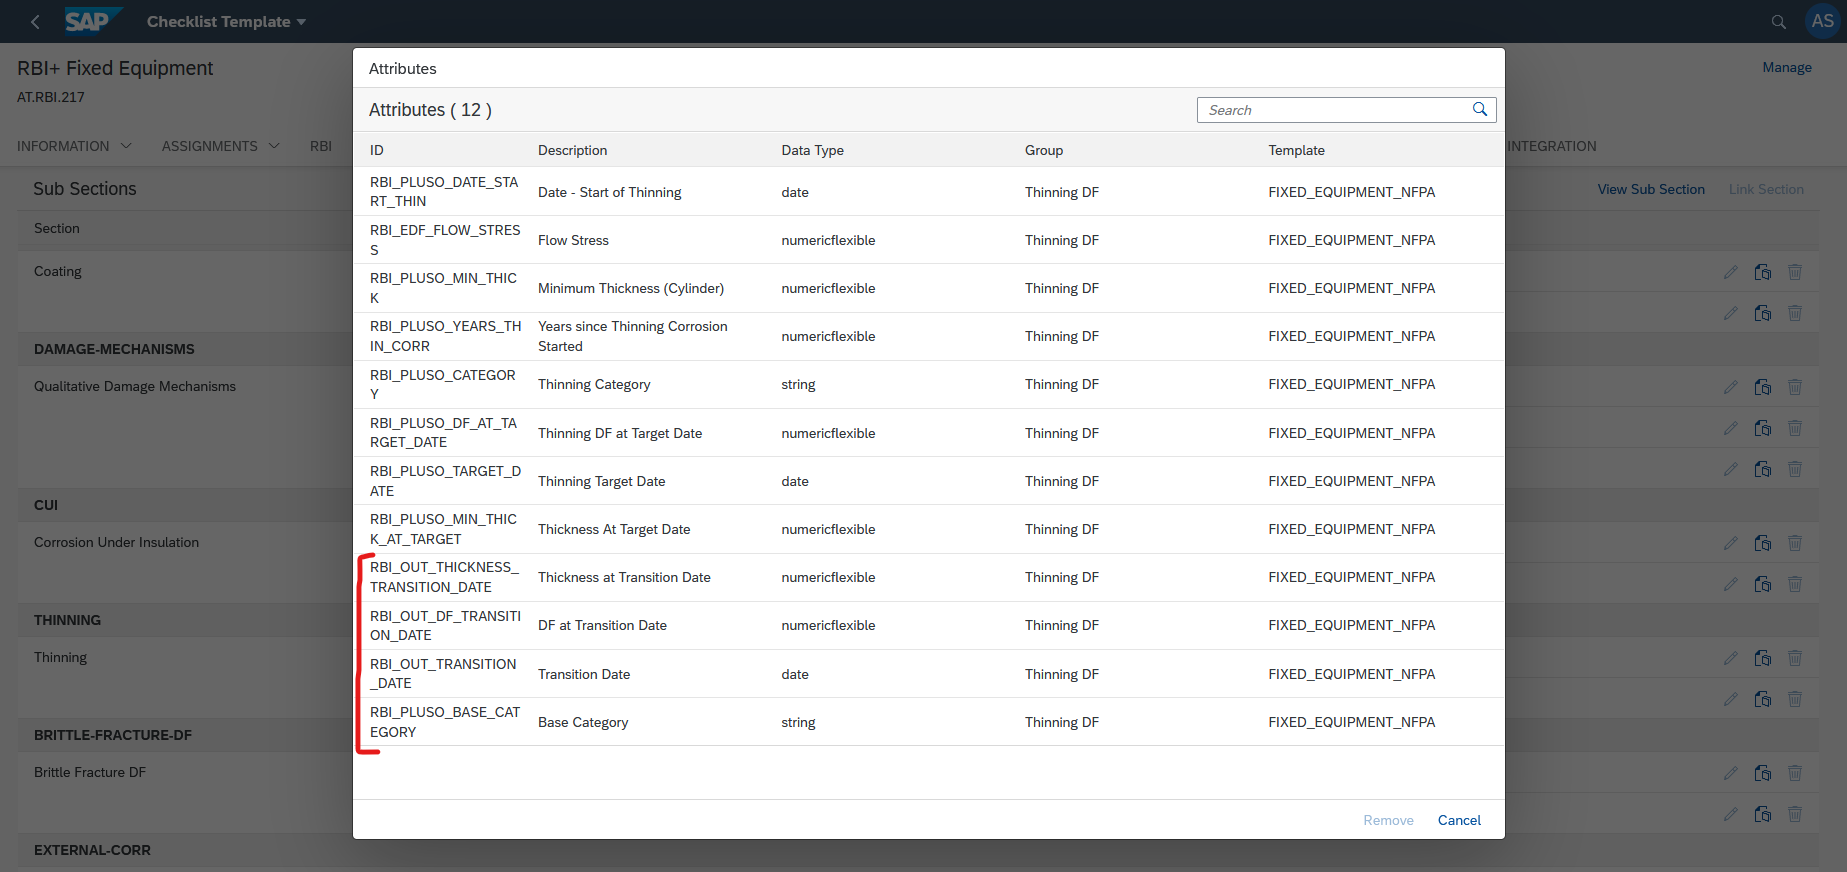
· RBI_OUT_DF_TRANSITION_DATE
· RBI_OUT_THICKNESS_TRANSITION_DATE
· RBI_OUT_TRANSITION_DATE
· RBI_PLUSO_BASE_CATEGORY
All these attributes will be added to the Thinning DF Section.
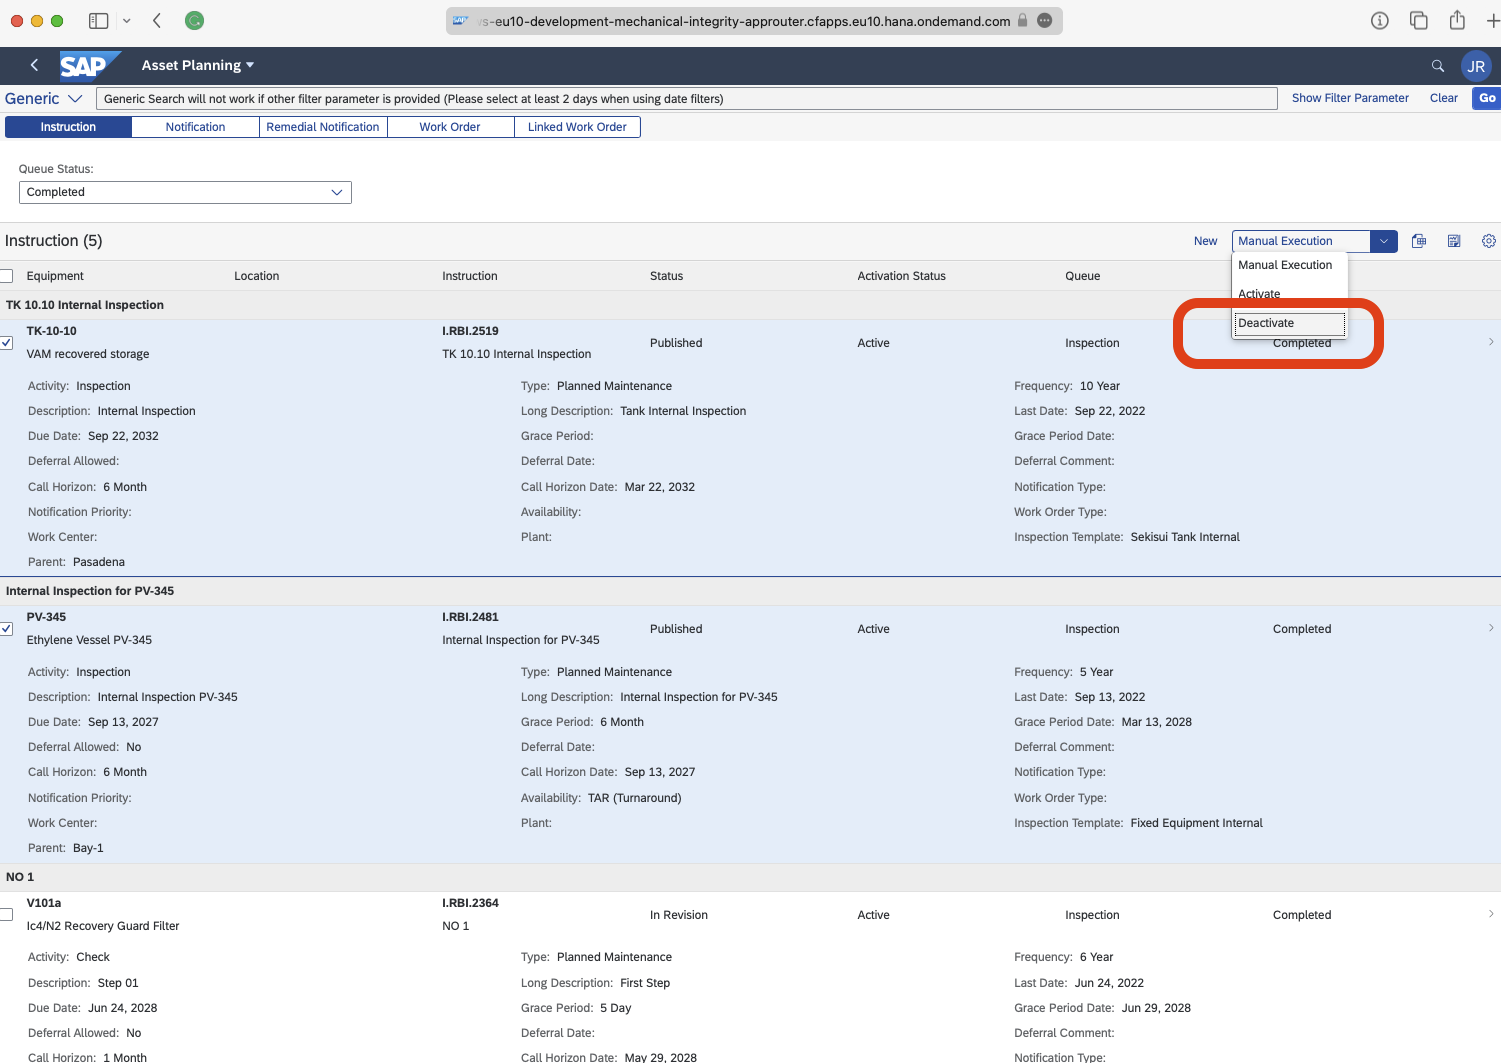
Previously, users had to deactivate the Instruction in the details page one at a time. Now, users can select a group of Instructions to be deactivated.
At AsInt, we’ve invested to ensure this data is easily available for consumption with everyday Microsoft Office tools. With this in mind, we’re happy to announce the official release of , AsInt Visualizer, an easy-to-use tool for visualizing and analyzing data, powered by Microsoft PowerBI.
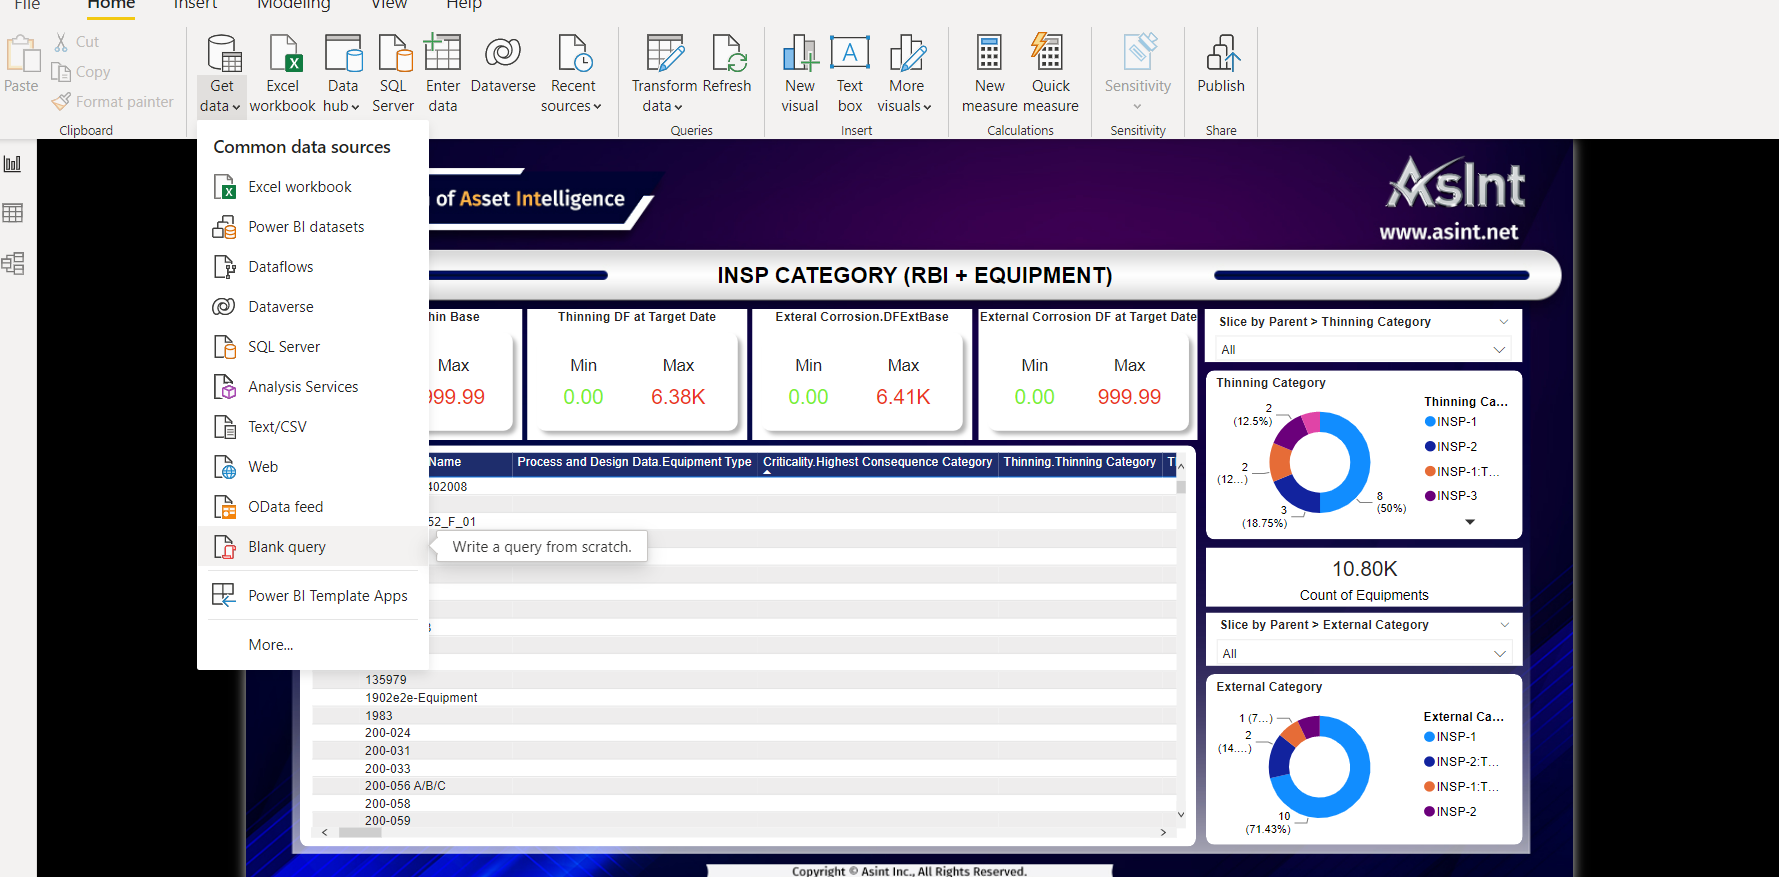
Data source for power BI reporting service is integrated with NodeJS APIs using Power Query editor. Data source for the power BI service is imported by selecting Get Data in Home. Please refer detail snapshot.
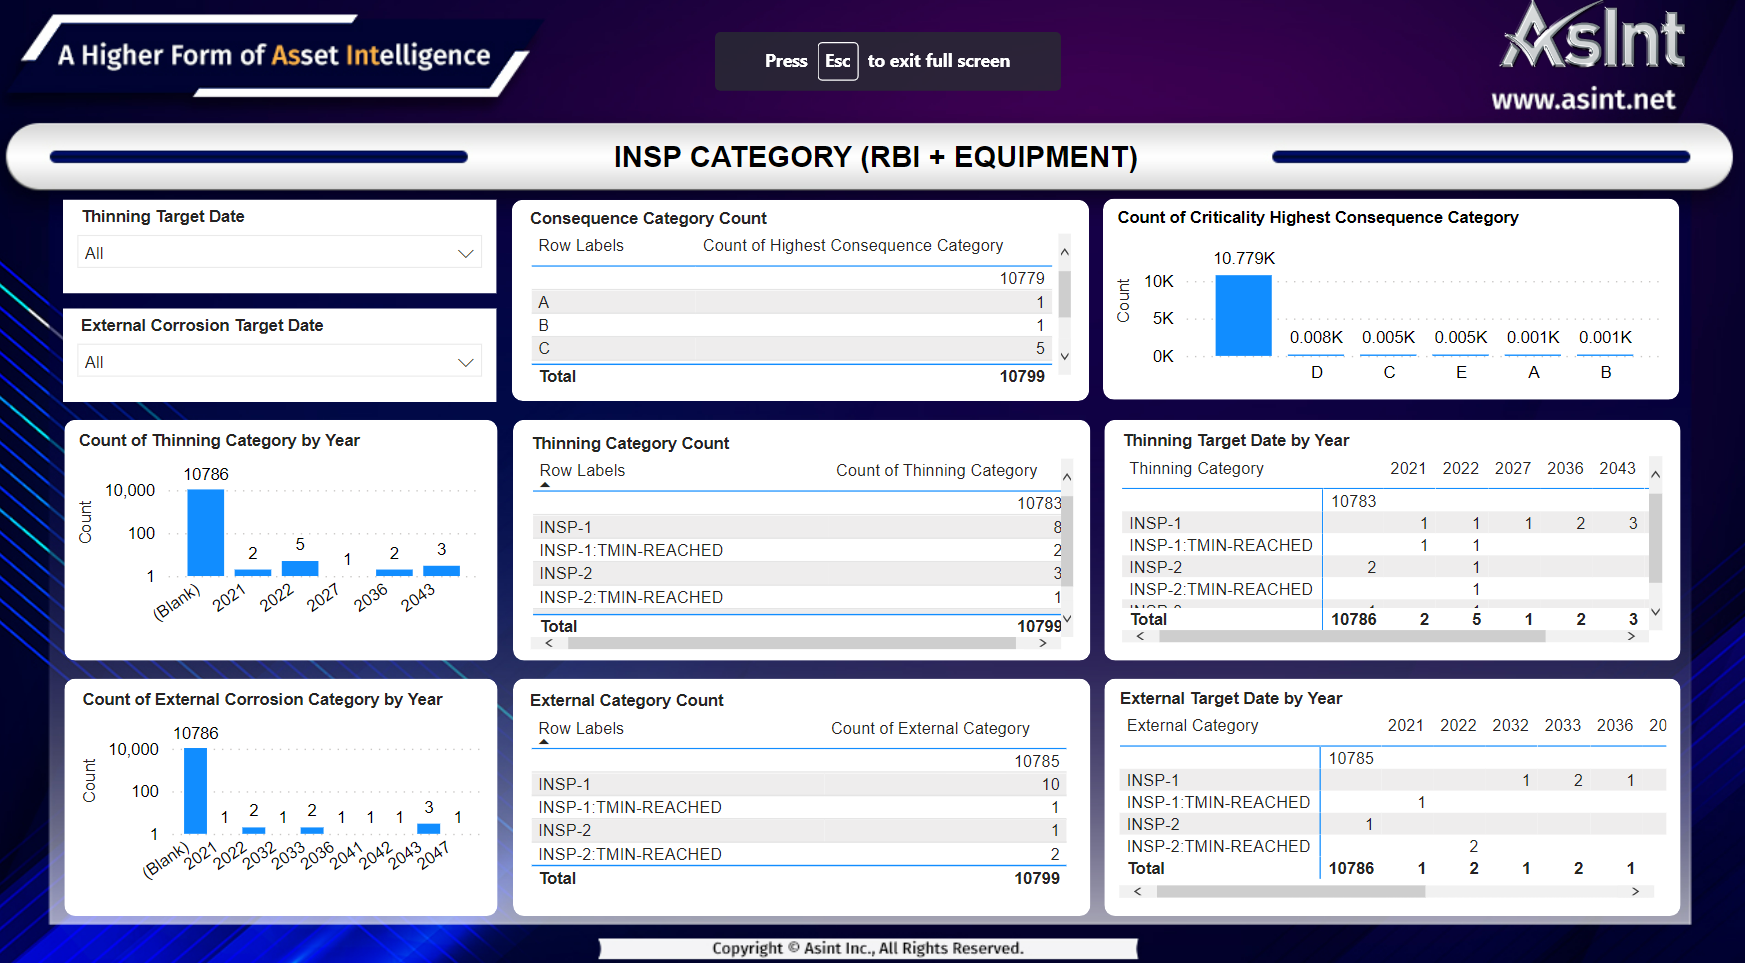
Sample Output Report– This page consists of the table containing all the information regarding INSP Category data and a few slicers, card, and doughnut charts which are pulled from NodeJS system using the NodeJS APIs. Following is the list of columns in the table –
· Parent
· Equipment Name
· Process and Design Data.Equipment Type
· Criticality. Highest Consequence Category Reading)
· Thinning.Thinning Category
· Thinning.Thinning Target Date
· Thinning.DFThinBase
· Thinning DF at Target Date
· External Corrosion.External Category
· External Corrosion.External Target Date
· External Corrosion.DFExtBase
· External Corrosion.External DF at Target Date
· Caustic SCC.Caustic SCC Category
· Caustic SCC.Caustic SCC Target Date
· Caustic SCC.Adjusted DF – Caustic SCC
· Caustic SCC.Caustic SCC DF at Target Date
· Chloride SCC DF.External Chloride SCC Category
· Chloride SCC DF.External Chloride SCC Target Date
· Chloride SCC DF.Internal Chloride SCC Category
· Chloride SCC DF.Internal Chloride SCC Target Date
· Chloride SCC DF.Adjusted DF – External Chloride-SCC
· Chloride SCC DF.External Chloride SCC DF at Target Date
· Chloride SCC DF.Adjusted DF – Internal Chloride-SCC
· Chloride SCC DF.Internal Chloride SCC DF at Target Date
· Hydrogen Stress DF.Hydrogen Stress Cracking Category
· Hydrogen Stress DF.Hydrogen Stress Cracking Target Date
· Hydrogen Stress DF.Adjusted Damage Factor
· Hydrogen Stress DF.Hydrogen Stress Cracking DF at Target Date
· Brittle Fracture.Adjusted Damage Factor-Brittle Fracture
· Process and Design Data.Design Pressure
· Process and Design Data.Operating Pressure
· Process and Design Data.Design Temperature
· Process and Design Data.Operating Temperature
· Process and Design Data.Material Code
· Process and Design Data.Material Spec
· Process and Design Data.Material Grade
· Process and Design Data.Tensile Strength
· Process and Design Data.Yield Stress
· Process and Design Data.Allowable Stress
· Process and Design Data.Original Thickness
· Process and Design Data.Tmin Override
· Process and Design Data.Minimum Thickness
· Process and Design Data.Service Date
· Process and Design Data.Representative Fluid
· Process and Design Data.Initial Fluid Phase
· Process and Design Data.Mixed Toxic Fluid
· Process and Design Data.% Mixed Toxic
· Thinning.Corrosion Rate Since Last Inspection (per year)
· Thinning.Corrosion Type
· External Corrosion.External Corrosion Rate Override (optional)
· External Corrosion. Is Equipment Insulated?
· Process and Design Data.HSE Category
· Thinning.Max Inspection Interval
· Thinning.Last Internal Inspection date (service date if no inspection)
· Thinning.A Level Inspection Count
· Thinning.B Level Inspection Count
· Thinning.C Level Inspection Count
· Thinning.D Level Inspection Count
· Thinning.E Level Inspection Count
· External Corrosion DF.Max Inspection Interval
· External Corrosion DF.A Level Inspection Count
· External Corrosion DF.B Level Inspection Count
· External Corrosion DF.C Level Inspection Count
· External Corrosion DF.D Level Inspection Count
· External Corrosion DF.E Level Inspection Count

AsInt ships Power Bi with a default set of Data Models and Reports, however users can customize your dashboardsand data for your industry need.