
With the recents enhancements, the Load More button at the end of the lists has been replaced with automatic infinite scrolling. As you scroll through the data, it will seamlessly load without the need for you to click the Load More button, providing a smoother and more efficient user experience.
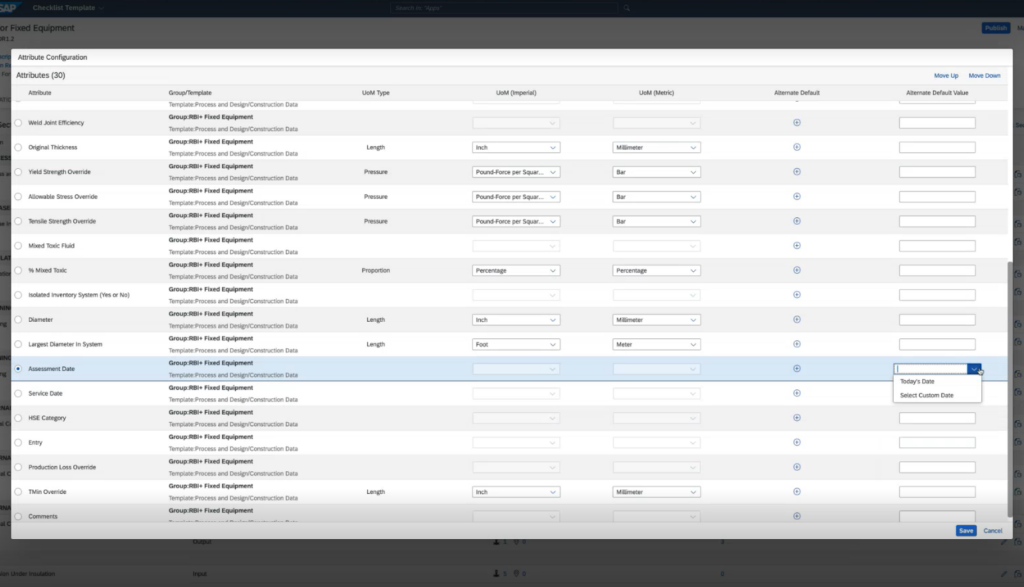
While configuring attributes for the Assessment Templates in the Sub-Section tab, you now have the option to set the Assessment Date to the Present Date/Today, and this will automatically populate as the default value. Note that you can modify it later based on your business requirements.
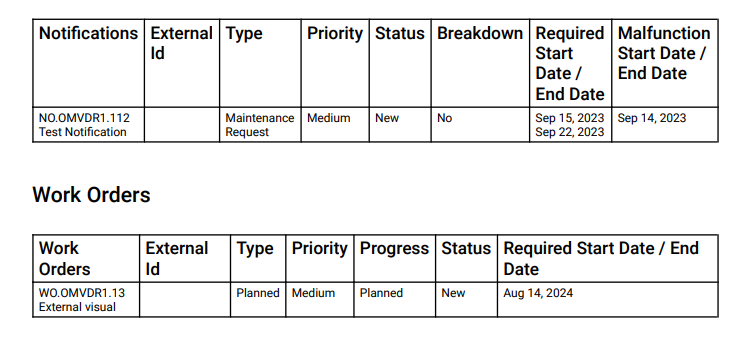
In the PDF reports for Asset Inspections, you can now view the External IDs associated with Notifications and Work Orders related to the inspection. This enhancement provides a better representation of the inspection details by including the External IDs for the respective Notifications and Work Orders.
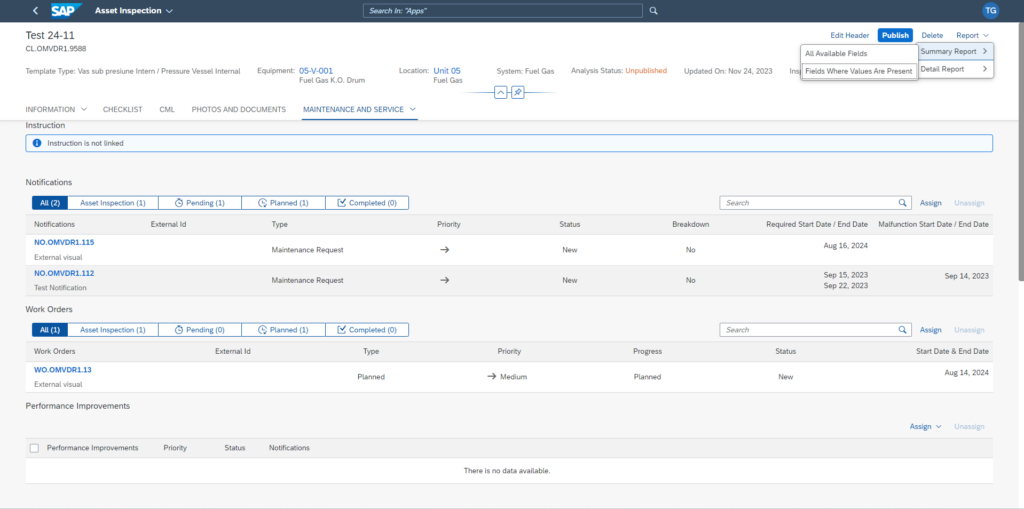
While viewing and managing your Inspection Templates, you now have the option generate Summary Report only for fields with values present in them. This streamlines the process by focusing on relevant data, making it more efficient for your business requirements.
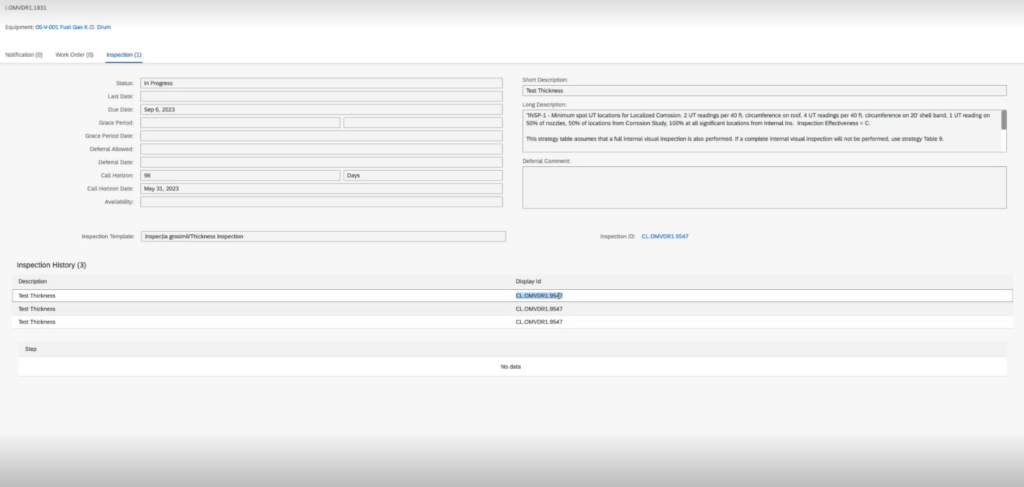
If a planning instruction generates multiple inspections for a single equipment, all the inspections can be viewed under the Inspection History section of the Inspection tab along with their inspection IDs. This provides you a comprehensive overview of the past inspections conducted for that specific equipment allowing you to easily track and understand the inspection history associated with the equipment.
Within the Asset Planning Instruction tab, you will now be able to view and access the Assessment ID alongside the Instruction ID. Clicking the Assessment ID will take you to the associated Asset Strategy. Additionally, you have the option to choose the Assessment that you want to associate with your Instruction from the options available in the dropdown. This enhancement makes it easier to manage and link Asset Strategies within the planning process.
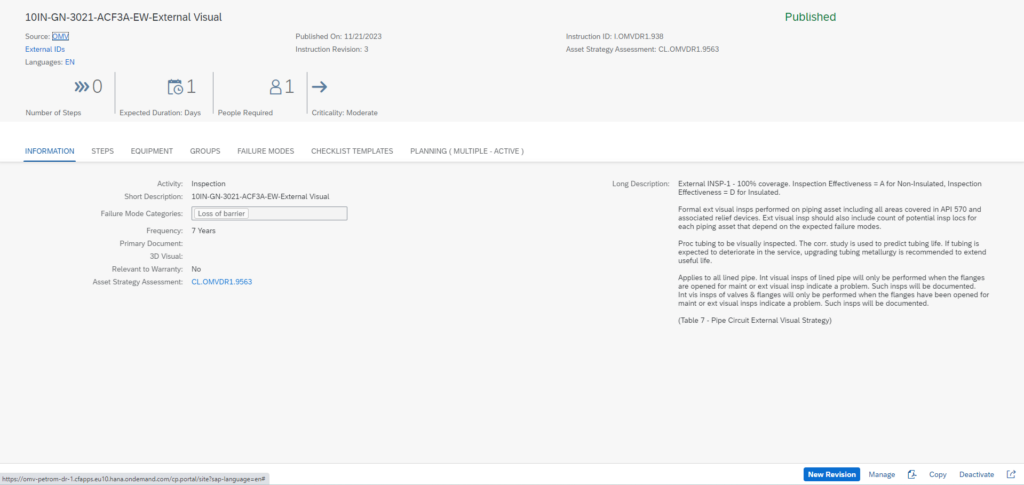
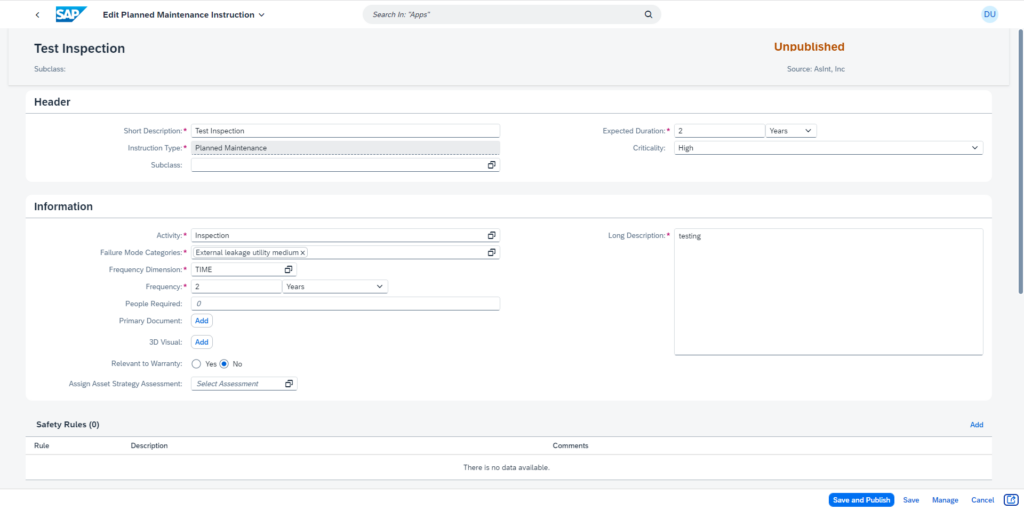
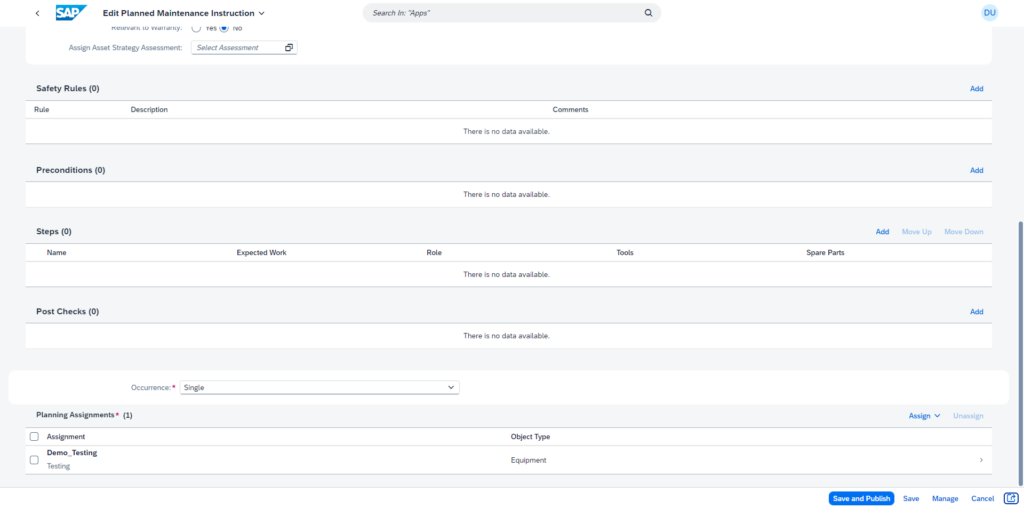
In Asset Planning, it is now mandatory to fill in details for Expected Duration, Long Description, and Planning Assignments fields before you can Save and Publish an Instruction. This ensures that essential information is provided before finalizing and making the Instruction available, ensuring completeness and accuracy in the planning process.
New Feature of Function
Change to Feature or Function
Bugs corrected
Any known issues the new release may cause
Edit The Risk Matrix Tab in Asset Strategy Detail will draw a line between the Point on the matrix and the legend to the right when we hover over either of them.

Support to Display one Qualitative and one Quantitative value to plot the point


The CMLTab in Equipment/Location will show the list of CML(s). By using this clone feature the user can clone the CML(s) within the same Equipment/Location or to a new Equipment/Location. To clone, at least one CML should be selected. If not selected, then the below error message will be shown

After selecting, click on the button next to search field. It will show to options – Copy to This Asset, Copy to New Asset. For Location, the options will be – Copy to This Location, Copy to New Location. If CMLs were already copied, then paste button will be visible or else it will not be visible.


Copy to This Asset:
Within the same asset we can clone one CML at a time. If the use selects more than one CML and tried to clone to same asset, then below error message will be shown. This applies to location too.

If only one CML was selected, then it will be duplicated successfully. Except history all other values will be moved to the duplicated CML. The naming convention of the duplicated item will be as follows –
At any given time, the CML name (name – description) will be unique. This applies to location too.

Selected CML:


New CML:


The values should be same for selected CML and new CML. New CML should not have any history.
Copy to New Asset:
User can clone CML(s) from one Equipment to another Equipment. It also follows the same naming convention which was mentioned above. Select one or more CMLs and click on Copy to New Asset. For cloning to different equipment browser’s session storage was needed.
If storage was restricted, then below message will be shown. This applies to location too.

If storage was not restricted, then the selected CML(s) will be copied and below message will be shown. This applies to Location too.


Paste:
To paste the copied CML(s) navigate back to the Equipment list and select another equipment. If same equipment was selected, then paste button will not be visible. This applies to location too.

To clone CML(s) to new equipment, then the new equipment must have the required CML templates. CML(s) were already copied, now paste button will be visible. Click on the paste button.


If the equipment does not have any templates, then below error message will be shown. This applies to Location too.
If the equipment has templates but do not have the required templates, then below error message will be shown. This applies to location too.

If the equipment has required templates, then the CML(s) will be cloned. This applies to location too.



A Higher Form of
Asset Intelligence
AsInt brings a fresh take on the design of mechanical integrity and reliability software with faster, more intuitive functionality for the multi-device generation.
© Copyright 2024, All Rights Reserved by AsInt, Inc.